UDO LP400 User Guide
_____________________________________________________________________________________________________
LP400 User Guide (11/07)
22
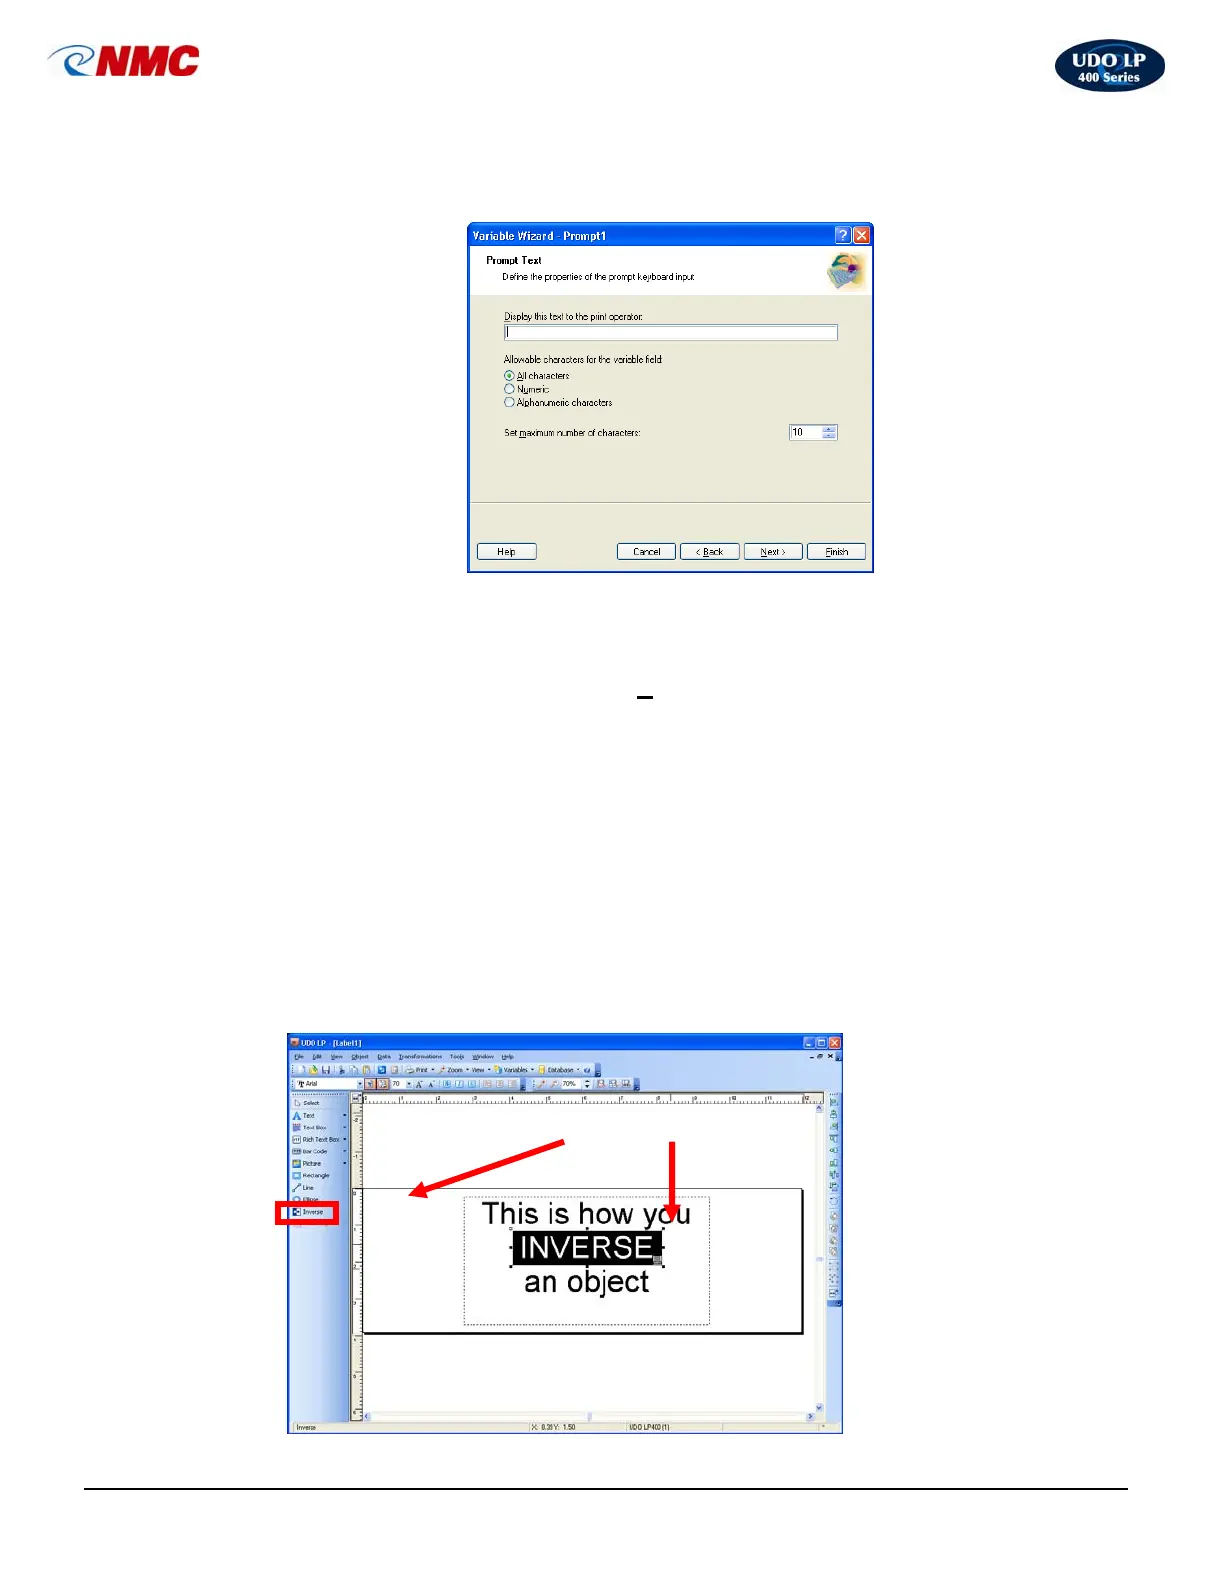
B. Inversing (Reverse Print)
This section will take you through the basic steps of how to add an inverse object to a
label. For more in-depth information, click the ‘H
elp’ menu at the top of the screen or
contact NMC.
The Inverse tool creates a rectangle that produces the inverse image of all elements
within the box.
1. Click on the ‘Inverse’ button in the Toolbox (Fig. 4).
2. Define the starting point by clicking the mouse at the upper-left of the object
(start position).
3. Drag the cursor to the end point. An inverse rectangle will be drawn from the
left to the right side of the label.
4. You can change the size and position of the inverted box by dragging it over
the label.
5.
Fig. 2
Inverse Inverse Box
Fig. 4