UDO LP400 User Guide
_____________________________________________________________________________________________________
LP400 User Guide (02/11) v5.2
6
NOTICE
• This printer complies with the requirements in Part 15 of the FCC rules for a Class A
or B computing device.
• Do not place the printer near a heat source or near water.
• Do not attempt to disassemble the printer if it malfunctions.
• All rights reserved. No part of this document may be reproduced or issued to third
parties in any form without the express written permission of NMC – National Marker
Company.
• The material in this document is provided for general information and is subject to
change without notice.
* * * * * * * * * * * * * * * * * * * * * * * * * * * * * * *
IV. SETTING-UP THE UDO LP400 PRINTER
Begin by making certain the printer is on a solid, flat surface. Ensure there is sufficient
space above the printer so the top cover may be easily opened, allowing for easy
installation and removal of vinyl rolls and printer ribbons.
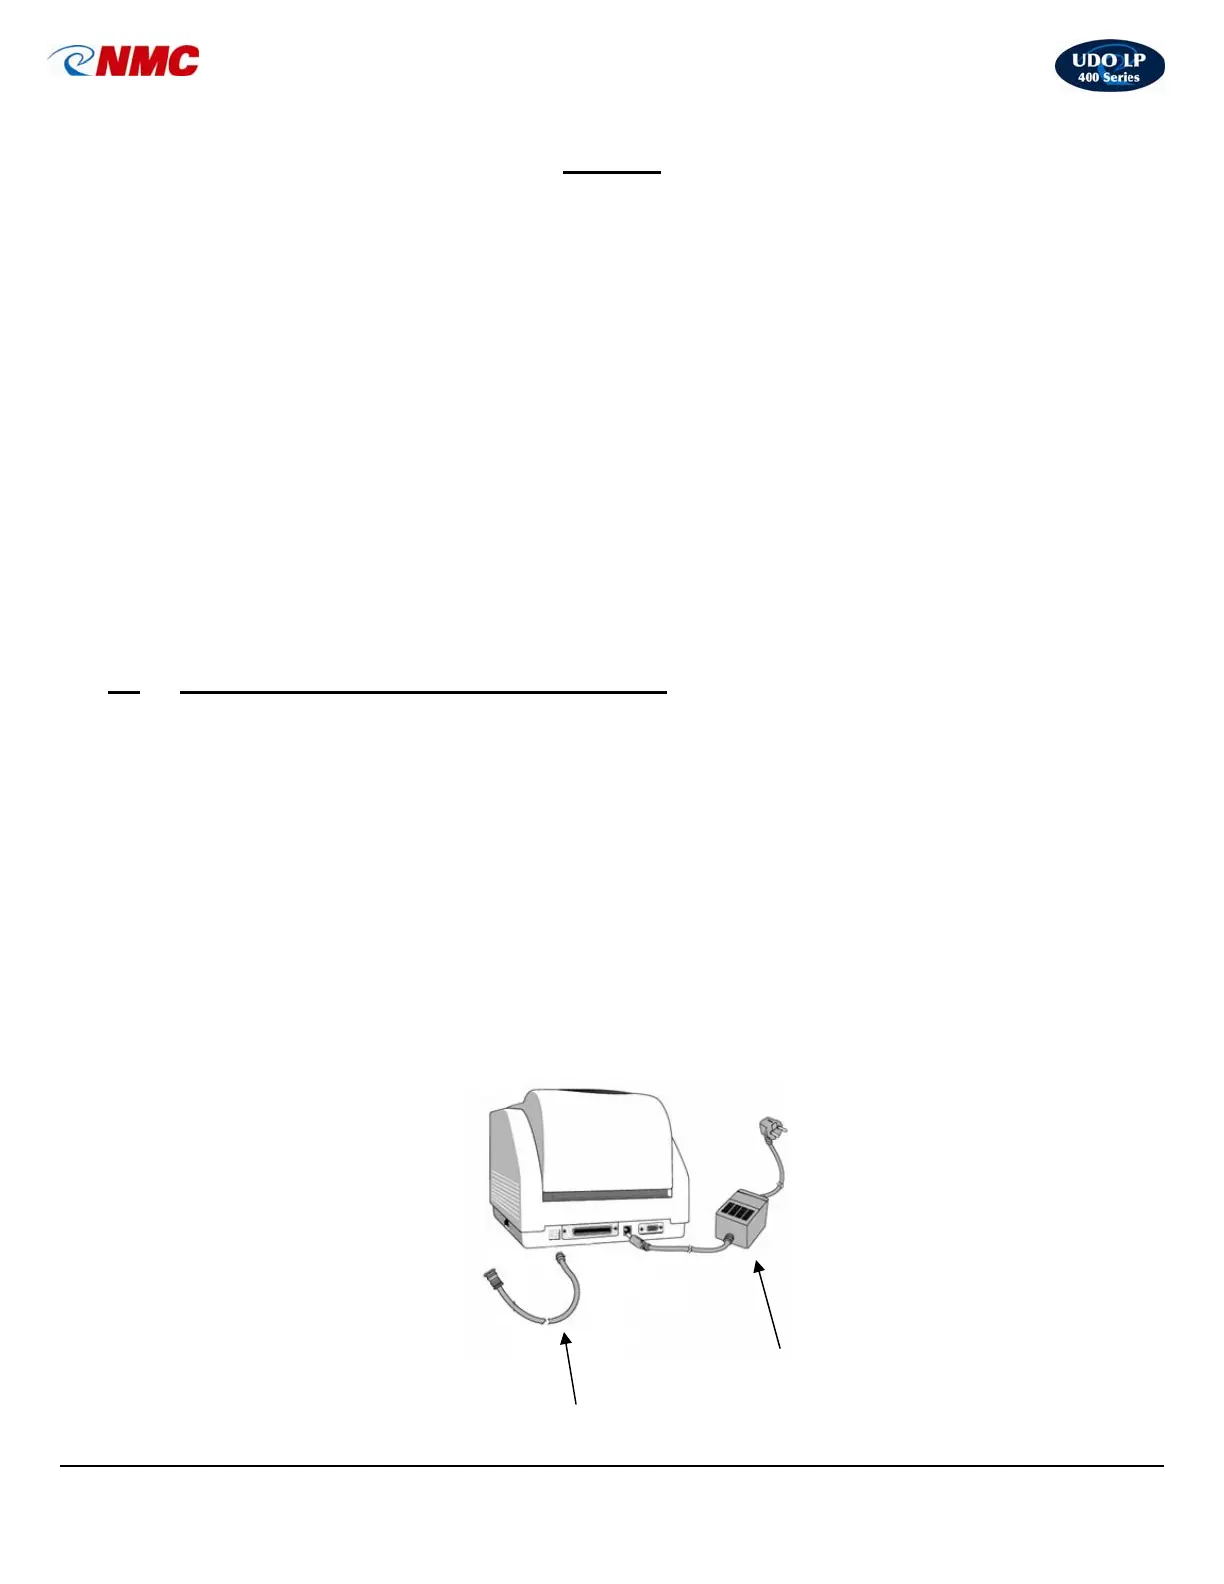
A. Installing Cables (Fig. 1)
(Be certain the printer is turned off while connecting the cables.)
1. Connect the power adapter to the printer but do not plug the power adapter into a
power outlet.
2. Connect the USB cable to the back of the printer as well as to the USB port
located on your computer.
USB Cable
Power Ada
ter
Fig. 1