UDO LP400 User Guide
_____________________________________________________________________________________________________
LP400 User Guide (02/11) v5.2
8
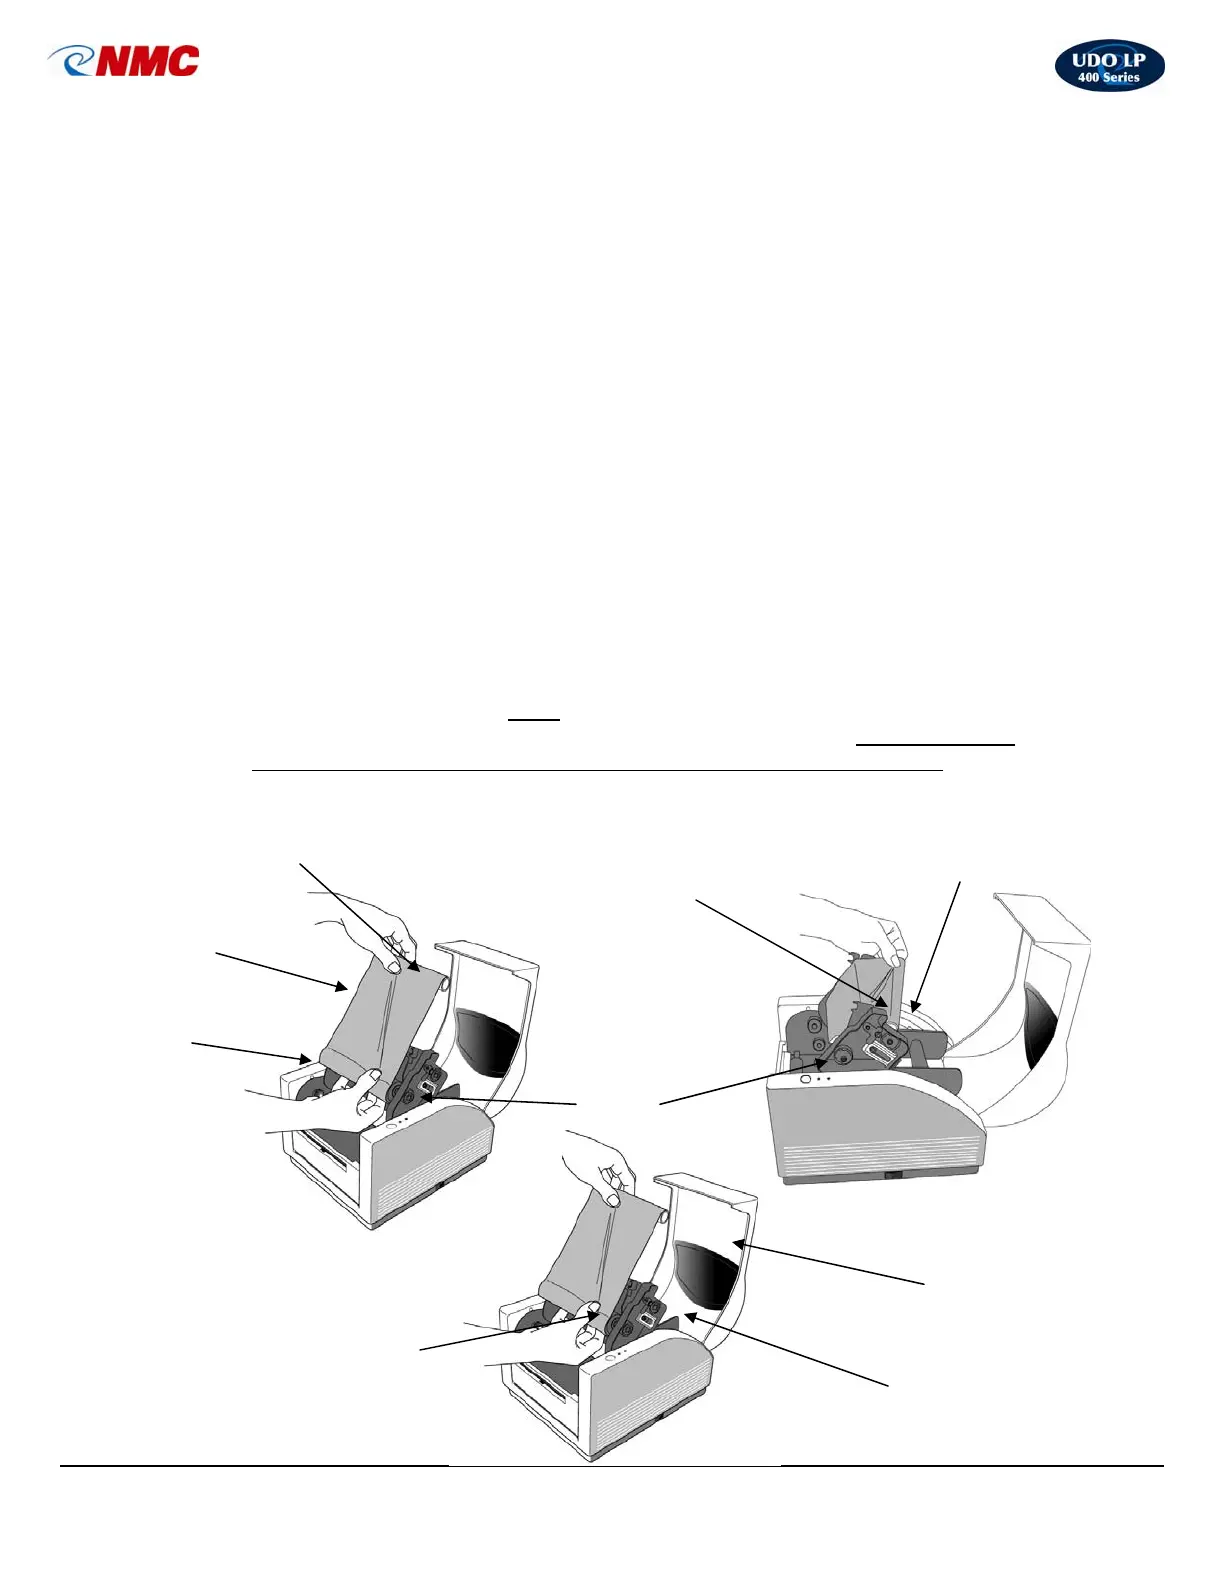
C. Installing Printer Ribbons
1. Remove the printer ribbon from its packaging. (Note: The black, blue & red
ribbons have a blue outer casing; thus, they will need to be unwound until the
appropriate color is revealed.)
2. Open the Print Head (if not already open) (Fig. 2) by pressing down on the two
(2) purple buttons.
3. Locate the two (2) Ribbon Holders (Fig. 7). One Ribbon Holder is on the top of
the Print Head and one Ribbon Holder is on the bottom of the Print Head. The
right side of each of the Ribbon Holders is spring-loaded; the left side has a
wheel with a catch.
4. Slightly unroll the ribbon so the shiny side faces you (Fig. 5).
5. Unroll the core of the ribbon spool. The core containing the unused ribbon (full
roll) fits into the bottom Ribbon Holder which is spring loaded on the right side.
Align the ribbon core with the left side. The wheel on the left side has a catch.
Align the notch in the ribbon core with the catch and insert.
6. The smaller ribbon spool (empty) fits into the top Ribbon Holder which is spring
loaded on the right side. Align the ribbon core with the left side. The wheel on the
left side has a catch. Align the notch in the ribbon core with the catch and insert.
7. Use the purple Ribbon Advance Wheel on the left side (Fig. 2) to advance the
ribbon as tight as possible and the ribbon is wound firmly onto the top spool.
Take care to ensure that the ribbon is not creased or uneven.
8. Push the print head down firmly
using the two (2) black tabs beneath the “Lock”
labels (located on the left and right side of the print head) and ensure that both
sides of the print head unit click into place (you should hear two clicks.)
9. Close the printer lid & plug the power adapter into an outlet.
Bottom Ribbon Holder
(Right Side is Spring-Loaded)
Large Ribbon Spool
(Full Roll – Unused Ribbon)
Spring Loaded
Ribbon Wheel
Bottom Roll Feeds
to the Top Roll
Ribbon
Holder
Fig. 5 Fig. 6
Top Ribbon Holder
(Right Side is Spring-Loaded)
Fig. 7
Ribbon Loading
Instructions
(Inside Top Cover)
Shiny Side of Ribbon
(On Top – Facing you)
Small Ribbon S
ool