UDO LP400 User Guide
_____________________________________________________________________________________________________
LP400 User Guide (02/11) v5.2
7
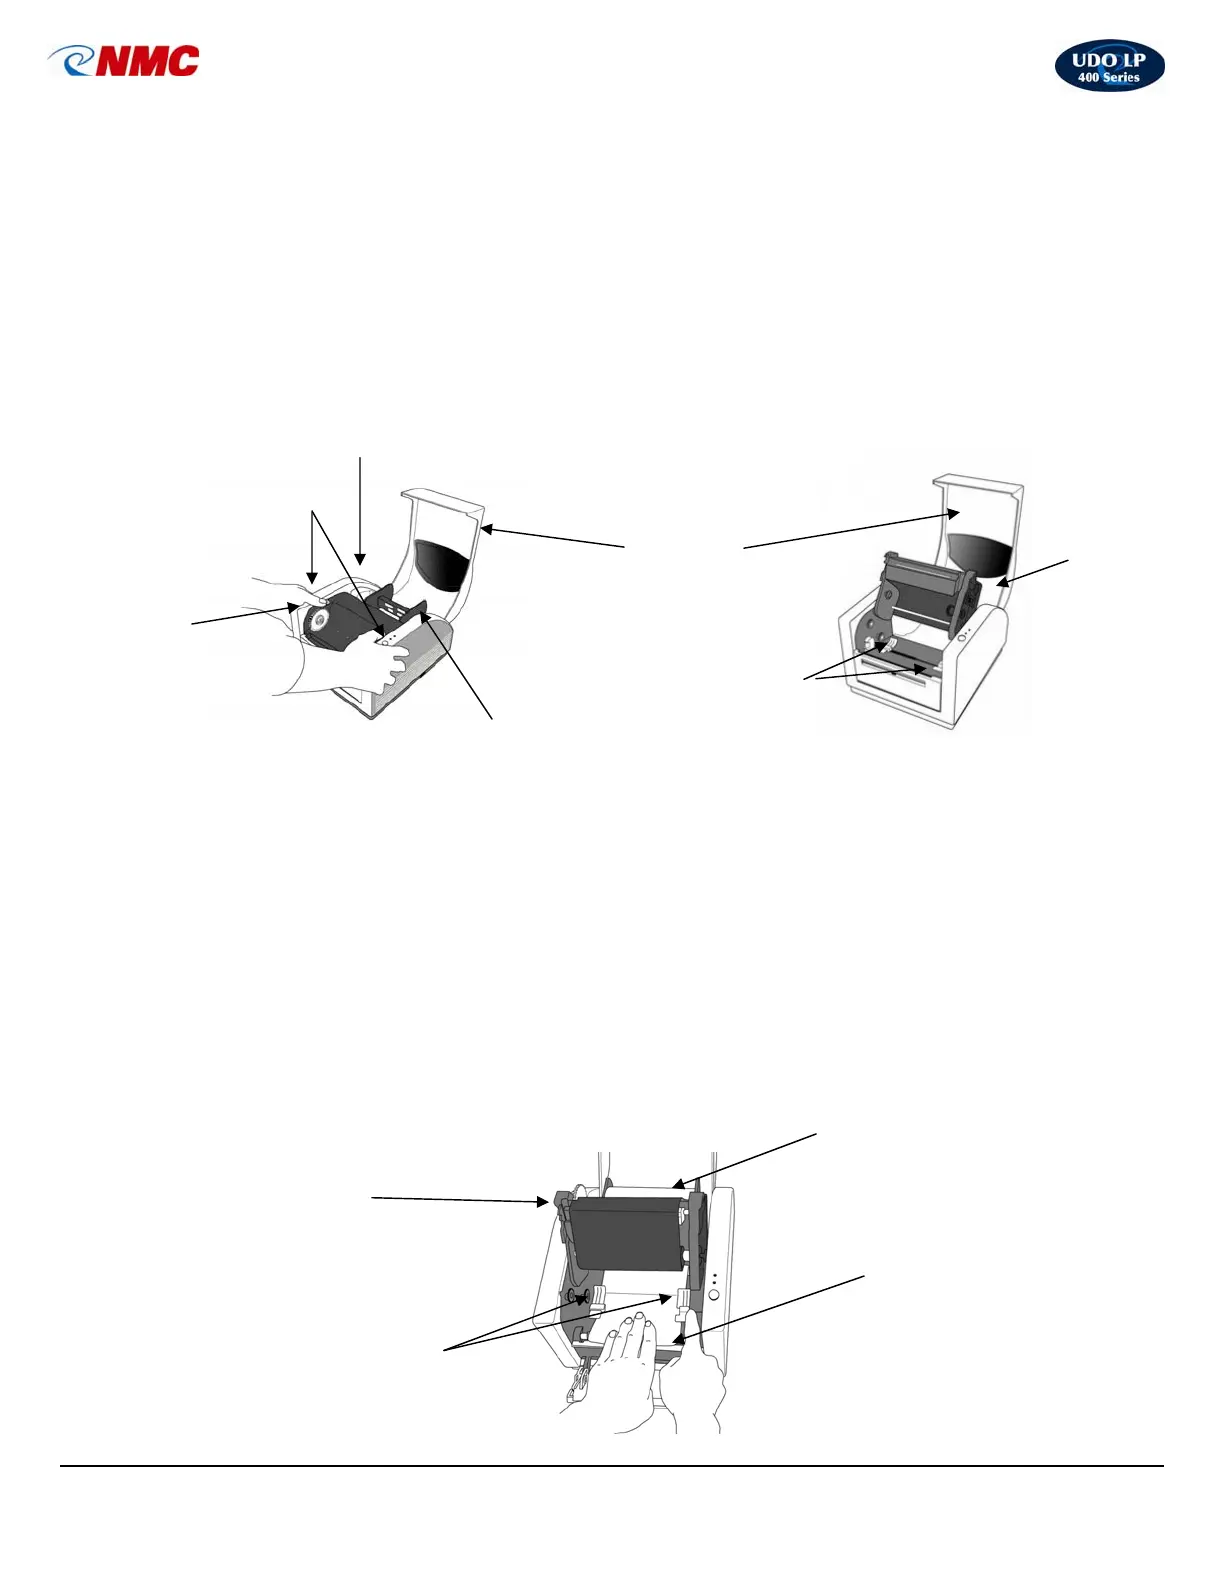
B. Installing Vinyl Rolls (Figs. 2-4):
1. Select the desired vinyl roll and remove from packaging.
2. Open the printer lid and press down on the two (2) purple buttons to open the
Print Head (Fig. 2).
3. In the printer is a plastic black bar with guides at each end (Supply Holder)
(Fig. 2). Remove the white tape which is holding the bar in place. If installing a 4”
vinyl roll, remove the guides from the main bar. (Do not discard guides; they are
required when the vinyl roll is less than 4”.)
4. Insert the plastic black bar through the core of the vinyl roll and return the Supply
Holder to its place; make sure the start of the vinyl roll is directed towards the
front of the printer (refer to diagram inside the printer lid for specific loading
instructions.)
5. Located beneath the Print Head are two (2) purple Self-Centering Guides (Fig. 3).
Slide the guides apart as far as possible.
6. Hand feed the vinyl towards the front of the printer (Fig. 4). Feed the vinyl under
the Print Head and under the Centering Guides; proceed over the black roller bar
until vinyl begins to come through the Cutter/Discharge. While holding the vinyl
flat, move the Centering Guides back into the center position (as far as they can
go) to secure the vinyl in place.
Print Head in Closed Position
Print Head
In
Open
Position
Purple Buttons
(Used to Open &
Close Print Head)
Self-Centering
Guides
(Purple)
Printer Lid
Self-Centering Guides
Pur
le
Vinyl Roll
Black Roller & Black Metal Bar
Print
Head
(open)
Vinyl Roll
Supply Holder
Fig. 2
Purple
Ribbon
Advance
Wheel
Fig. 3
Fig. 4