UDO LP400 User Guide
_____________________________________________________________________________________________________
LP400 User Guide (11/07)
35
C. Inverted Text
This section will take you through the steps of how to design a label using the Inverse
feature. For more in-depth information, click the ‘H
elp’ menu at the top of the screen or
contact NMC.
1. Open the ‘F
ile’ menu and select ‘New’ to create a new label.
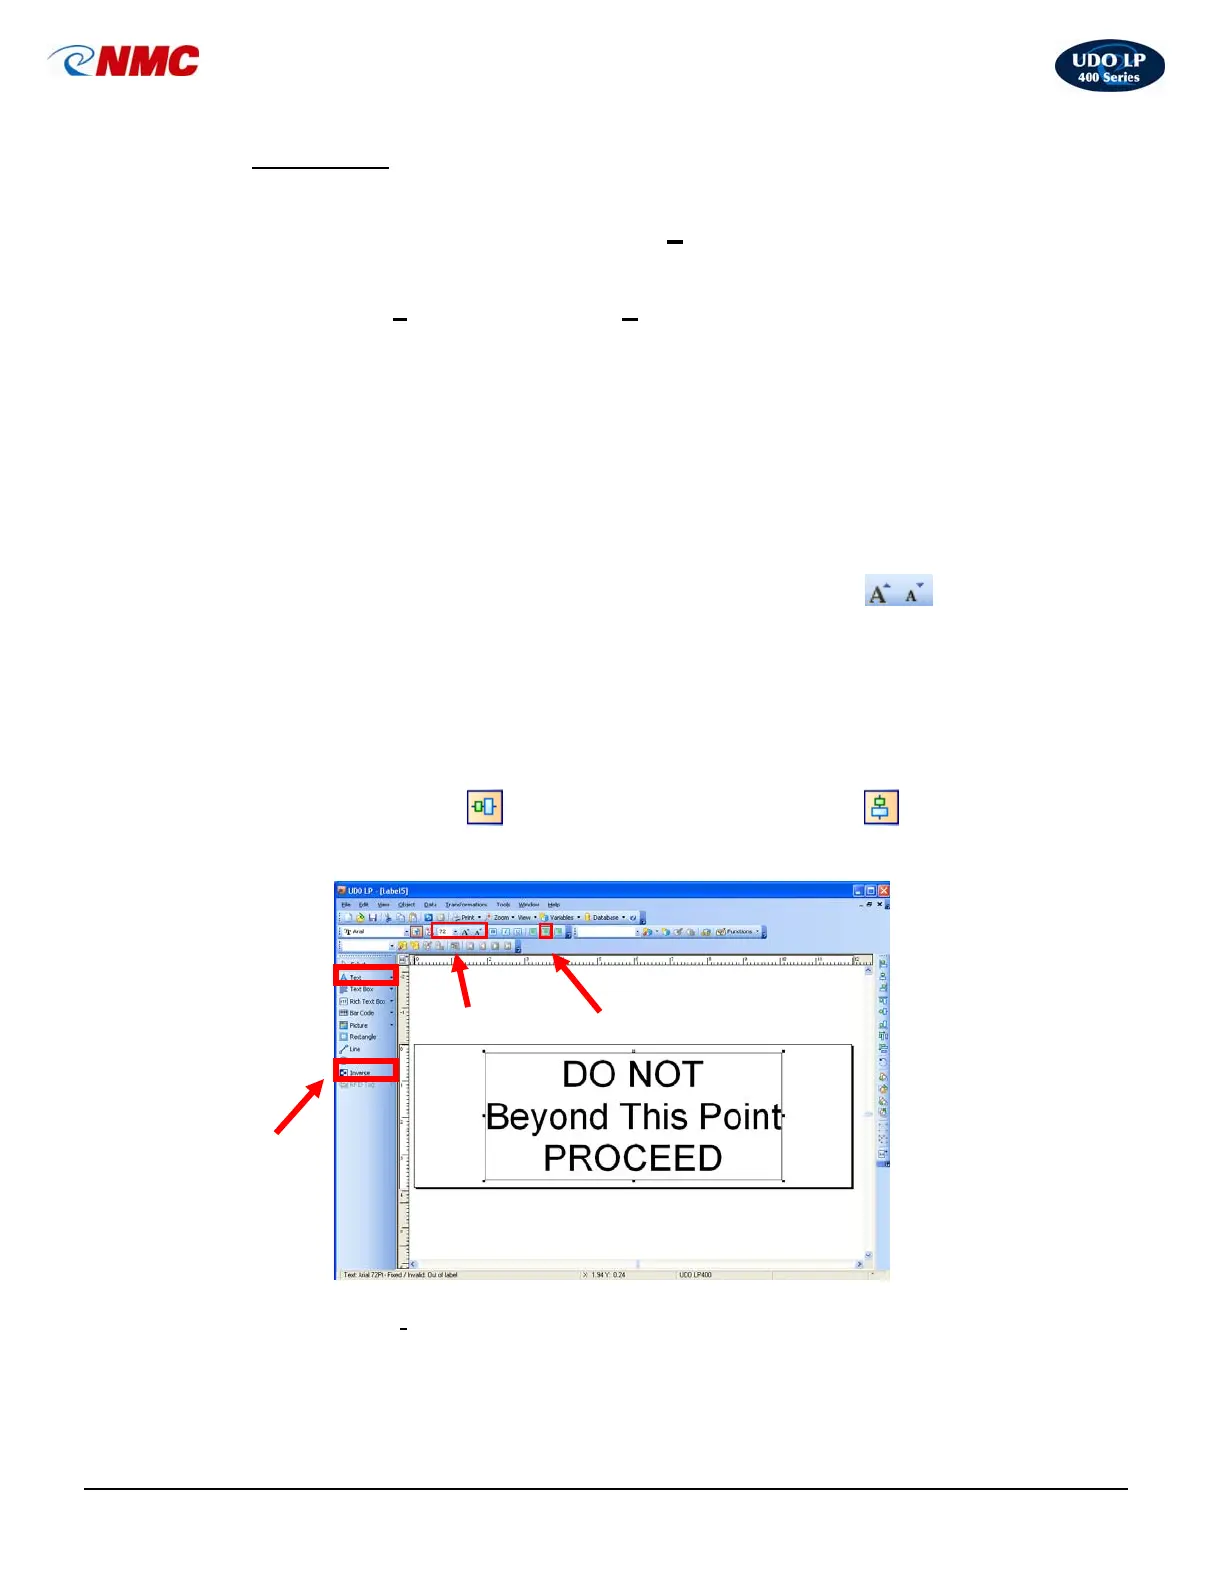
2. Select the Text tool (Fig. 10). Position the cursor on the label and click.
(Note: The ‘A’ will appear next to the cursor.) Type the text on three lines:
DO NOT
Beyond This Point
PROCEED
Now click on the text box or on the label to select the text box.
3. With the Text Box selected, click the ‘Increase Font Size’ icon from
the text toolbar (Fig. 10). You can also change the font size from the pull
down menu or type in the size. Increase the font size to 72.
4. With the Text Box selected, click the ‘Center Alignment’ option from the
Text Menu (Fig. 10).
5. With the text box selected, hold down the ‘Ctrl’ button and Click the
‘Vertical Center’
icon. Click the ‘Center Alignment’ icon from the
Design/Alignment Tool Bar (Fig. 10). The label should look like Figure 10.
6. Select the ‘I
nverse’ option from the Toolbox. Click and Drag on the label
extending the Inverse Box from left to right over the top line (Fig. 11).
Center
Font Size
Fig. 10
Inverse