UDO LP400 User Guide
_____________________________________________________________________________________________________
LP400 User Guide (11/07)
36
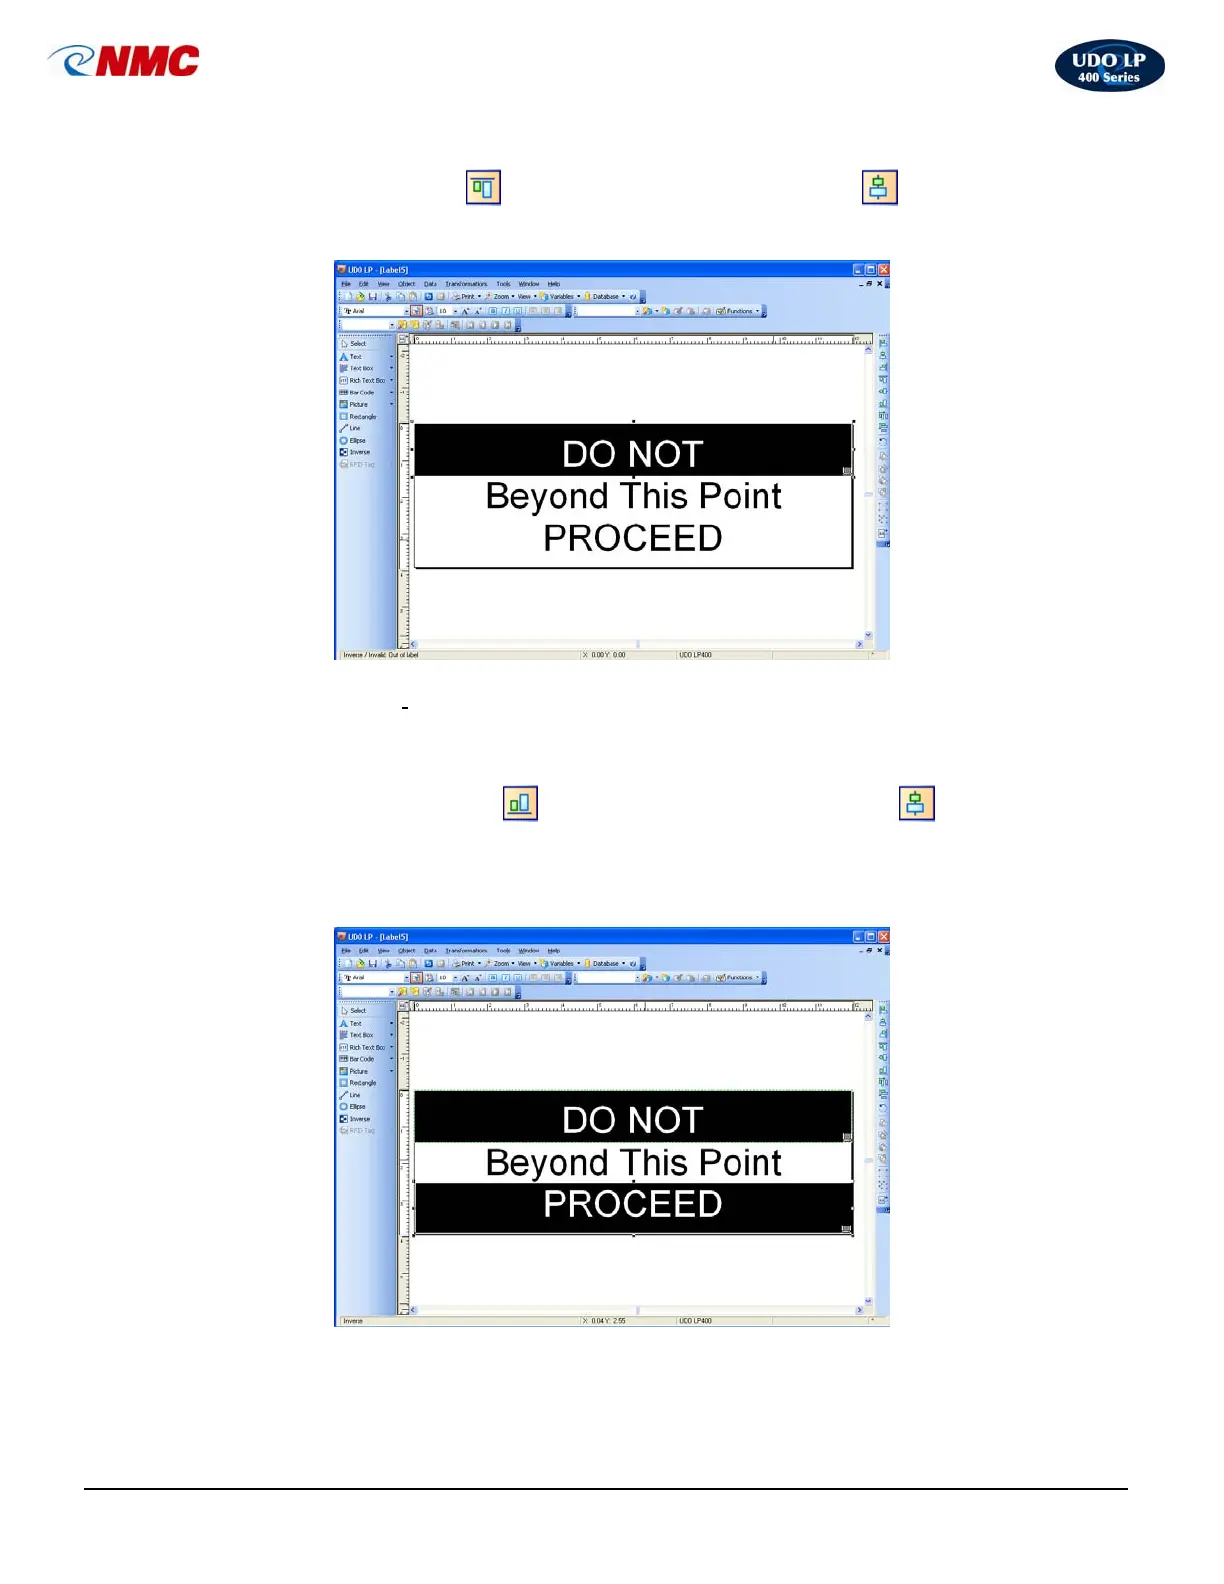
7. With the Inverse Box selected, hold down the ‘Ctrl’ button and Click the
‘Top Alignment’
icon. Click the ‘Center Alignment’ icon from the
Design/Alignment Tool Bar. The label should appear as in Figure 11.
8. Select the ‘I
nverse’ option from the Toolbox. Click and Drag on the label
extending the Inverse Box from left to right over the bottom line (Fig. 12).
9. With the Inverse Box selected, hold down the ‘Ctrl’ button and Click the
‘Bottom Alignment’
icon. Click the ‘Center Alignment’ icon from
the Design/Alignment Tool Bar. The label should appear as in Figure 12. The
label is now ready to print. Save the file.
Fig. 11
Fig. 12
 Loading...