45
Note ► If no device is selected, the data are stored on the current device shown on the homepage (1 in Figure
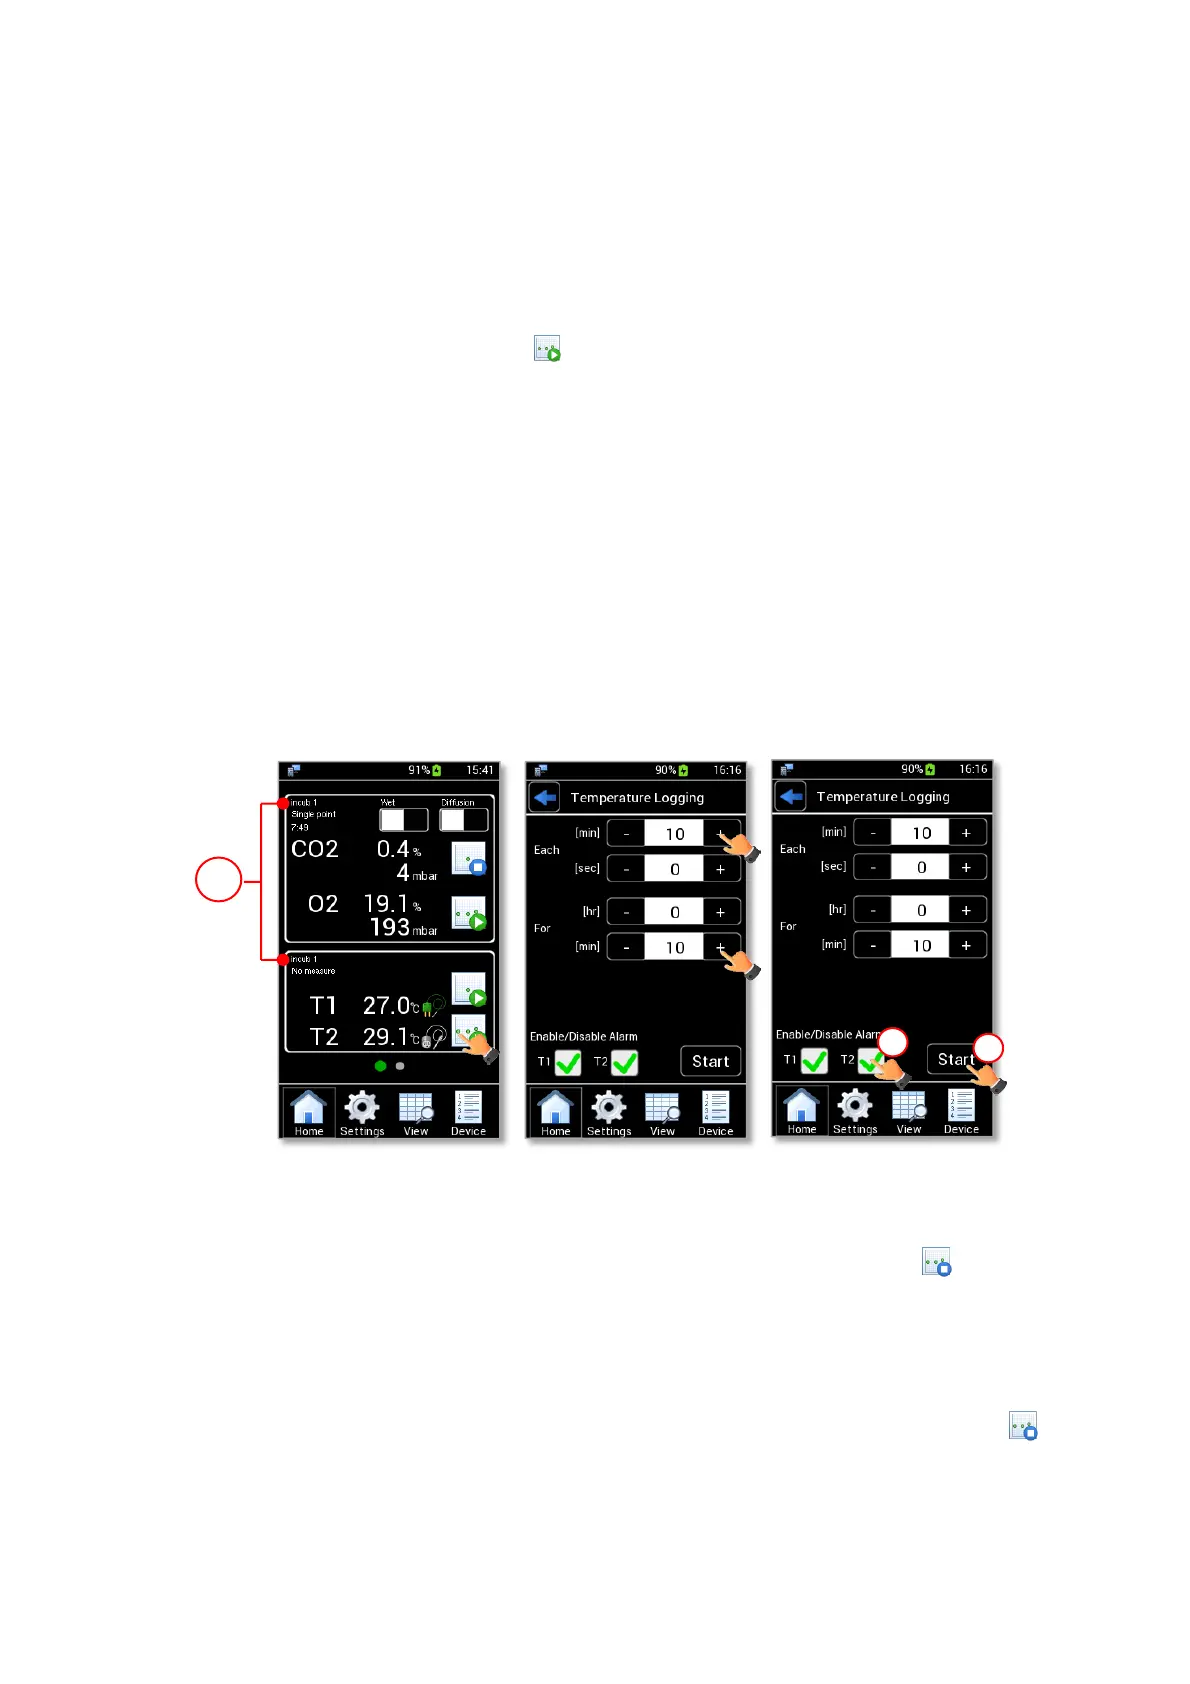
56 a).
Tip ► During a gas measurement, you can start a temperature measurement and select a different Device
for which temperature data shall be stored.
2. Wait for the temperature reading is stable.
3. Press the Temperature Logging icon (see Figure 56 a). The Temperature Logging settings page is
shown.
4. Insert the measurement time using + and – (see Figure 56 b):
• Each: the time between two measurement points. It is the acquisition frequency. The time can be
inserted in minutes and seconds. Each time can be set at minimum of 5 seconds.
• For: the time interval of the Temperature Logging. The time can be inserted in hours and minutes.
5. Enable/Disable the alarm on T1 and/or T2 (1 in Figure 56 c) and then press Start to start the
measurement (2 in in Figure 56 c).
Note ► If T1 and/or T2 check boxes are enabled (see Figure 56 c), the alarm triggers when the reading
temperature values are out of the set range. See paragraph 9.3.4 to set the temperature alarm range.
Figure 56. Temperature logging (a – b – c)
When the Temperature Logging is in progress, the Temperature Logging icon becomes (see Figure 57
b).
Note ► During a Temperature Logging, the timer (1 in Figure 57 a) indicates the remaining time for
completing the time interval, set as “For” value (see Figure 56 b).
Note ► The Temperature Logging can be interrupted before the time set by clicking on the icon (see
Figure 57 a).