Display the setup menu.
_ "Setup menu" (p. 6)
2 From the playback menu r;l, select [Print
Order] and then press the (o_ button.
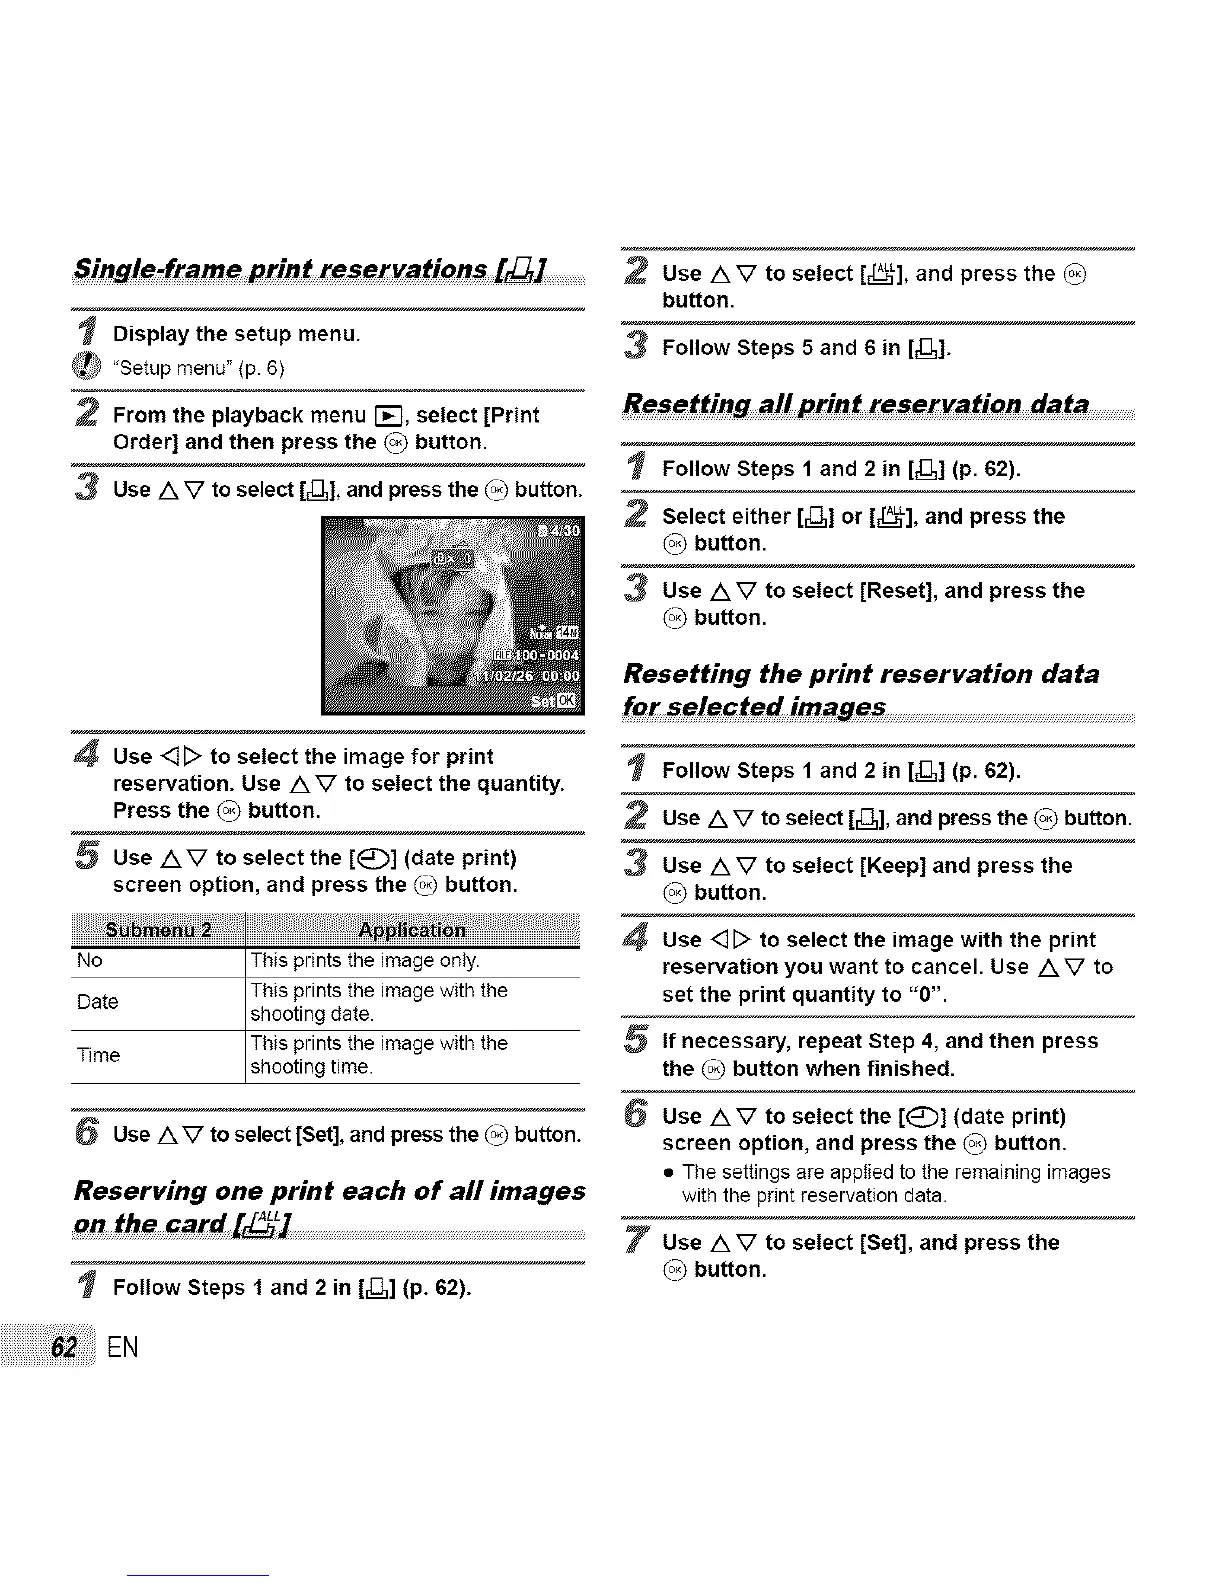
3 Use AV to select [,[1], and press the (°3 button.
4 Use 4[> to select the image for print
reservation. Use AV to select the quantity.
Press the (o_ button.
5 Use AV to select the [E_::)] (date print)
screen option, and press the _ button.
No This prints the image only.
This prints the image with the
Date shooting date.
This prints the image with the
Time shoot ng t me.
6 Use A V to select [Set], and press the (o_button.
Reserving one print each of all images
on the card [_L] ................................................................................................................
Follow Steps f and 2 in [_3,] (p. 62).
EN
Use AV to select [_E_,L],and press the (_
button.
3 Follow Steps 5 and 6 in [Z1].
Follow Steps 1 and 2 in [_],] (p. 62).
Select either [_,] or [EL_L],and press the
(o_button.
Use AV to select [Reset], and press the
(o_button.
Resetting the print reservation data
for selected images .............................................................................................
Follow Steps 1 and 2 in [,[1] (p. 62).
Use AV to select [_3,], and press the (o_button.
3 Use AV to select [Keep] and press the
(o_button.
Use <][::> to select the image with the print
reservation you want to cancel. Use AV to
set the print quantity to "0".
If necessary, repeat Step 4, and then press
the _ button when finished.
Use AV to select the [1_:)] (date print)
screen option, and press the (o_ button.
• The settings are apptied to the remaining images
with the print reservation data.
Use AV to select [Set], and press the
(o_button.