During subsequent accesses, the system also shows any
new user and program added, the interface will be in
the chosen language.
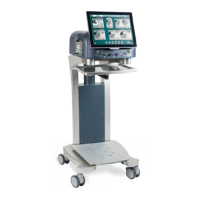
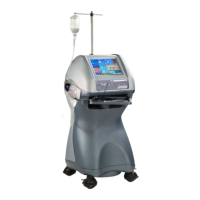
4.3.2 Installation of the I/A cassette
For a correct installation of the cassette, proceed as follows:
• Connect the male Luer lock connector of the
administration set into the corresponding connector on
the short tube at the top of the I/A Cassette.
• Insert the I/A cassette in the side panel by aligning the
reference line on the I/A cassette with the
corresponding point on the side panel.
• Turn the I/A cassette clockwise until it stops.
CAUTION Risk of infection!
When replacing the infusion bottle, pathogens may enter
the bottle and contaminate the balanced saline solution.
• Never touch the drip chamber spike when
connecting, replacing or removing the infusion
bottle.
• Insert the drip chamber spike into the rubber stopper of
the infusion bottle or the controlled irrigation infusion
bag.
• Connect the end of the irrigation and aspiration lines to
the corresponding connectors of the handpieces.
CAUTION Risk of injury to the patient!
• Before using the handpiece, always perform the
"Priming" procedure for the preparation and testing of
the irrigation/aspiration tubes. During this procedure,
the operation and proper installation of the I/A
Cassette and Irrigation/Aspiration Tubes is verified and
the I/A System is also filled with sterile saline. This
way, possible malfunctions and injuries to the patient
are avoided.
To remove the I/A cassette, proceed as follows:
Press the "PUSH" button to remove the I/A cassette after
the surgery has been completed.
Wait until the peristaltic pump is completely retracted.