Chapter 13 - Where to find features
Review Tools Controls
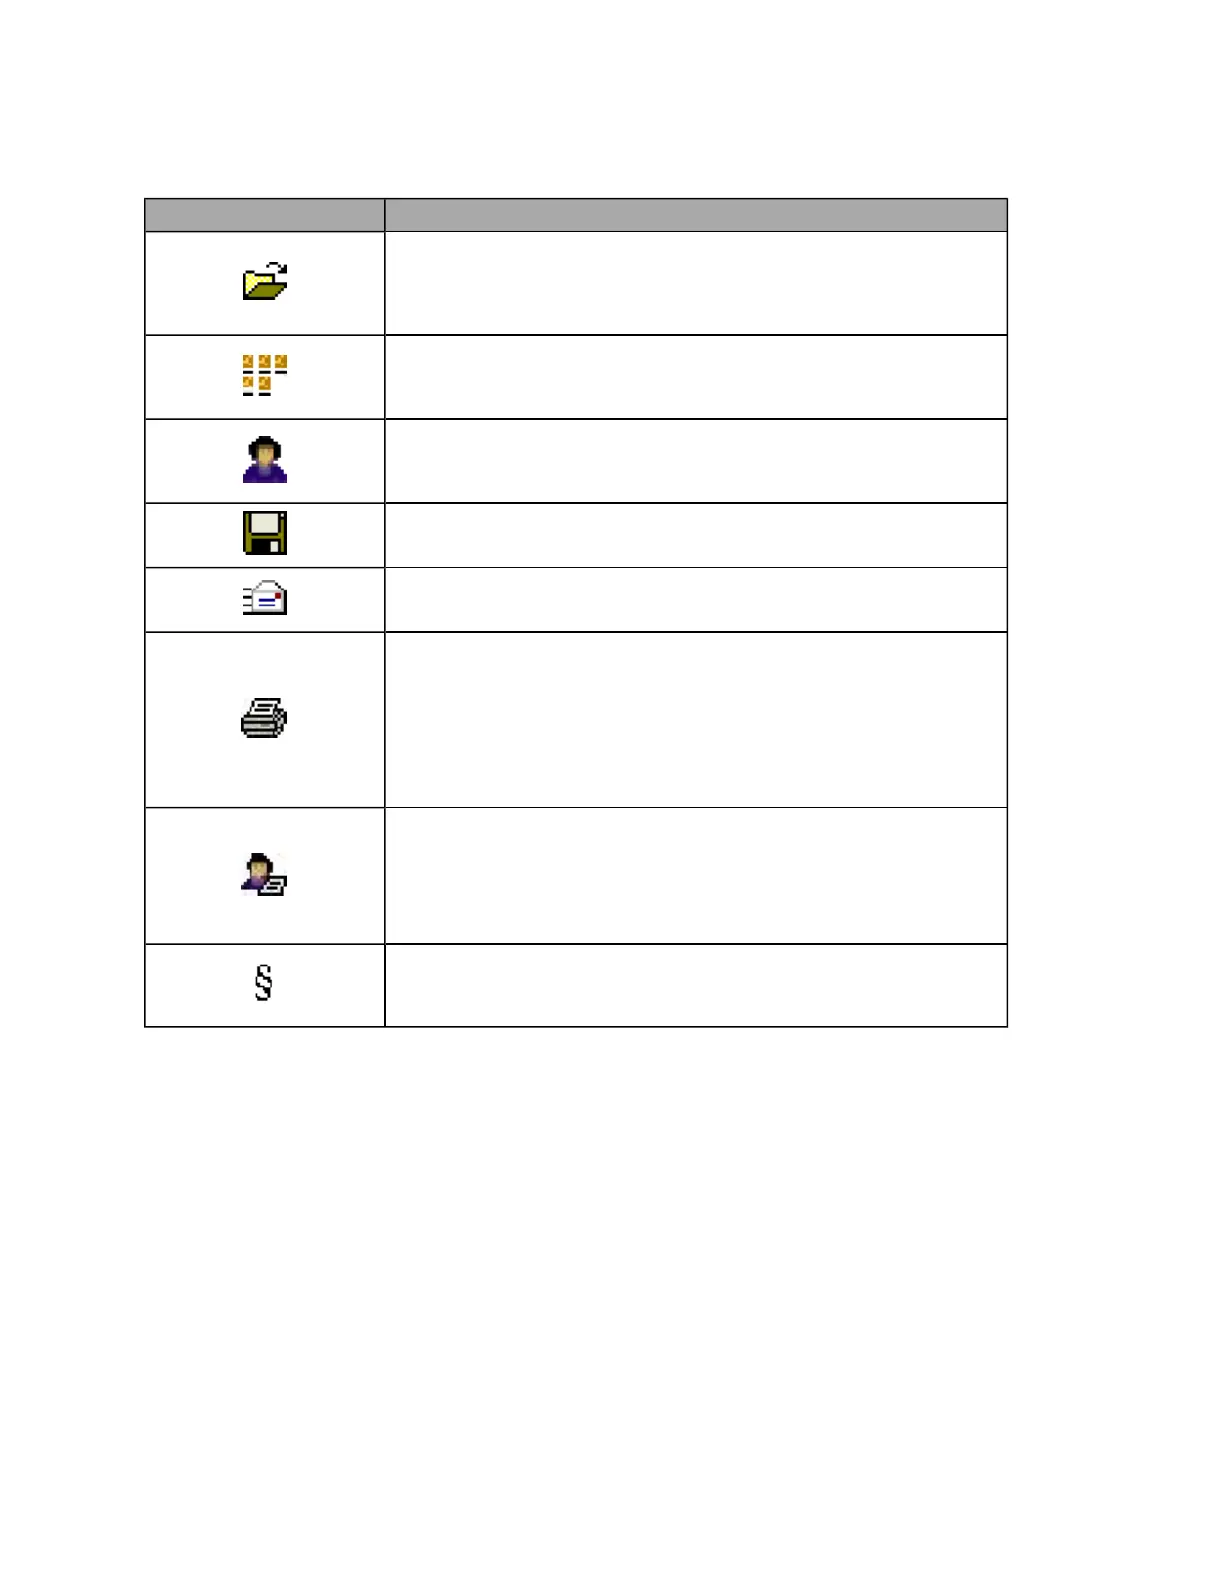
Button/section Description
Open Files(s) to View button
Opens the Select Image(s) to View dialog box. Hold down [Ctrl] and click each
image filename or [Shift] to select the first and last image filenames in a
group.
Browse Images in Folder button
Opens the Browsing dialog box. Select the folder and file type to filter the
images. Click each image you want to open.
Review Patient History button
Opens the Select Patient dialog box. Select the patient then click OK to open
the Patient History view, see About the Patient History view on page 35.
Export button
Opens the Export Image to File dialog box, see Exporting images on page 62.
Send to E-Mail Recipient button
Opens the Export Image To E-Mail dialog box, see Emailing images on page 61.
Quick Print Active Image button
Sends the current image directly to the default printer. The currently
displayed annotations, image area and display settings will be used
automatically.
If you want to customize what is printed you should use the full print feature
to print images that have been dragged to the Print Bar, see How to print the
current image as displayed on page 64.
Print Patient Takeaway button
Sends the current image directly to the default printer and prints the image
that the patient can take away.
You can customize the layout to include your practice name and logo, see
How to customize the Patient Takeaway print layout on page 65.
Imported Image symbol
This symbol indicates that the image has been imported into the patient's
history.
82 of 100