Made in the U.S.A.
FIELD SETTINGS
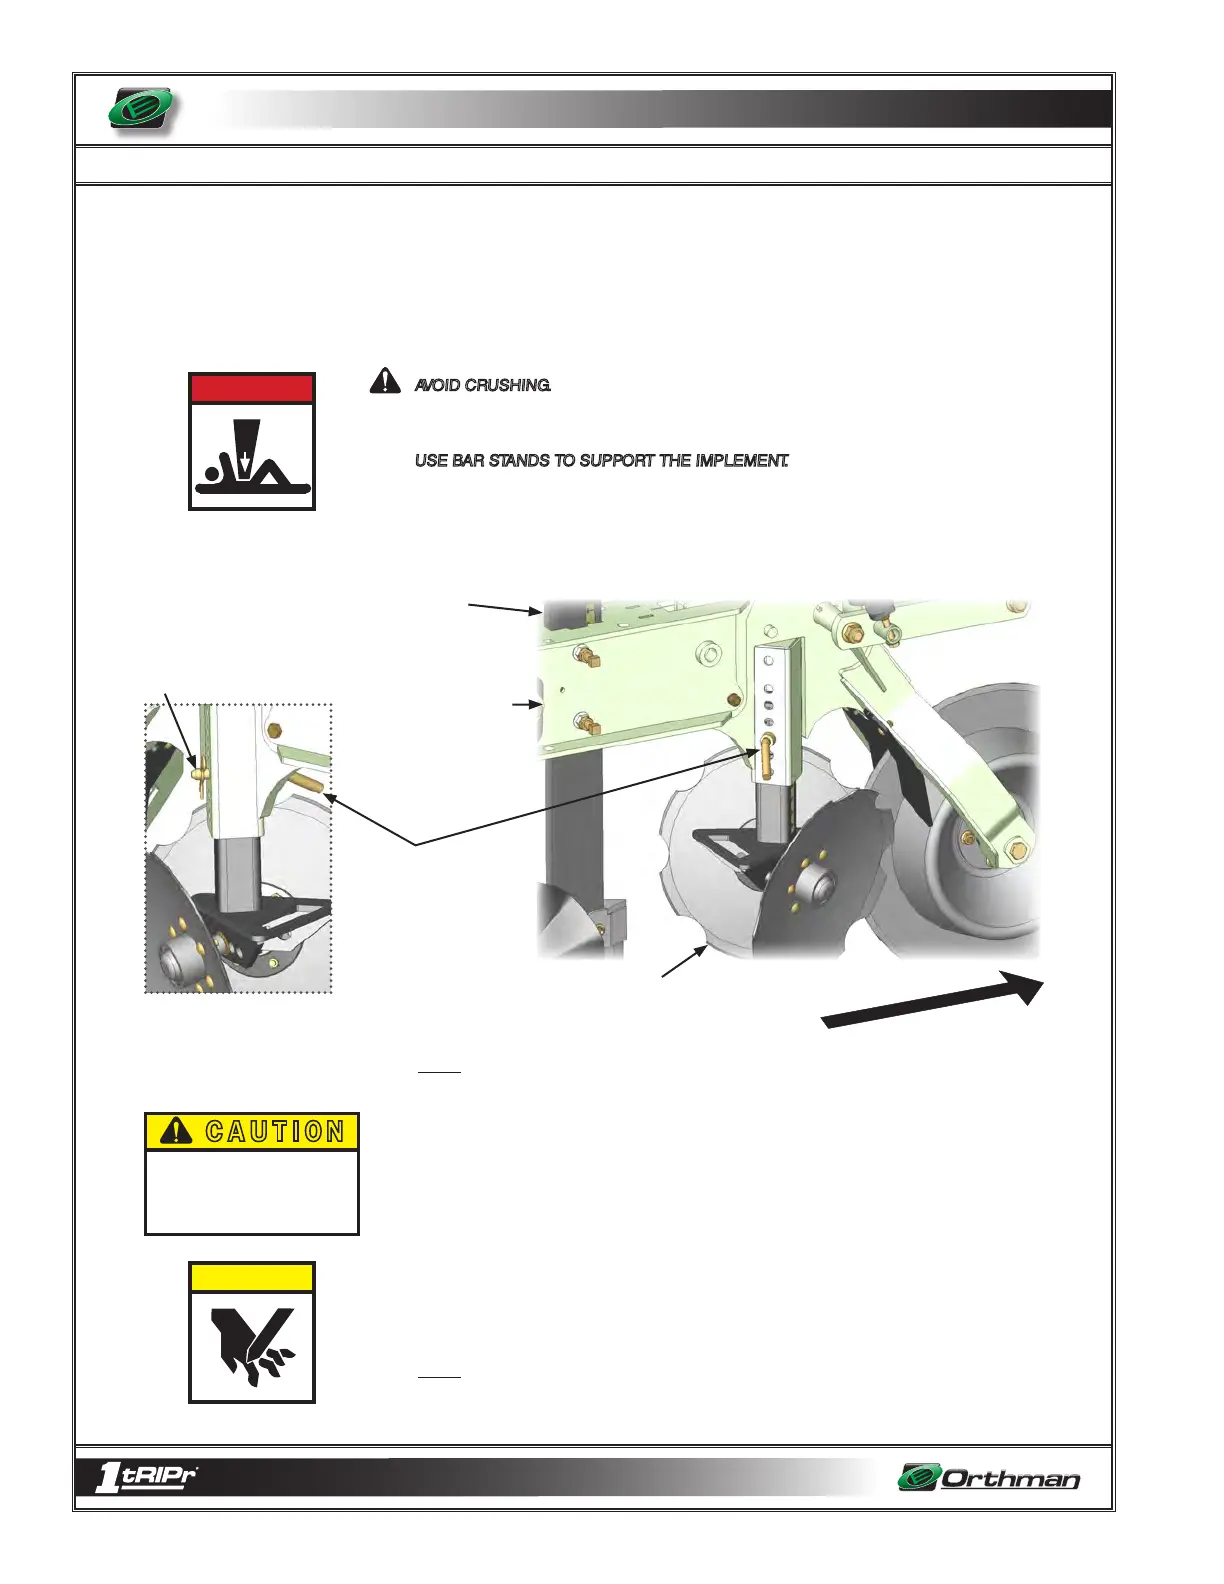
TRASH OPENER ASSEMBLY DEPTH
The trash opener assembly reduces field residue directly behind the depth band coulter
assembly prior to the arrival of rearward tooling. The trash opener assembly can be
vertically pin adjusted
in 1/4 inch increments.
AVOID CRUSHING. Make sure all personnel are clear of the implement. Lower implement
to the ground, place tractor in park, turn off engine, and remove key.
USE BAR STANDS TO SUPPORT THE IMPLEMENT. Park implement on a clean, dry, and
level surface. An uneven surface could cause implement to shift or fall, resulting in injury
or death, as well as implement damage. Securely support all implement components that
must be raised. Remove buildup of grease, oil, or debris prior to adjusting the trash opener
assembly.
D A N G E R
C A U T I O N
C A U T I O N
Be extremely careful working
around unshielded sharp edges.
Injury may result from contact
with sharp edges.
153 - 045
NOTE: Recommended trash opener depth is approximately 1/2 inch below soil surface
to gently remove surface residue with minimal soil disturbance. Trash openers are often
removed when operating in a low residue cover crop such as drilled wheat, alfalfa, beans,
etc.
1. Remove hairpin from depth adjustment pin.
2. Physically support weight of trash opener assembly.
3. Remove depth adjustment pin from tail section and shank.
4. Vertically adjust trash opener assembly to desired depth.
5. Insert depth adjustment pin through receiver tube. Replace hairpin in depth adjustment
pin.
NOTE: A depth indicator allows for uniform trash opener assembly depth between row
units. Depth indicator decal does not reflect actual tillage depth. Use depth indicator decal
as a tool to achieve uniform depth across the implement.
Hairpin
Inset (left side view)
Tail Section
Shank
Trash Opener Assembly
DIRECTION OF TRAVEL
(right side view)
Depth
Adjustment Pin
5 - 4