Made in the U.S.A.
FIELD SETTINGS
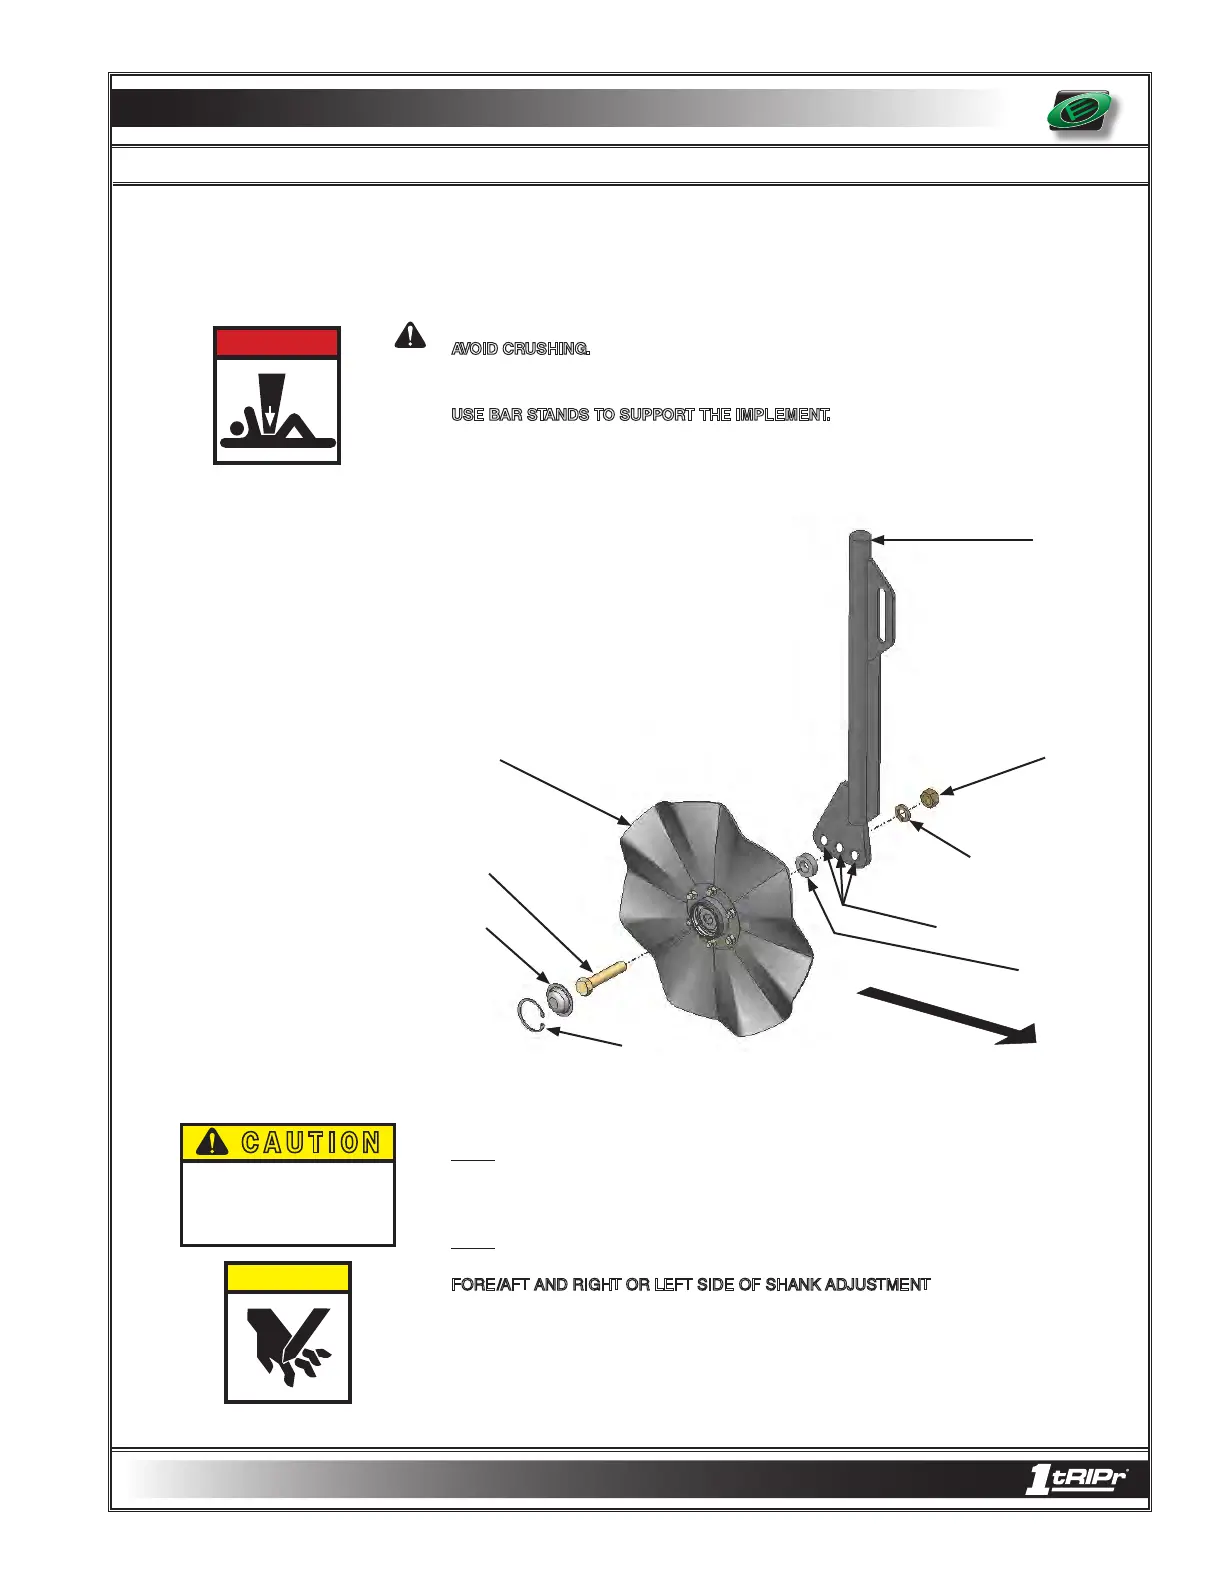
DIRECTION OF TRAVEL
Wavy
Shank
Shank Bolt Holes
Nut
Lock Washer
Spacer
Bolt
Cap
Snap
WAVY COULTER ASSEMBLY FORE
AND AFT
Each wavy coulter assembly can be adjusted fore and aft.
AVOID CRUSHING.
Make sure all personnel are clear of the implement. Lower
implement to the ground, place tractor in park, turn off engine, and remove key.
USE BAR STANDS TO SUPPORT THE IMPLEMENT.
Park implement on a clean,
dry, and level surface. An uneven surface could cause implement to shift or fall,
resulting in injury or death, as well as implement damage. Securely support all
implement components that must be raised. Remove buildup of grease, oil, or debris
prior to adjusting wavy coulter assembly.
(RIGHT HAND WAVY COULTER PICTURED)
NOTE: If utilizing a Combo Caddy and the 1tRIPr® row units are mounted to a double
toolbar, the wavy coulters near the Combo Caddy lift wheels must occupy the forward
most shank bolt holes.
NOTE: Recommended tools: Snap Ring Pliers, 1 1/8 sockets and/or end wrenches.
FORE/AFT AND RIGHT OR LEFT SIDE OF SHANK ADJUSTMENT
1. Remove snap ring and cap.
2. Secure bolt to remove nut and lock washer.
3. Reposition wavy coulter, bolt, and spacer to desired side of shank and bolt hole.
4. Secure bolt to install lock washer and nut.
5. Tighten all hardware to proper torque specifications.
(pg. 8 - 4)
6. Install cap and snap ring.
D A N G E R
C A U T I O N
C A U T I O N
Be extremely careful working
around unshielded sharp edges.
Injury may result from contact
with sharp edges.
153 - 045
5 - 9