Made in the U.S.A.
FIELD SETTINGS
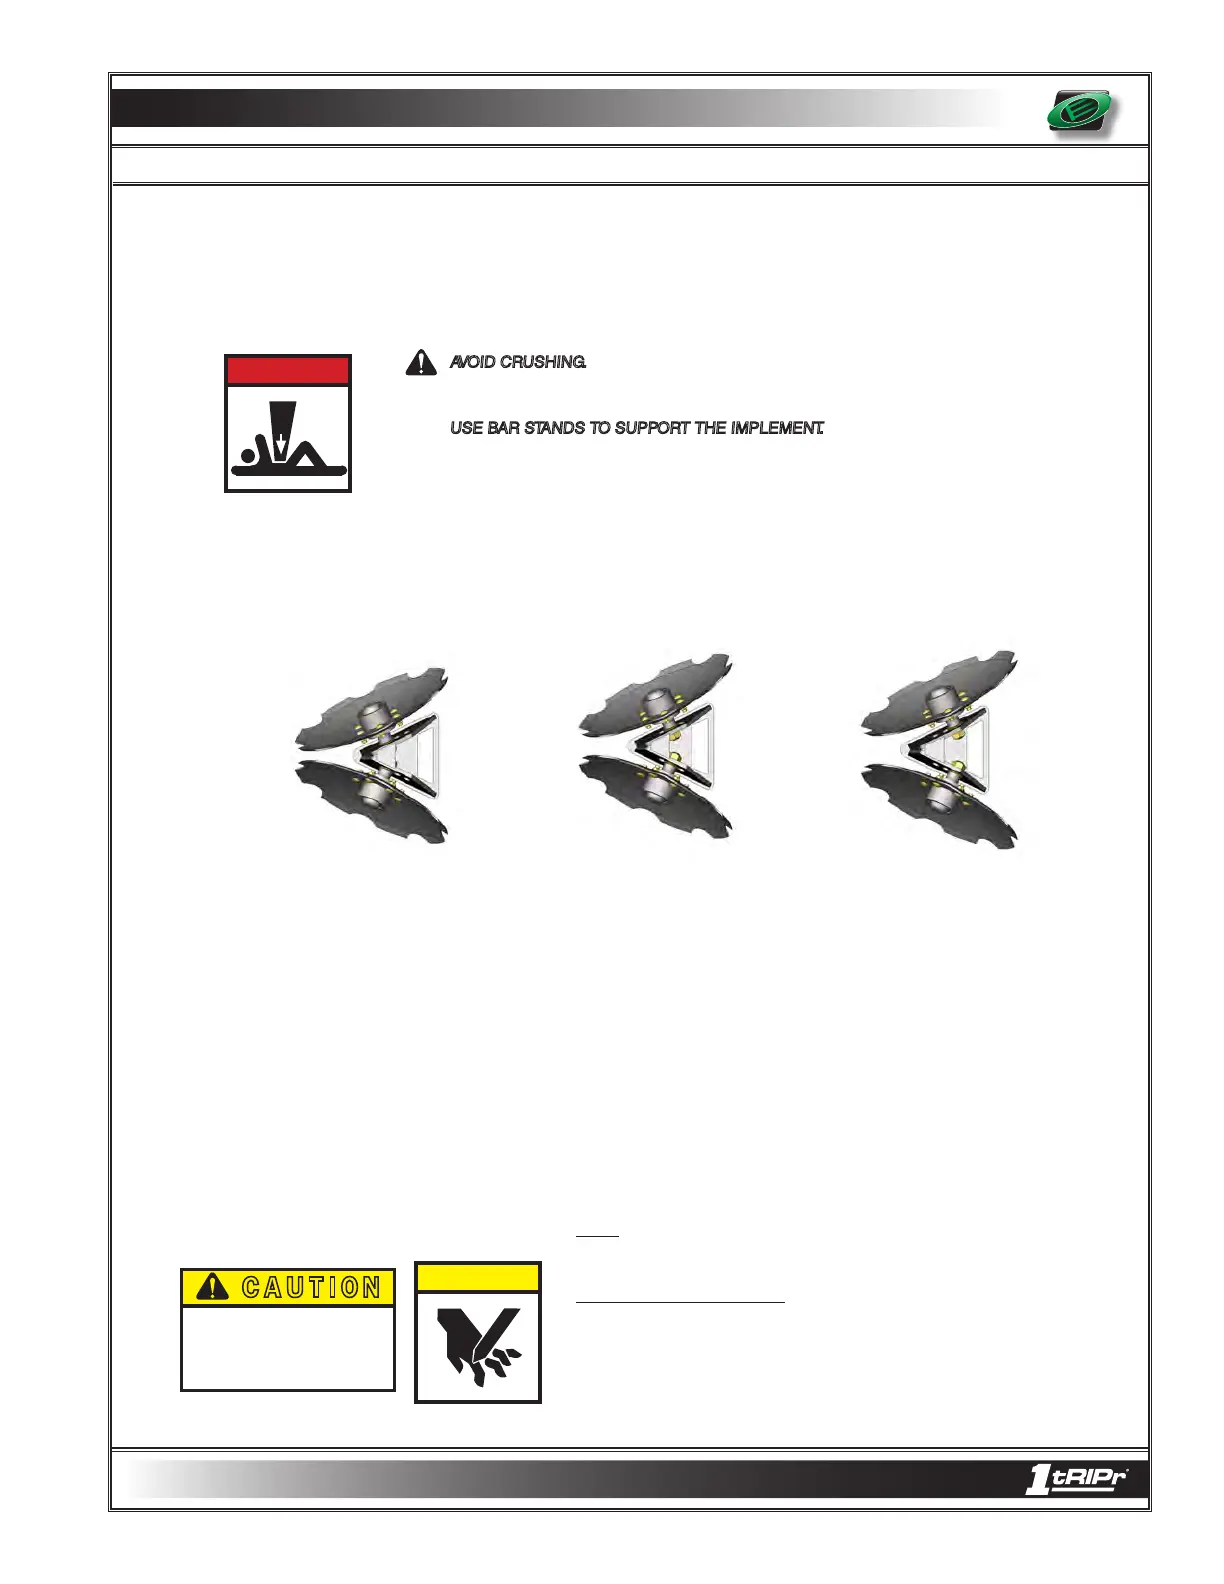
Middle Position Rearward PositionFront Position
TRASH OPENER ASSEMBLY WIDTH
The trash opener assembly reduces field residue directly behind the depth band coulter
assembly prior to the arrival of rearward tooling. The trash opener assembly can be
adjusted fore and aft. The trash opener width can be adjusted.
AVOID CRUSHING. Make sure all personnel are clear of the implement. Lower implement
to the ground, place tractor in park, turn off engine, and remove key.
USE BAR STANDS TO SUPPORT THE IMPLEMENT. Park implement on a clean, dry, and
level surface. An uneven surface could cause implement to shift or fall, resulting in injury
or death, as well as implement damage. Securely support all implement components that
must be raised. Remove buildup of grease, oil, or debris prior to adjusting the trash opener
assembly.
The trash opener discs can be adjusted fore and aft by removing them and changing their
position to one of three holes on the trash opener mount. Each rearward hole move the
disc assembly nearly 1” further away from the depth band coulter. As the discs are moved
rearward the distance between the discs will increase.
D A N G E R
There are two spacers along with a washer that set the width between the discs.
A combination of these spacers may be used to attain different widths
between discs at different fore and aft positions. As discs are moved rearward it
is adviseable to remove spacers to decrease the width between the discs.
NOTE: Recommended tools: Snap Ring Pliers, 1-1/8” sockets and/or
end wrenches.
Fore/aft and width adjustment
1. Remove snap ring and cap.
2. Secure bolt to remove nut.
3. Reposition discs.
4. Secure bolt and install nut.
5. Tighten all hardware to proper tourque specifications (pg. 8-4).
6. Install cap and snap ring.
C A U T I O N
C A U T I O N
Be extremely careful working
around unshielded sharp edges.
Injury may result from contact
with sharp edges.
153 - 045
5 - 5