Operator's Manual
Issue 14 / Mar 2016
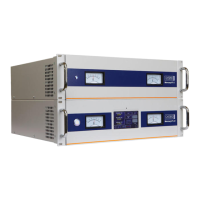
MercuryiPS
©2016 Oxford Instruments NanoScience. All rights reserved.
Page 61
6
NC
7
NC
8
Connected to pin 3
9
Chassis ground.
Connections to the sensor vary depending on the type of sensor in use, as summarized in the
next table.
Connection Thermocouple Metal resistor
Ge/C resistor Si/GaAs diode
Sensor Input High V+ V+ V- V+
Sensor Input Low V- V- V+ V-
Current source +ve
Connect pins 3,4,5
together
I+ I+ I+
Current source -ve
Connect pins 3,4,5
together
I- I- I-
6.1.1 Connecting thermocouples
Thermocouples must be connected using the correct wire type to ensure accurate
measurements.
Stability of the measurement is improved by biasing thermocouples above the ground plane of
the iPS. This is achieved by connecting together pins 3, 4 and 5 of the 9 way D connector (see
table above). Biasing the thermocouple in this way prevents error currents flowing in the
thermocouple even if the equipotential isothermal junction is grounded, as the iPS
measurement circuit is fully isolated.
To reduce noise and increase accuracy, the connector should have a hood fitted with a cable
gland (seal between cable and hood) to minimise any air current flowing around the
thermocouple connection pins. It is preferable for this hood to be plastic, rather than metal,
since this allows the connection pins to more closely match the iPS’s internal reference
temperature.
6.2 Configuring a temperature sensor
The home page shows six widgets and four buttons. If the iPS is not yet configured, all six
widgets will display None and 0.0000. Additional widgets can be displayed by scrolling left or
right by tapping the appropriate scroll button.
 Loading...