SC-HM910/SC-HM810
14
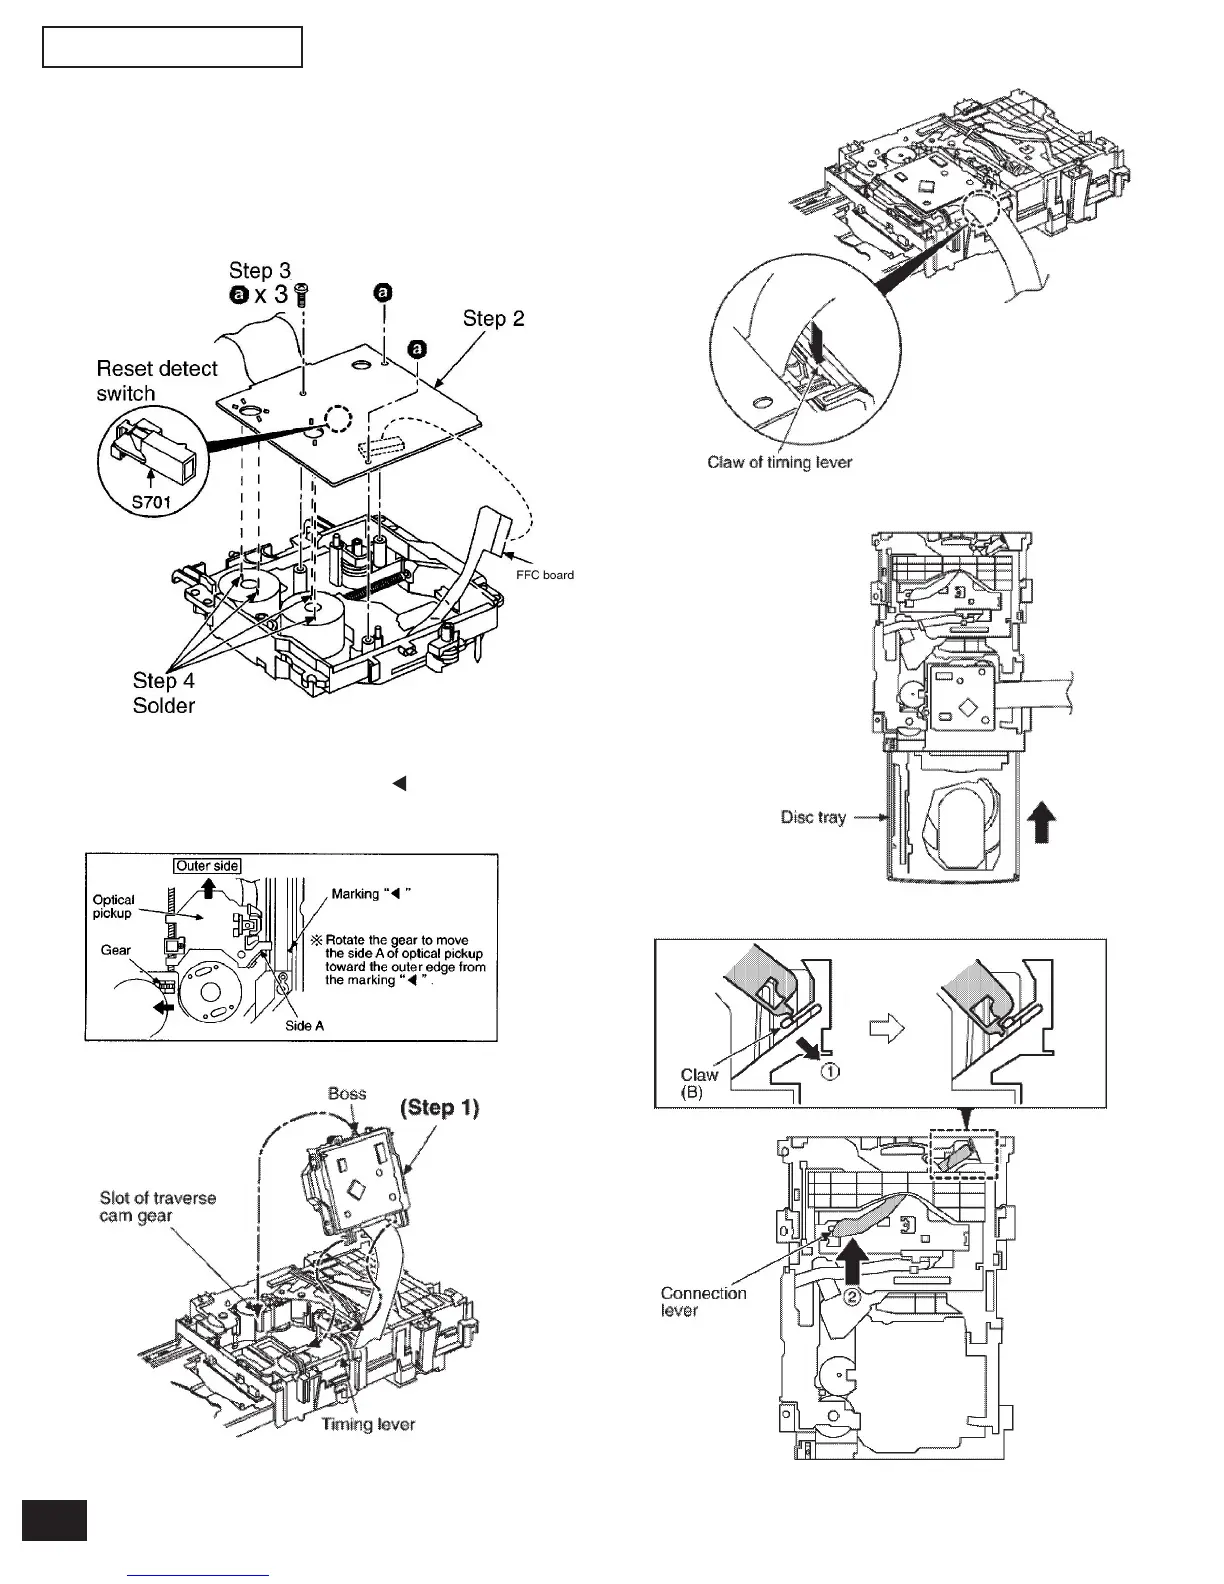
• Installation of the CD Servo P.C.B. after replacement
Step 1 Connect the FFC board.
Step 2 Install the CD servo P.C.B. in the traverse deck ass’y.
Step 3 Remove 3 screws.
Step 4 Solder.
Note:
Be careful no to lose the 3 floating spring because those will
also be removed on removal of the traverse deck ass’y.
• Note for installation of the CD servo P.C.B.
Before installing the CD servo P.C.B., move the optical pickup
toward the outer edge from the mark “ “.
(Otherwise, the rest detect switch (S701) mounted on the CD
servo P.C.B. may be damaged.)
• Installation for traverse deck ass’y
Step 1 Install the traverse deck ass’y to the timing lever.
Step 2 Align the boss of traverse deck ass’y with the slot of
traverse cam gear.
Step 3 Force the claw of timing lever.
Step 4 Force the disc tray fully.
Step 5 With pressing the claw (B) in the direction of arrow (1),
force the connection lever in the direction of arrow (2).