83
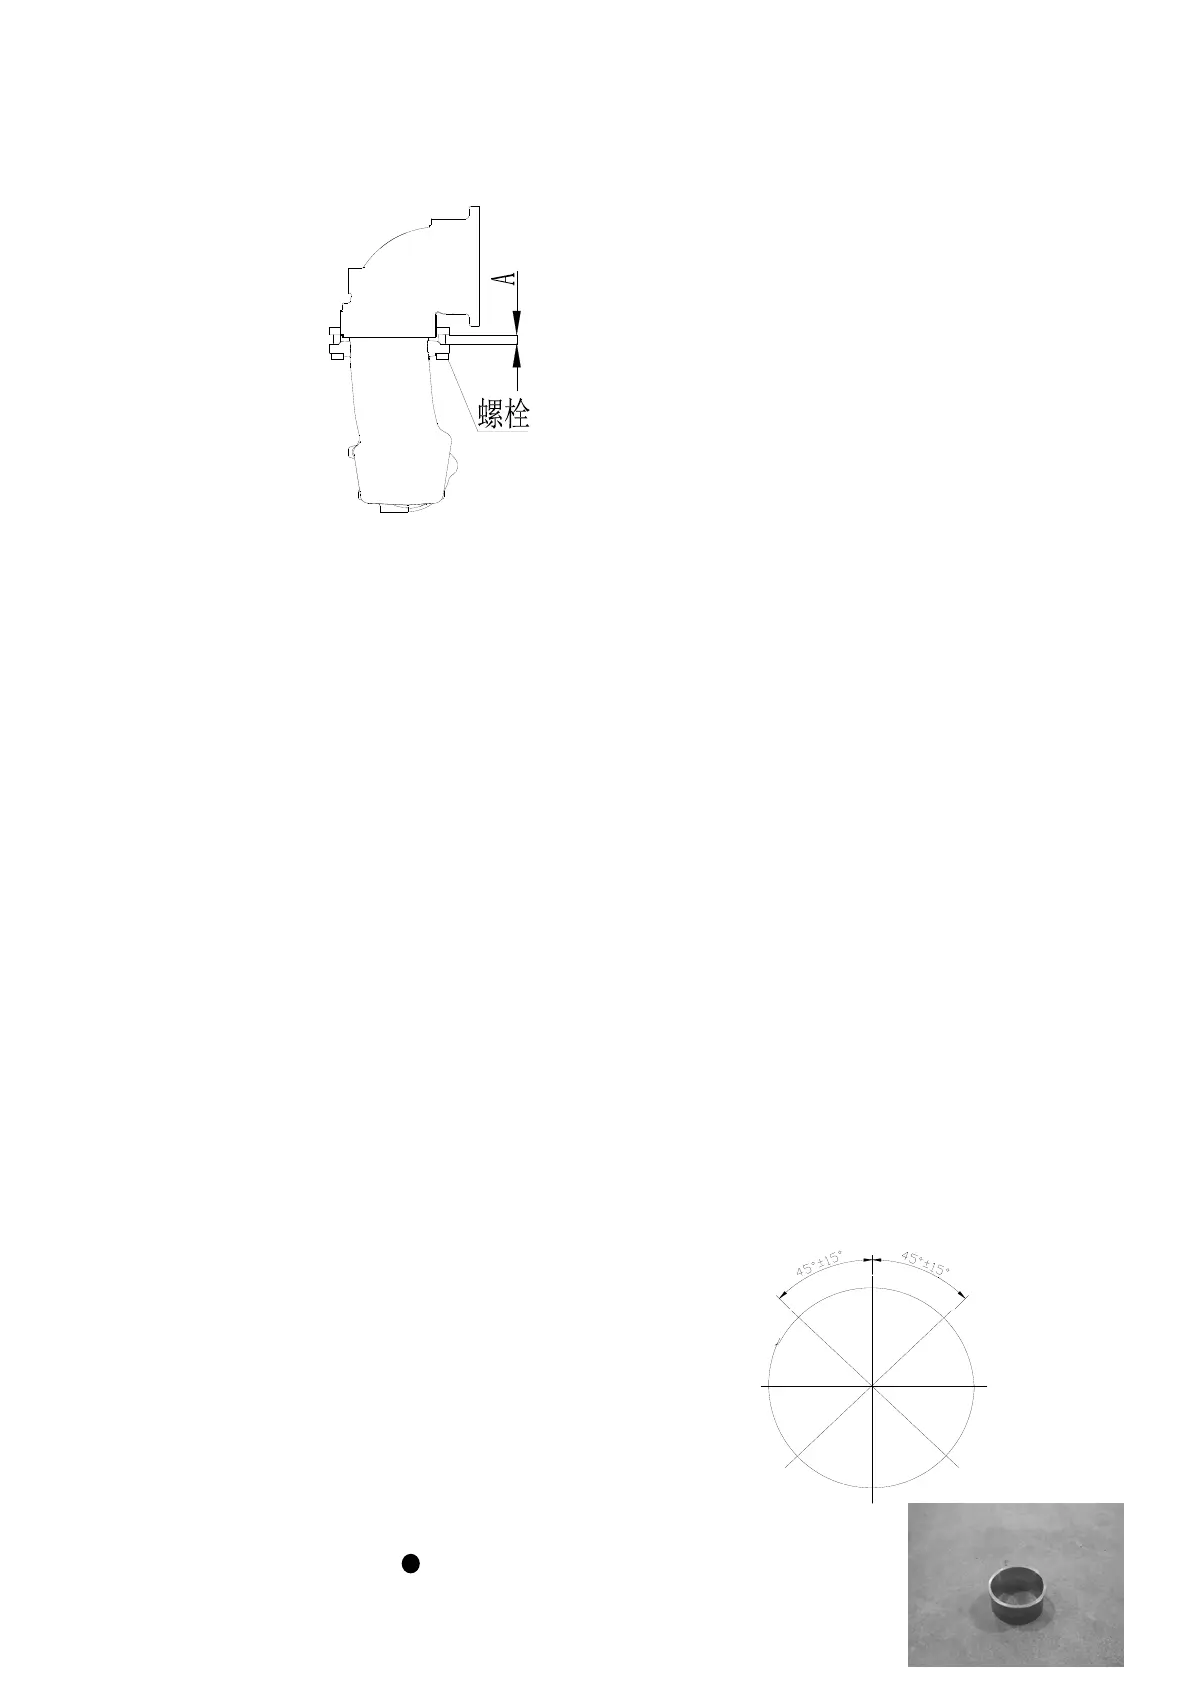
4. Re-mount the exhaust pipe assembly.
Alternately tighten the bolts (M6x30mm) to mount the exhaust pipe A&B and control the
clearance shown in the figure to the specified value.
Specified clearance: 9.5 mm
Note:
Use a new O-ring.
5. Remove the bolts (M6x30mm).
6. Use new exhaust pipe gasket A and exhaust gasket B.
7. Mount the exhaust pipe assembly and tighten the bolts twice at the specified torque.
Seating torque: 14 Nm for the first time
21 Nm for the second time
Reinstallation
Assemble piston connecting rod
Install piston, connecting rod, piston pin and piston pin clip clutch.
Note:
When installing, make sure that the mark on the connecting rod and the mark on the top of
the piston are on the same side.
Installing the piston rings
1. Install piston rings in the order of oil ring, second ring and top ring.
Note:
When installing the second ring, ensure that the mark faces the top of the piston.
2. Schematic diagram of piston ring notch position.
Oil ring lower retaining ring 1
Oil ring elastic ring 2
Oil ring upper retaining ring 3
Second ring 4
Top ring 5
Installing piston
Install piston with piston slideway,
Make sure that the “ ” mark on the top of the piston faces the flywheel.
Note:
UP
3
2,5
1
4