Going inside: Upgrading
Inside the System
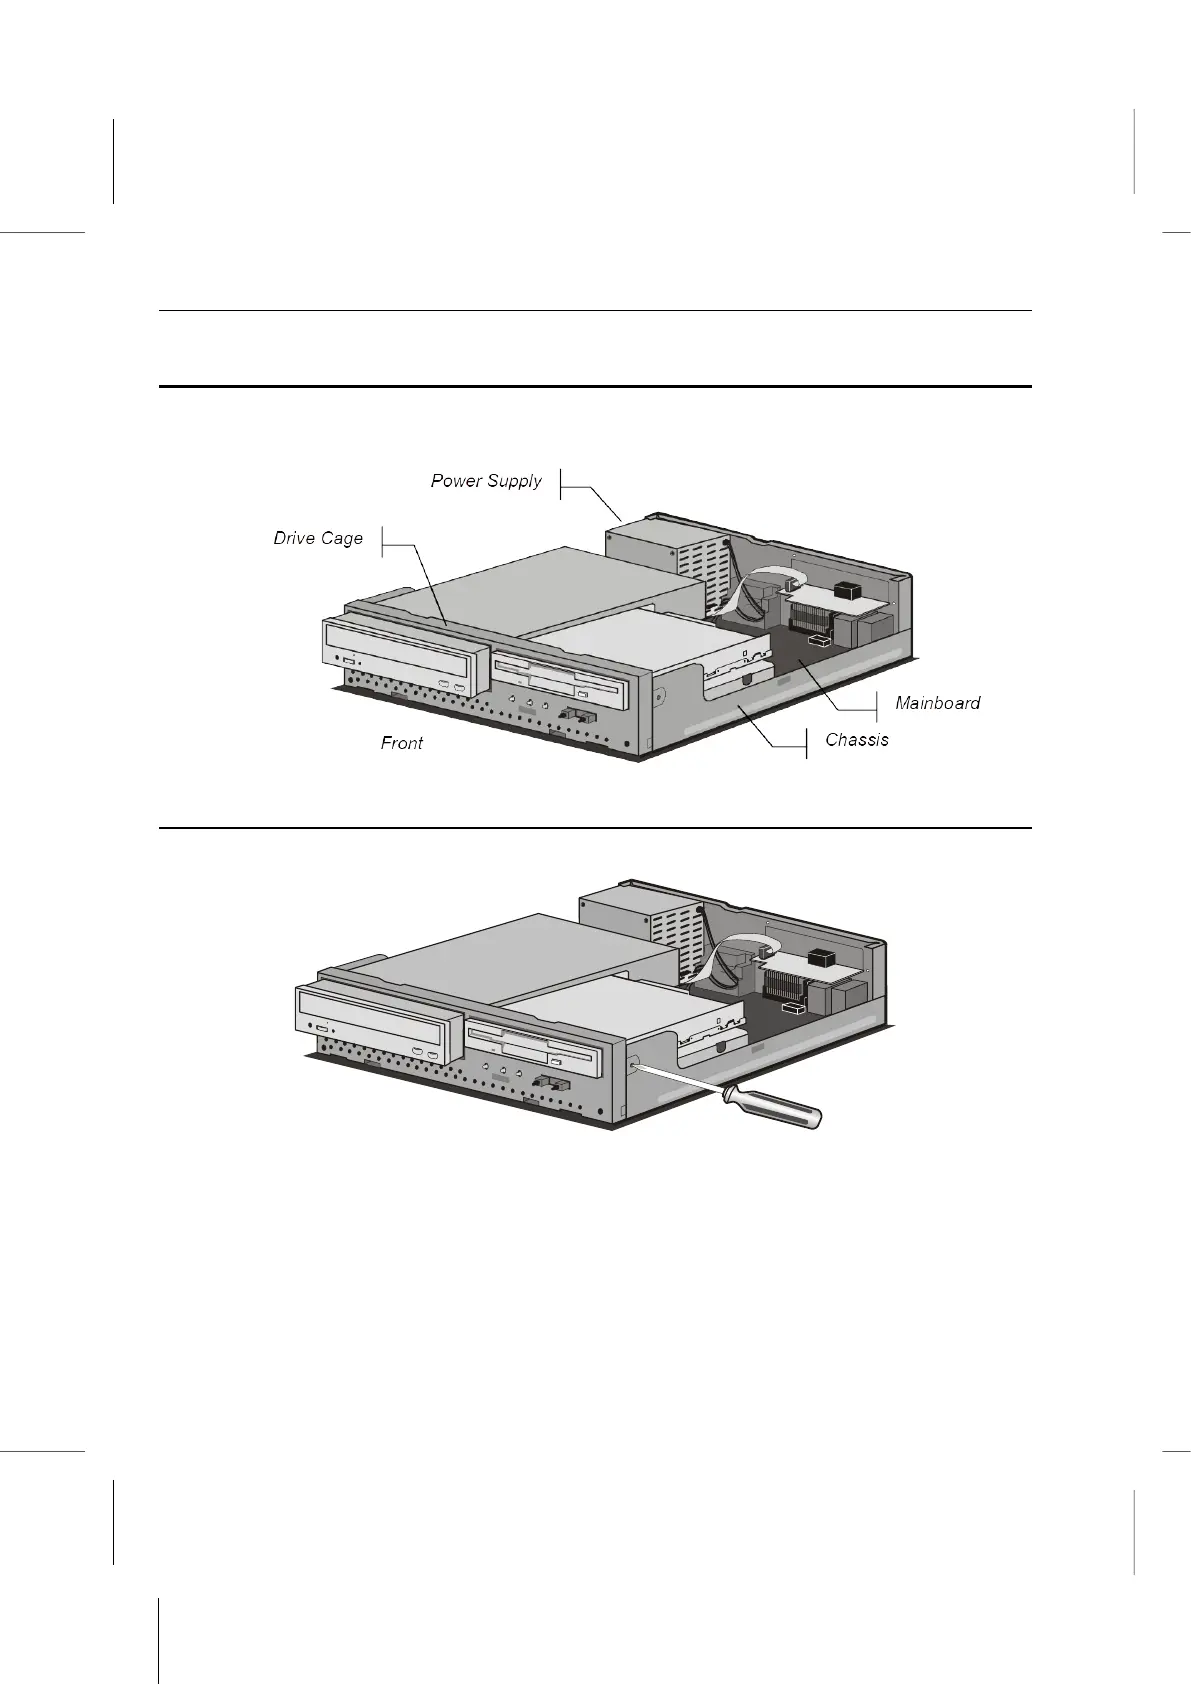
With your open Book PC in front of you, use the pictures below to locate each of the
labeled parts.
Removing the Drive Cage
1. Use a Philips-head screwdriver to remove the screws on each side of the chassis.
2. Disconnect all the connectors and power supply cables from the drives in the drive
cage. Also disconnect the indicator panel connector cable.
3. Pull the drive cage out of the chassis from the front, and gently slide it out until it is
completely free.