Going inside: Upgrading
Upgrading
In this chapter we will limit ourselves to talking about upgrading or changing the CPU,
system memory, and the drives.
Changing the CPU
The Book PC features a Socket-370 for housing the system’s processor. Take care that
you do not try to install a Socket-7 processor such as the Pentium MMX, or the AMD
K5/K6 into the Socket-370, since it will not fit.
The following list of processors is currently supported by the Socket-370: PPGA Celeron
300A to 600 MHz or FCPGA Pentium III 500 to 800 MHz.
Note: New processors may be released after this manual is printed
The processor installs into the ZIF (Zero Insertion Force) Socket-370 on the mainboard.
1. Locate the Socket-370 on the motherboard.
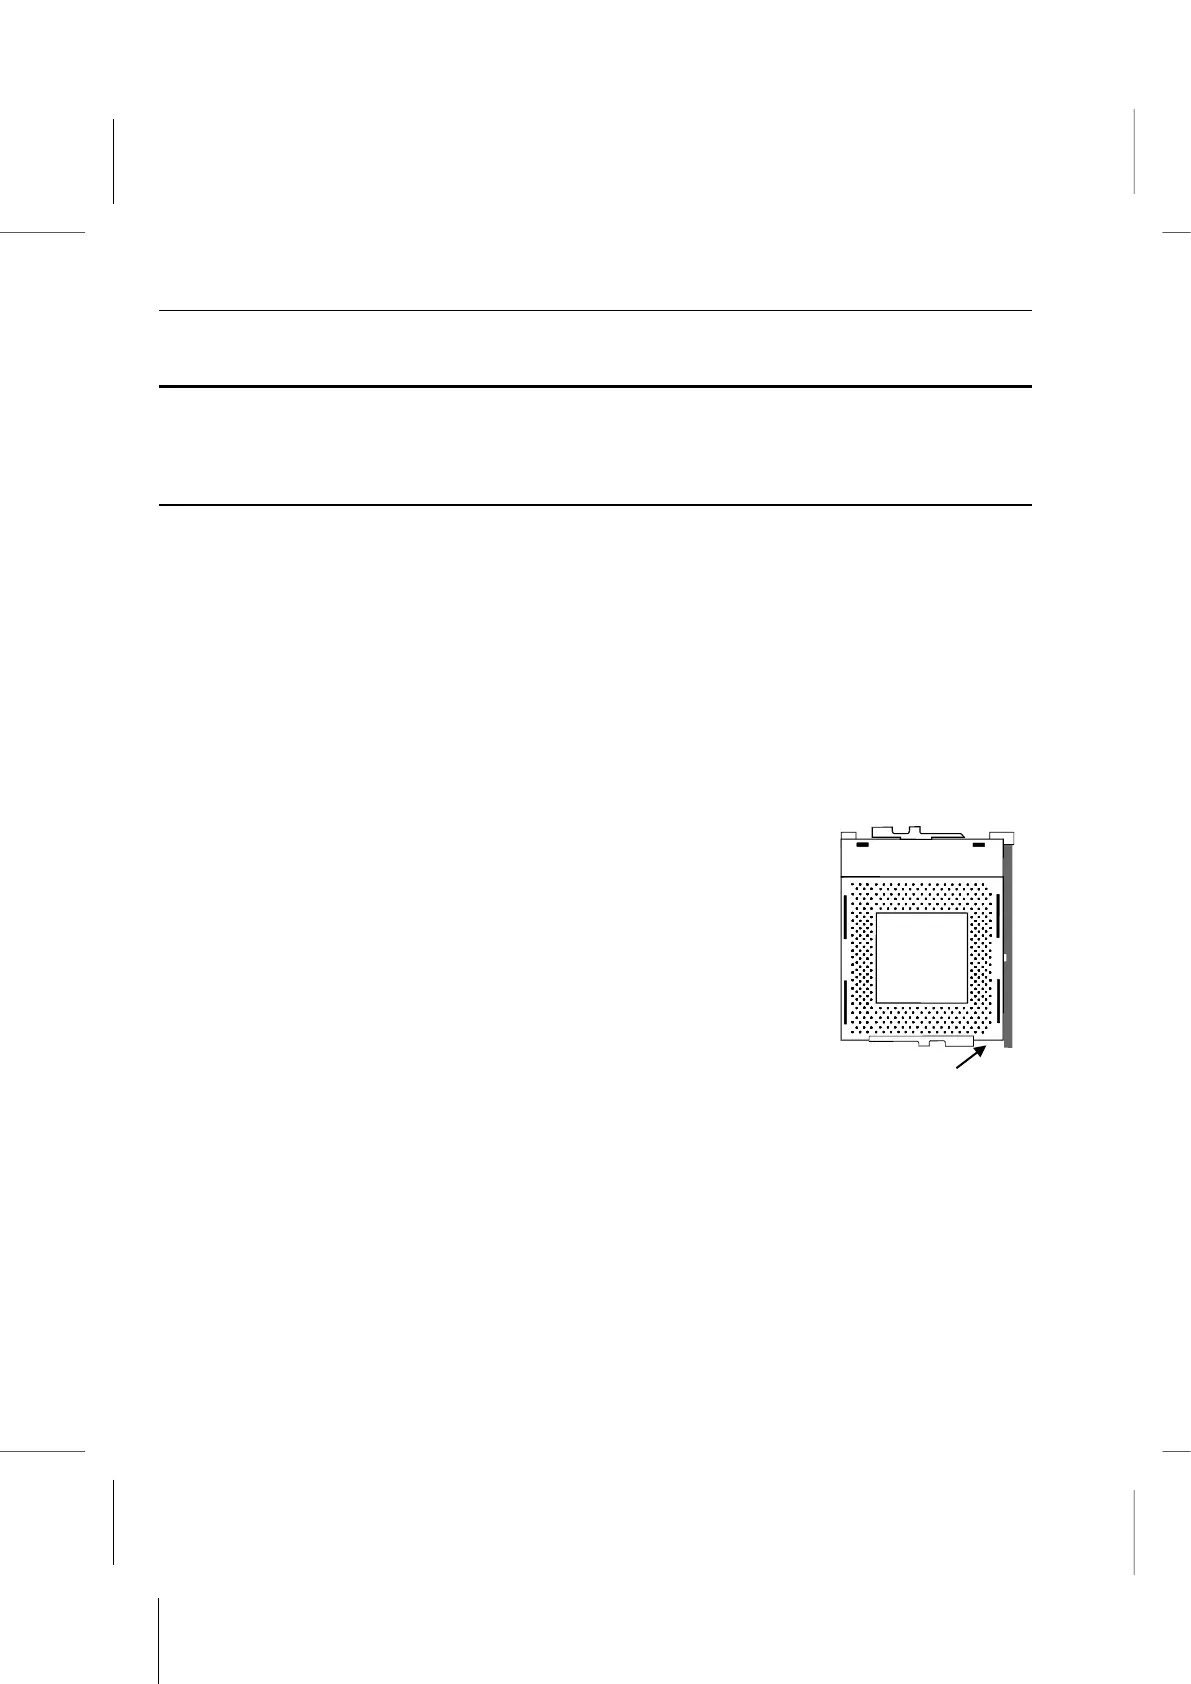
2. Pull the locking lever out from the socket and swing it to the upright position.
3. On the processor, identify the pin-1 corner by noting that it has a
slight bevel.
4. On the Socket-370, identify the pin-1 corner. The pin-1 corner is
on the same side as the locking lever, closest to the top of the
lever when it is in the locked position.
5. Match the pin-1 corners and insert the processor into the socket.
No force is required and the processor should drop into place
freely.
6. Swing the locking lever down and hook it under the catch on the
side of the socket. This locks the processor in the socket.
7. Locate the jumper JP8 and JP11 (if your model is BKi810E). Use these jumpers to
select the installed CPU type and the 133 MHz FSB CPU or not. See the Jumper
Settings section in the above.
8. If the processor is installed with a cooling fan assembly, connect the cable from the
fan to the CPU fan power connector CPUFAN1.
9. While power-on your system, press “DEL” key to enter BIOS SETUP.