A200SP Absorber 31 User Manual
Sterilisation
8.4.3 Electrical Interface, Cables, Tubing
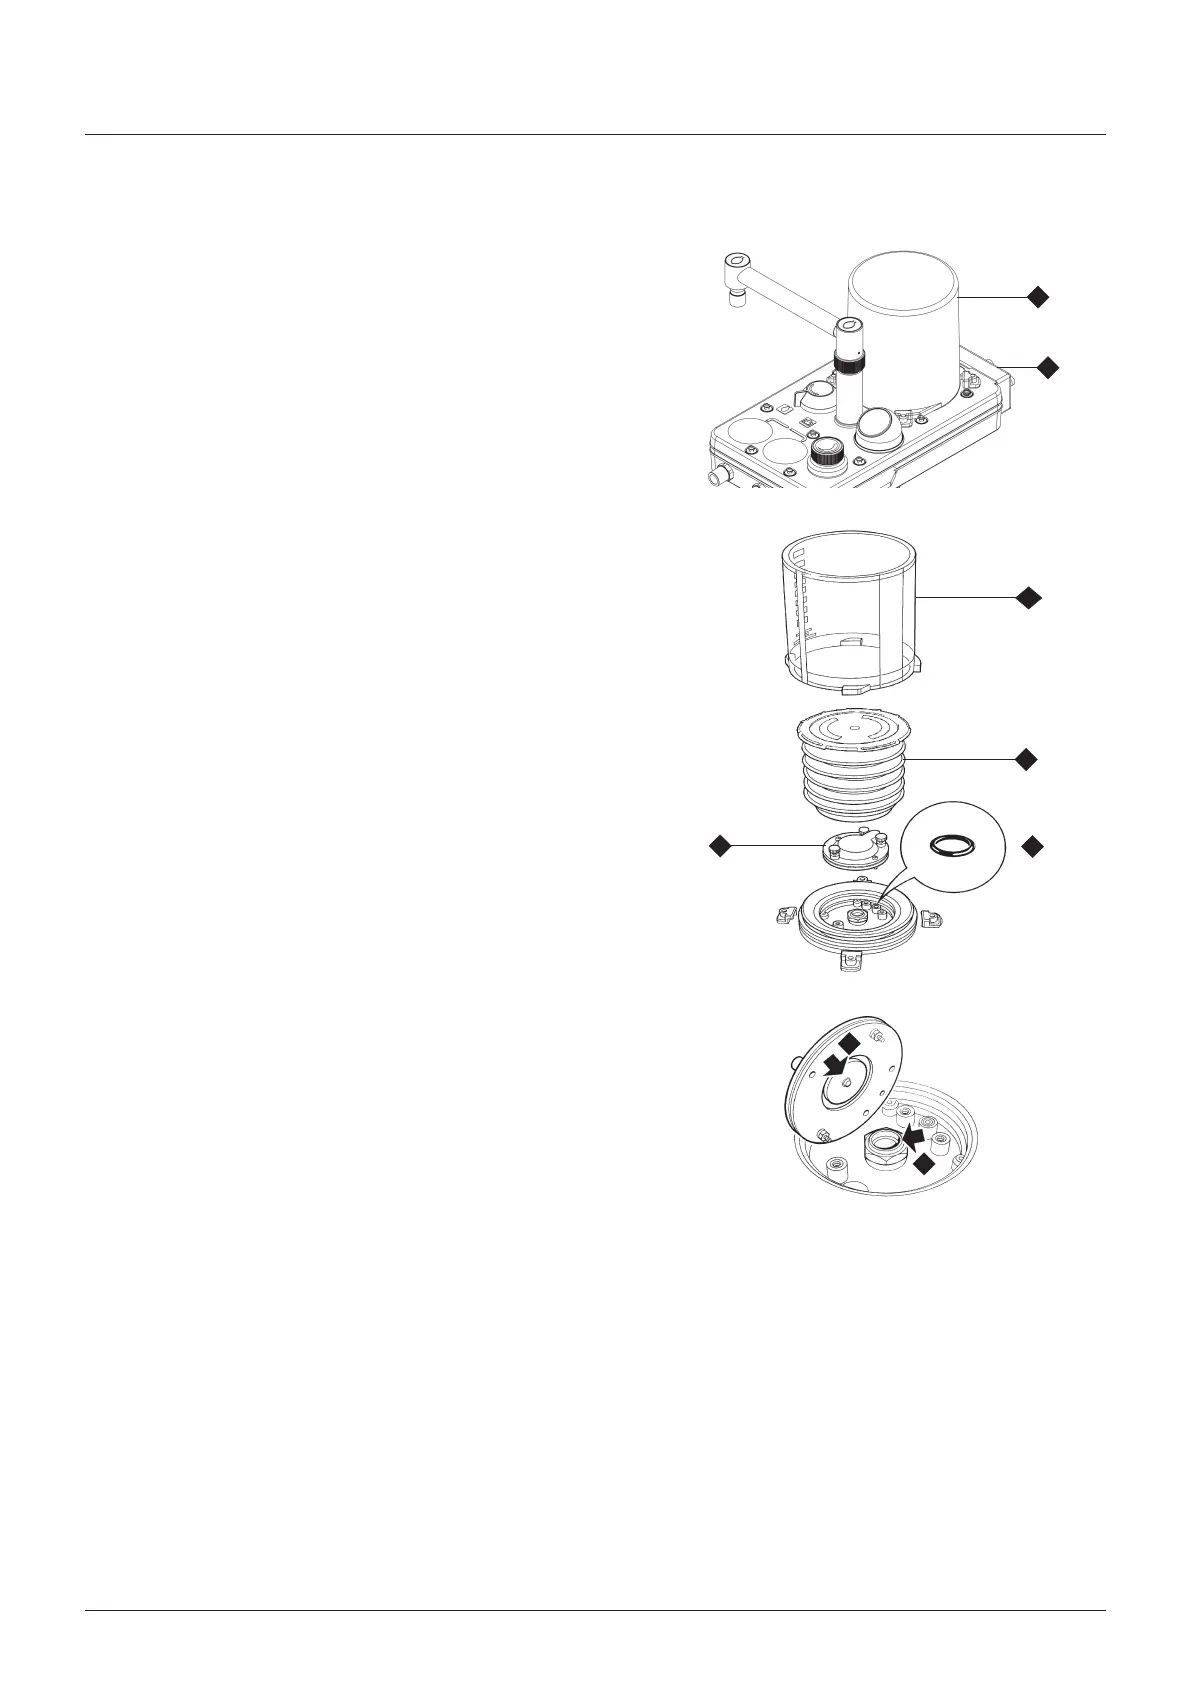
1 Dsconnect all cable connectors and hoses, then remove
the electrcal nterface unt (1)
2 Dsconnect the mans lead from the heater unt (f ftted,
see secton 55)
WARNIN
Do NOT mmerse or autoclave the electrcal nterface
unt (1)
8.4.4 Bellows Assembly - Removal and Cleaning
1 Turn the bellows housng (1) ant-clockwse, then lft t
from the base
2 Remove the bellows (2), by carefully pullng t off the base
Do not dsmantle
3 Undo the three retanng screws, then remove the
exhalaton valve assembly (3)
4 The valve seat (4) s now vsble
WARNIN
reat care must be taken Do not damage the precson
surface of the valve seat (4)
Never use any hard obect or abrasve agent to clean t use
only a soft cloth
If the valve seat s damaged, the daphragm valve wll leak
and may cause serous malfuncton
5 lean the valve seat (4) , and the metal dsk (5) attached to
the base of the daphragm valve, thoroughly and remove
all contamnaton from the surfaces of both components
NOTE
If excessve contamnaton s dscovered, check that a bacteral
flter s used n the expratory lmb of the breathng crcut (and
an HME at the patent tee-pece)
6 After cleanng, check that the small O-rng (6) located n
the bellows base under the daphragm valve s n place
The ventlator wll not functon f the O-rng s mssng
7 Refer to secton 852 for dsnfecton and sterlsaton
nformaton for the bellows components
2
1
1
2
3
6
5
4