19
Setting Up the Printer
Connecting to Your Computer
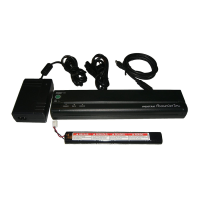
You can connect the printer to your computer by using:
◆ The parallel interface cable supplied with the complete
printer kit. See “Parallel Interface” below.
◆ The optional RS-232C serial interface cable. See
“Optional Serial Interface” on page 20.
◆ The optional infrared adapter. See “Optional Infrared
Interface” on page 22.
◆ The optional interface cables for Macintosh PowerBook
and Newton computers and for many Personal Digital
Assistants (PDAs), palmtops and pen-based systems. See
pages 59 and 60.
For information about what type of printer connection your
computer has and about connecting your computer to a
printer, see the documentation that came with your
computer.
Parallel Interface
1 Make sure your printer is off before installing the
interface cable.
2 Take the printer end of the cable and hold it so the
notched metal surface is facing up.
3 Insert the printer end of the cable into the interface
connector on the side of the printer.
See Figure 12 on
page 20.
CAUTION:
Always insert and remove the interface
cable gently. Press the latching devices on each side
of the interface connector when removing the cable.
4 Insert the other end of the cable into the appropriate
connector on your computer.