Illustration 44 g07693497
Illustration 45 g07693498
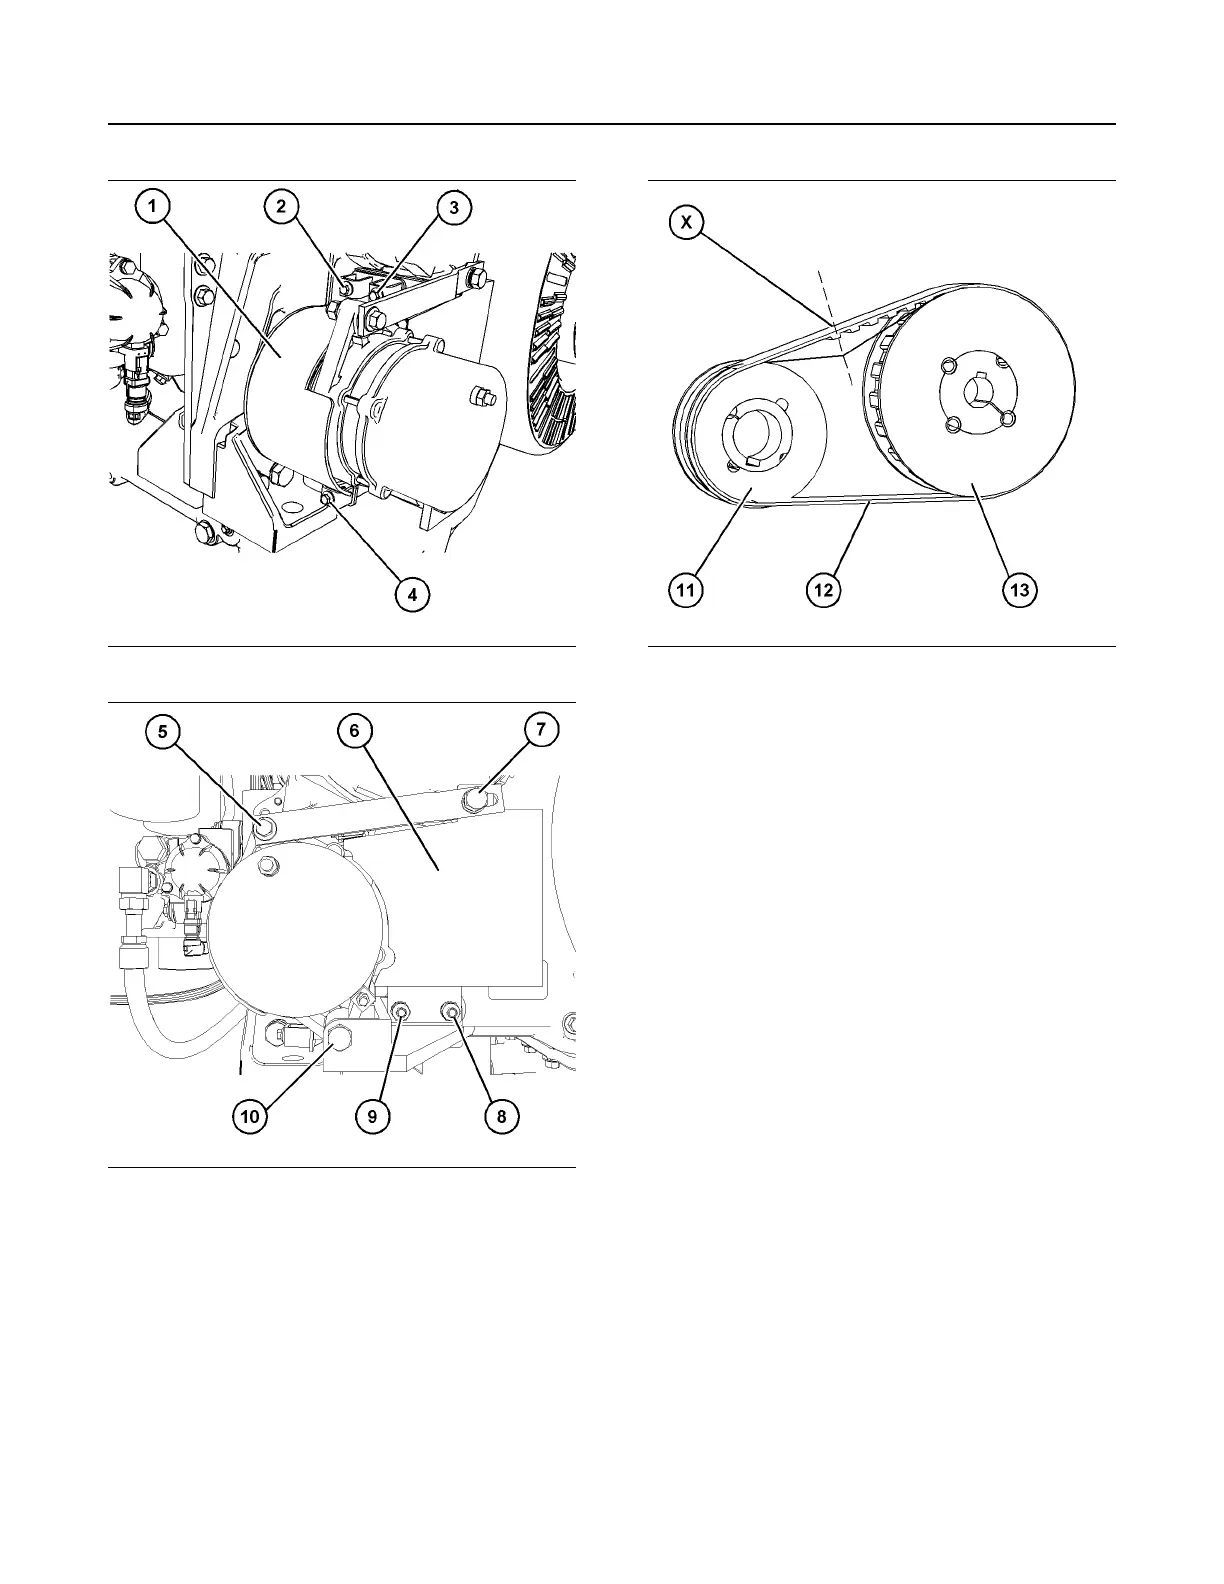
2. Remove bolt (2), remove bolt (3), and remove bolt
(4). Remove top cover (1).
3. Remove bolt (8) and remove bolt (9). Remove
lower cover (6).
4. Inspect the belt (12) for cracks. Inspect the belt for
contamination. If necessary, replace the belt.
Refer to “Replace the Belt” for more information.
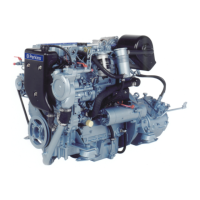
Illustration 46 g07693494
5. Apply 4.3 to 8.7 N (1 to 1.9 lb) of pressure at point
(X).
The total deflection should not exceed 2.75 mm
(0.10 inch).
Replace the belt if the total deflection exceeds
1.5 mm (0.06 inch). Refer to“Adjustment” for more
information.
6. Install lower cover (6) and install top cover (1).
Tighten bolt (5), bolt (7), bolt (8), and bolt (10) to a
torque of 47 N·m (416 lb in). Tighten bolt (2), bolt
(3), and bolt (4) to a torque of 5 N·m (44.3 lb in).
Adjustment
The alternator belt is a toothed belt. The belt tension
is not adjustable. The belt does not require a preload.
Light tension will ensure that the belt is a snug fit on
the pulleys.
Replace the Belt
Isolate the electrical supply to the engine.
1. Refer to “Inspection” for removing the belt guard
covers.
2. Loosen bolt (6) and loosen bolt (11). Push
alternator (5) towards engine. If necessary,
remove bolt (11) from link (10) to allow more
moment.
3. Remove belt (13) and discard. Install new belt and
ensure that the belt is located over pulley (12) and
pulley (14). Ensure that new toothed belt is located
into the pulley (12) and pulley (14).
62 M0163009
Maintenance Section
Alternator Belt