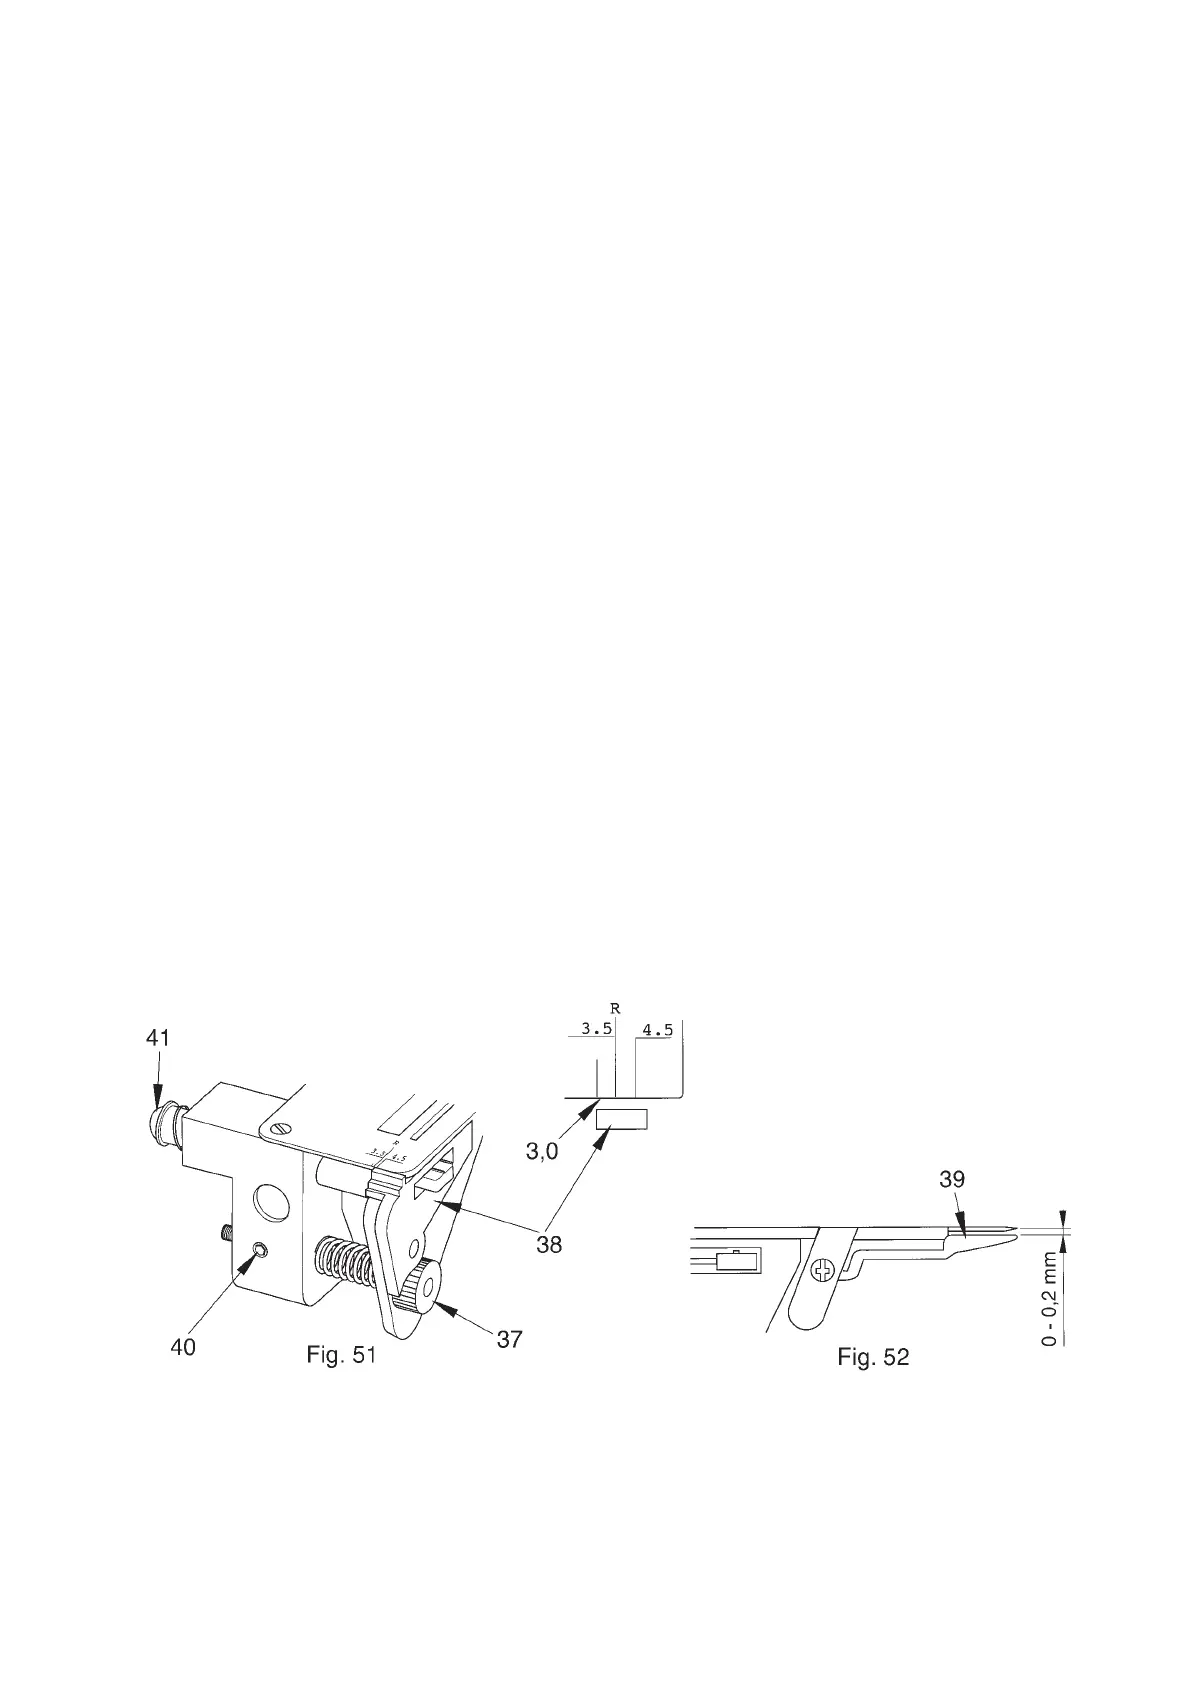
28. Setting the lower blade bracket
Requirement:
Should the adjustment knob 37 for the seam width be positioned at the lowest or highest number,
then the bracket 38 must be lined up with the increment lines (figure 51).
The chaining finger 39 must be between 0 and 0.2 mm underneath the needle plate (figure 52).
Check:
● Turn the adjustment knob 37 as far as it will go.
● Carry out a visual check (figure 51).
Setting:
● Set the adjustment knob 37 to the smallest seam width.
● Loosen the fastening screw 40.
● Push the lower blade bracket 38 to the left until the left side of the bracket is lined up
with the increment line “3.0”.
● Tighten the fastening screw 40.
● Loosen the fastening screw 41.
● Push the lower blade bracket 38 forward until the chaining finger 39 is between 0 and 0.2 mm
underneath the needle plate (figure 52).
● Tighten the fastening screw 41.
Test:
As described under “Check”.
47
 Loading...