F
B
A
C
G
D
E
Sewing – 41
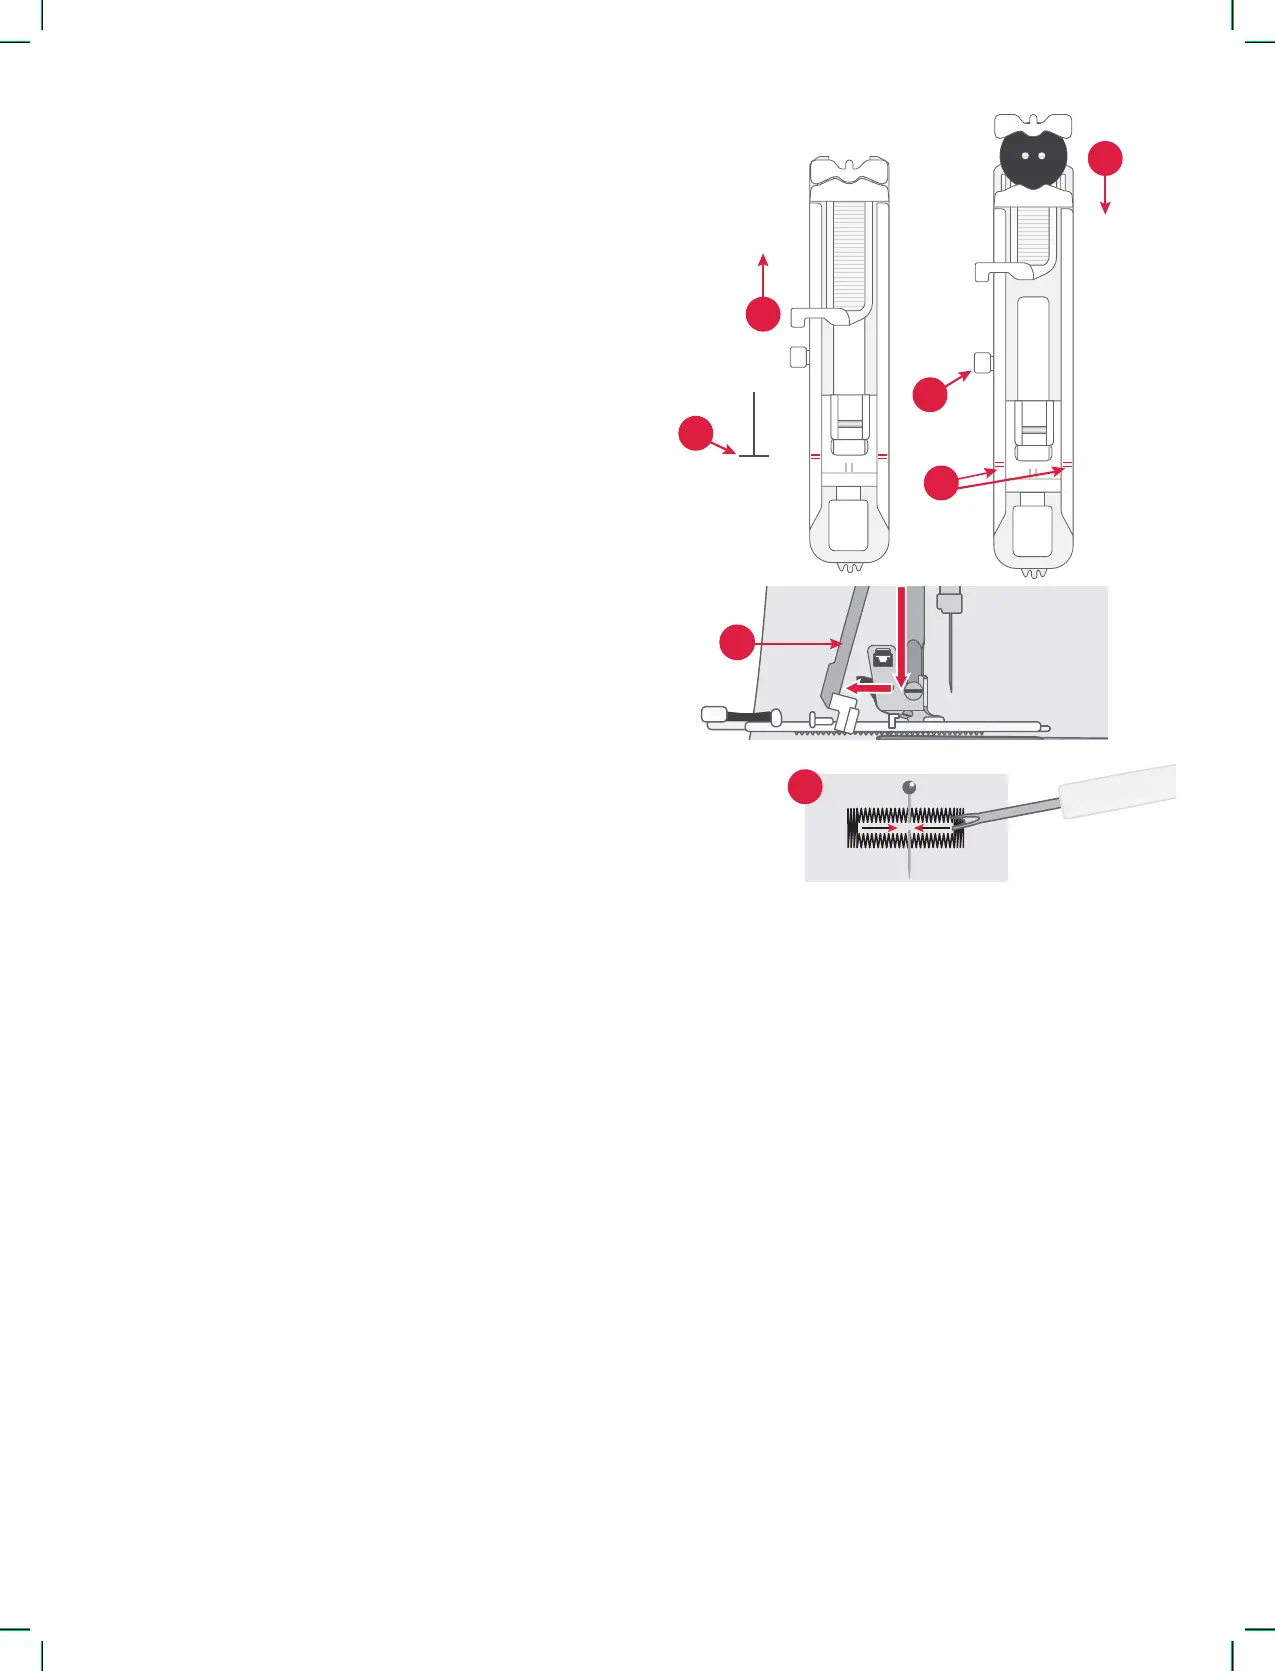
Sew buttonholes perfectly sized for your button.
The fabric should be interfaced and/or stabilized
where buttonholes are to be sewn.
1. Mark the start position of the buttonhole on the
fabric (A).
2. On the One-Step Buttonhole Foot, push the but-
ton holder open by pushing the lever backwards
(B). Insert the button. Push the button holder
forward until the button is locked in place (C).
The button will determine the length of the but-
tonhole. The distance between the button holder
lever (B) and the stopper (D) is the length of the
buttonhole.
3. Attach the One-Step Buttonhole Foot.
4. Position your fabric under the presser foot so
that the marking on the fabric is aligned with the
red markings on the sides of the Buttonhole Foot
(E).
5. Lower the Buttonhole Lever (F) all the way
down. The Buttonhole Lever should t between
the button holder lever (B) and the stopper (D).
6. Hold the end of the upper thread and start sew-
ing. The buttonhole is sewn from the front of the
presser foot to the back. Stop sewing when the
buttonhole is nished.
7. Once the buttonhole is nished, raise the presser
foot. Push the Buttonhole Lever all the way up.
8. Use a seam ripper cut the buttonhole open from
both ends towards the middle (G).
If you want to sew another buttonhole, do not push
the Buttonhole Lever up when the buttonhole is
nished. Sew another buttonhole.
Note: Always sew a test buttonhole on a piece of scrap
fabric.
One-Step Buttonhole