E9480UD_EN.qx3 04.7.22 8:26 PM Page ii
Hookups (cont'd) 11
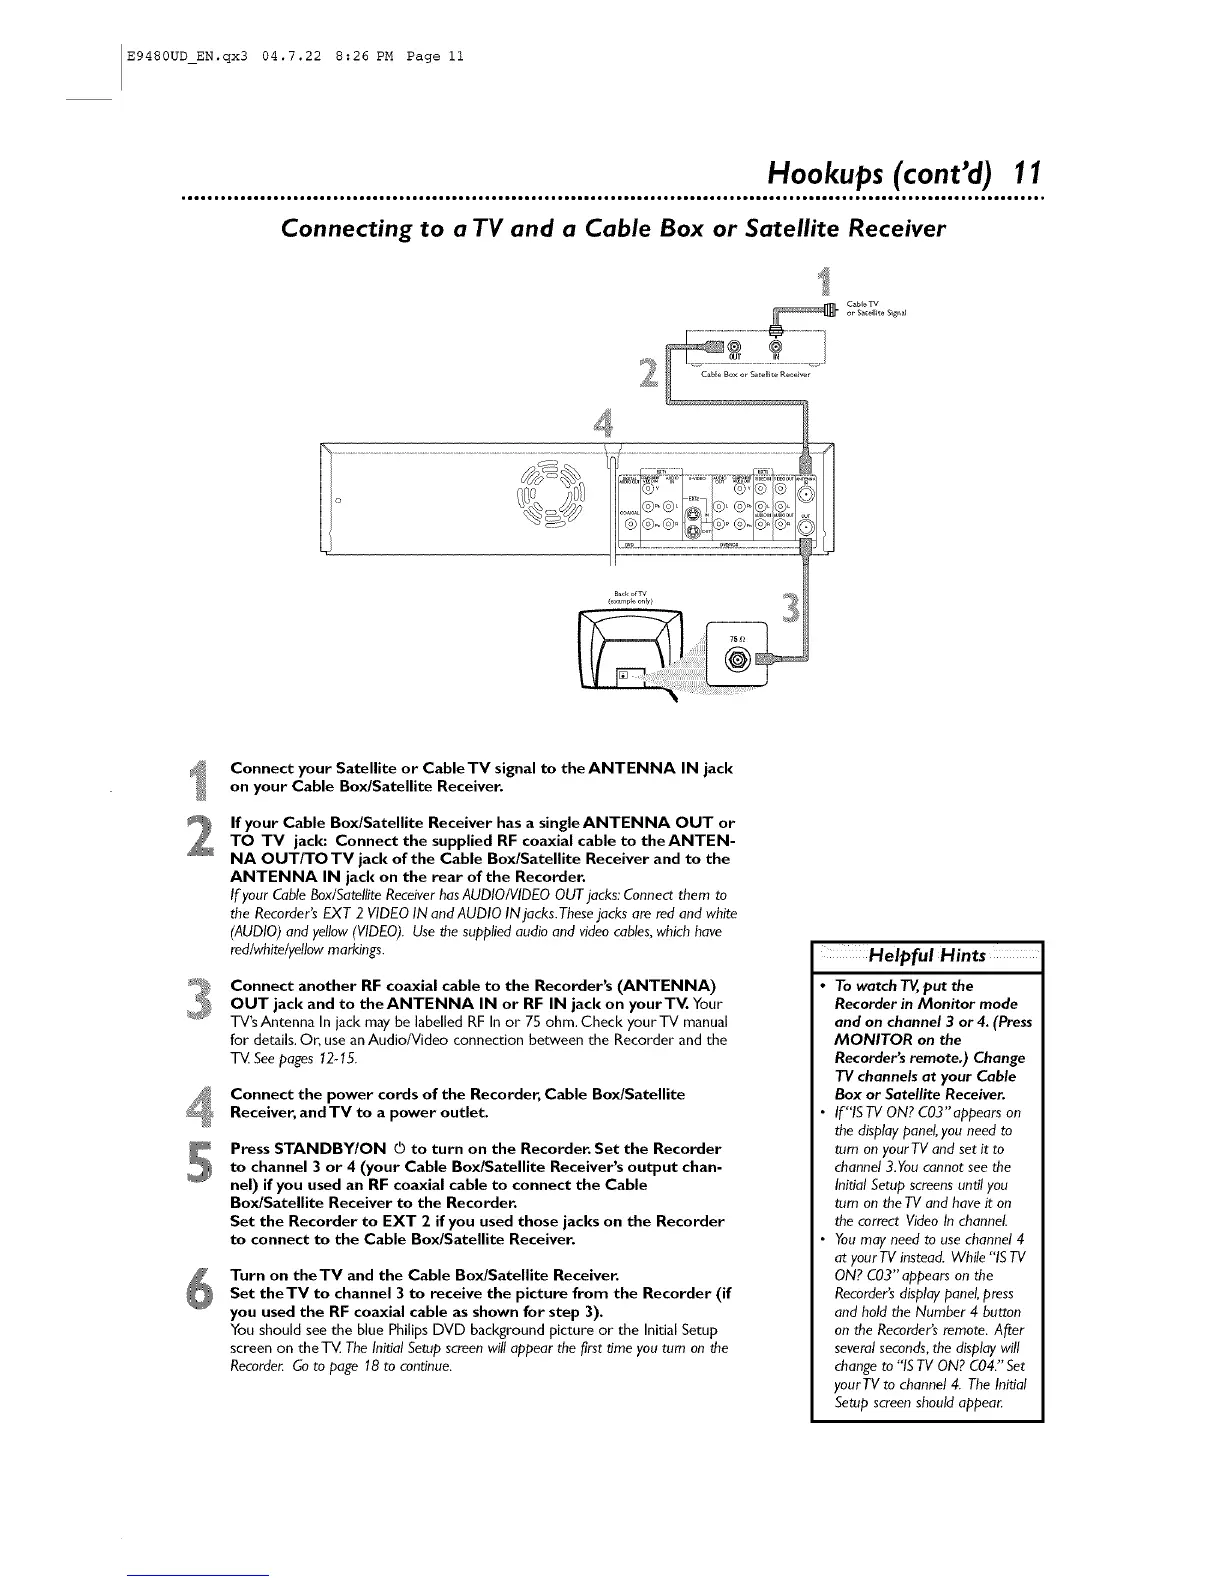
Connecting to a TV and a Cable Box or Satellite Receiver
C_bleTV
or Satellite S_g,,_l
2
5
Connect your Satellite or Cable TV signal to the ANTENNA IN jack
on your Cable Box/Satellite Receiver.
If your Cable Box/Satellite Receiver has a singleANTENNA OUT or
TO TV jack: Connect the supplied RF coaxial cable to theANTEN-
NA OUT/TO TV jack of the Cable Box/Satellite Receiver and to the
ANTENNA IN jack on the rear of the Recorder,
If your CableBox/SatelliteReceiverhasAUDIO/VIDEO OUT jacks: Connect them to
the Recorder's EXT 2 VIDEO IN and AUDIO IN ]acks. Theselacks are red and white
(AUDIO) and yellow (VIDEO). Use the supplied audio and video cables,which have
red/white/yellow markings.
Connect another RF coaxial cable to the Recorder's (ANTENNA)
OUT jack and to theANTENNA IN or RF IN jack on yourTV. Your
TV's Antenna In jack may be labelled RF In or 7S ohm. Check your TV manual
for details. Or, use an Audio/Video connection between the Recorder and the
T_ Seepages 12-15.
Connect the power cords of the Recorder, Cable Box/Satellite
Receiver, and TV to a power outlet.
Press STANDBY/ON O to turn on the Recorder, Set the Recorder
to channel 3 or 4 (your Cable Box/Satellite Receiver's output chan-
nel) if you used an RF coaxial cable to connect the Cable
Box/Satellite Receiver to the Recorder,
Set the Recorder to EXT 2 if you used those jacks on the Recorder
to connect to the Cable Box/Satellite Receiver.
Turn on theTV and the Cable Box/Satellite Receiver,
Set theTV to channel 3 to receive the picture from the Recorder (if
you used the RF coaxial cable as shown for step 3).
You should see the blue Philips DVD background picture or the Initial Setup
screen on theT_ The Initial Setup screenwill appear the first time you turn on the
Recorde_ Go to page 18 to continue.
Helpful Hints
To watch T_, put the
Recorder in Monitor mode
and on channel 3 or 4, (Press
MONITOR on the
Recorders remote.) Change
TV channels at your Cable
Box or Satellite Receiver,
If"IS TV ON? C03"appears on
the displaypanel,you need to
turn on yourTV and set it to
channel 3.You cannot see the
Initial Setup screensuntil you
turn on the TV and have it on
the correct Video In channel.
You may need to use channel 4
at your TV instead. While "'ISTV
ON? C03" appears on the
Recorder'sdisplay panel, press
and hold the Number 4 button
on the Recorder'sremote. After
several seconds,the display will
change to "ISTV ON? C04." Set
yourTV to channel 4. The Initial
Setup screenshould appear.