Lean Managed Switch
7278_en_04 PHOENIX CONTACT 1-5
Firmware 3.03 offers the following additional functions:
– Optimized Rapid Spanning Tree Protocol (RSTP)
– Optimized IGMP snooping and querier function
– RSTP extension: Fast ring detection
– RSTP extension: Large tree support
– BootP and IP parameter storage optimized
– Ping requests >1500 bytes are answered
Firmware 3.10 offers the following additional functions:
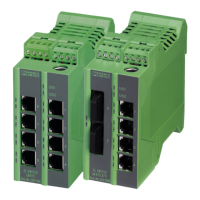
– Support of the following devices
FL SWITCH LM 5TX
FL SWITCH LM 4TX/1FX
FL SWITCH LM 4TX/1FX ST
FL SWITCH LM 4TX/1FX SM
FL SWITCH LM 4TX/1FX SM ST
FL SWITCH LM 4TX/2FX ST
FL SWITCH LM 4TX/2FX SM ST
1.1.4.2 For the following switch versions (LM-E)
– FL SWITCH LM 8TX-E
– FL SWITCH LM 4TX/2FX-E
– FL SWITCH LM 4TX/2FX SM-E
Firmware 1.11 offers the following functions:
– Multicast filter mechanisms
– IGMP snooping and querier function
– MAC address clearing
1.2 Mounting/removal
1.2.1 Mounting and removing the LMS
Mount the LMS on a clean DIN rail according to DIN EN 50 022 (e.g., NS 35 ... from
Phoenix Contact). To avoid contact resistance only use clean, corrosion-free DIN rails.
Before mounting the modules, an end clamp (E/NS 35N, Order No. 0800886) should be
mounted on the left-hand side next to the LMS to stop the modules from slipping on the DIN
rail. The end clamp should only be mounted on the right-hand side once the LMS has been
mounted.