System
wlan
32
3.7.3 CV Programming on the Main track (XPOM) for Experts
The PIKO SmartControl
wlan oers a relatively new type of programming method known as Program-
ming on the Main for Experts (XPOM). This is used to speed up access to CVs and to address the area
of the CV banks that can only be accessed via CVs 31 and 32. Up to four CVs can be written with one
command. If the decoder is RailCom®-enabled, the system can read four CVs at the same time. This
processing is done in decimal or hexadecimal notation
.
PLEASE NOTE: CV numbering starts with "0". CV1 is really CV0. CV29 is actually CV28, etc.!
The CV number to be entered is always 1 number less than the value you want to give the CV!
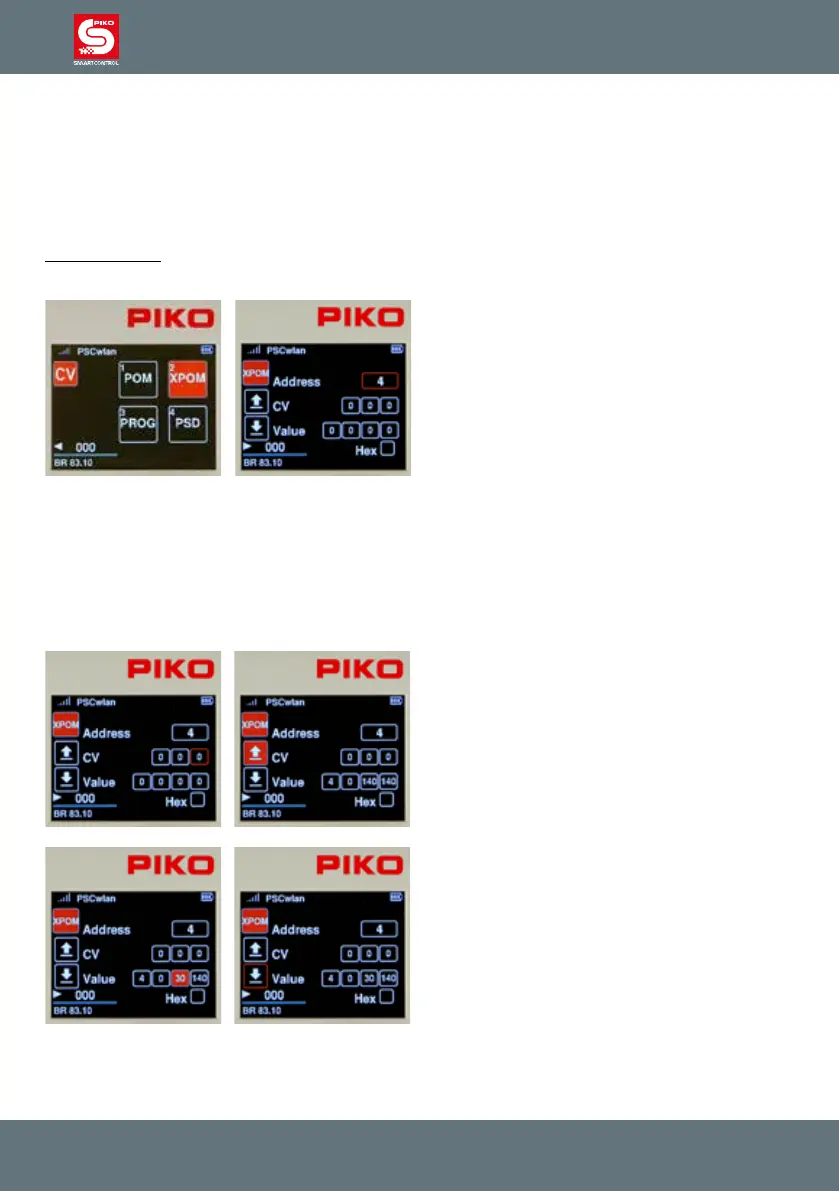
To start the XPOM process, rst place a
locomotive with a known decoder address on the
main track.
In the programming menu, call up the XPOM
menu using key 2 or by navigating with the
navigation buttons and pressing OK.
Now go to the "Address" eld, press the OK
button and enter the address of the decoder to
be edited using the keypad. Conrm with the OK
button.
The line CV basically consists of the values of the “pointer” CVs 31 and 32 (elds 1 and 2) and the
actual CV to be edited (eld 3). This CV is always between 0 (CV1) and 255 (CV256). If, for examp-
le, the decoder instruction manual says "CV31 = 16, CV32 = 0 and CV257 = volume level value" for
setting the overall volume, then CV257 is the rst CV in this CV bank and is also entered here with CV
number 0.
For this example, the values of the three input elds would then be "16, 0, 0"..
If the CVs are to be read from the "CV" line, then
use the "left" navigation button to select the "read
out" symbol and conrm with the OK button.
The read values of the four CVs are now dis-
played from left to right in decimal or hexadecimal
notation in the "Value" elds in ascending order.
Here are the values of CVs 1 - 4.
If the values are to be changed, then use the
navigation keys to select the desired eld and
conrm with the OK button. Now enter a new va-
lue using the keypad and conrm again with the
OK button. Finally, use the “left” navigation button
to select the “Write” icon, and conrm by pressing
the OK button.
.