System
wlan
8
1. Putting the PIKO SmartControl
wlan
into operation
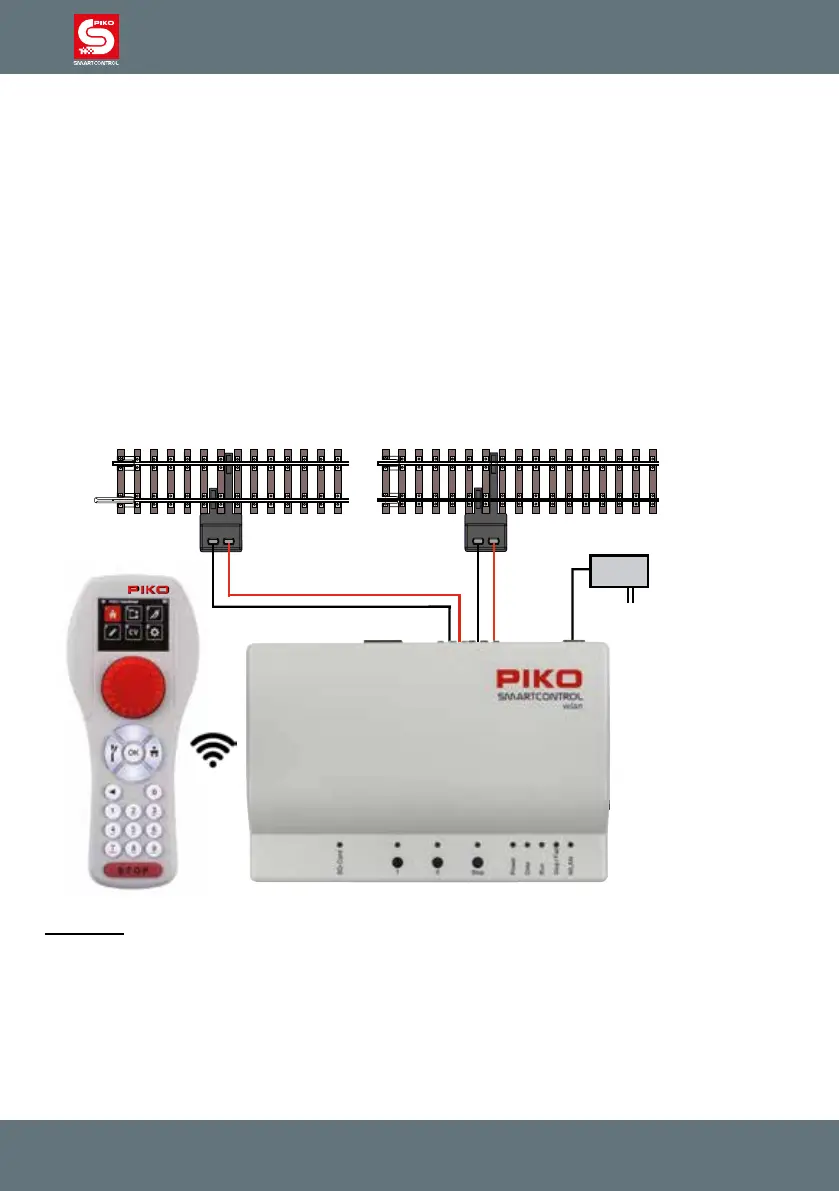
First connect the main track port (Main) of the PIKO SmartBox
wlan
to the main track and, if necessary,
the programming track port (Prog.) to the programming track. The main and programming tracks should
not be connected to each other in any way or it will damage (and possibly destroy) your
PIKO SmartBox
wlan
.
Make sure the SD card is inserted into the SD card slot.
Now turn on the operating voltage by plugging the 16V power supply cord into the Power connection
port. The following control LEDs will now illuminate: SD card (yellow, briey), Power (white), Stop/Fail
(red) and WLAN (blue; blinking)
Now insert the included battery into the battery compartment on the back of the PIKO SmartControl-
ler
wlan
. Make sure the battery is oriented correctly to its contacts. Reattach the battery compartment
cover with the enclosed screw. Now the PIKO SmartController
wlan
will turn on automatically. If the
battery is already inserted and the throttle is turned o, press and hold the "STOP" button for approx.
3 seconds to turn the throttle on again. After the PIKO start screen, the locomotive selection menu will
appear on the display and the "STOP" button will ash (track voltage is turned o).
CAUTION:
The SmartController throttle and SmartBox are not paired to each other from the factory. There is no
Wi-Fi connection and the Wi-Fi symbol on the throttle’s display is crossed out!
You must rst activate the Wi-Fi connection, which will then pair the throttle and command center to
each other. If both devices have not been used before, please carry out the "FastConnect" function by
following the instructions on the SmartController’s screen and pressing and holding button II on the
control panel until the "Run" and "Stop/Fail" LEDs ash in-synch. Then conrm seeing the two informa-
tion windows on the throttle by highlighting "Yes" within 30 seconds.