3 • Printer Maintenance
3-6 SV61749 Rev. D
Performing a Print Head Alignment
You'll want to perform a print head alignment
each time you replace an ink cartridge.
However, you only need to perform the
alignment for the affected print head assembly
( A or B). Follow the step by step instructions
once for print head assembly A (containing
heads 1, 2 and 3) and once for print head assembly B (containing
heads 4, 5 and 6) if applicable.
1. Make sure the printer is OFF LINE. To do this, press the
ON LINE key until the indicator light above the key goes out.
2. Access the Service Menu by holding down the Menu and minus
(-) keys simultaneously for two seconds. The Adjust Printing
screen will display.
3. Press Enter. The A. Print Head Adjust screen will display.
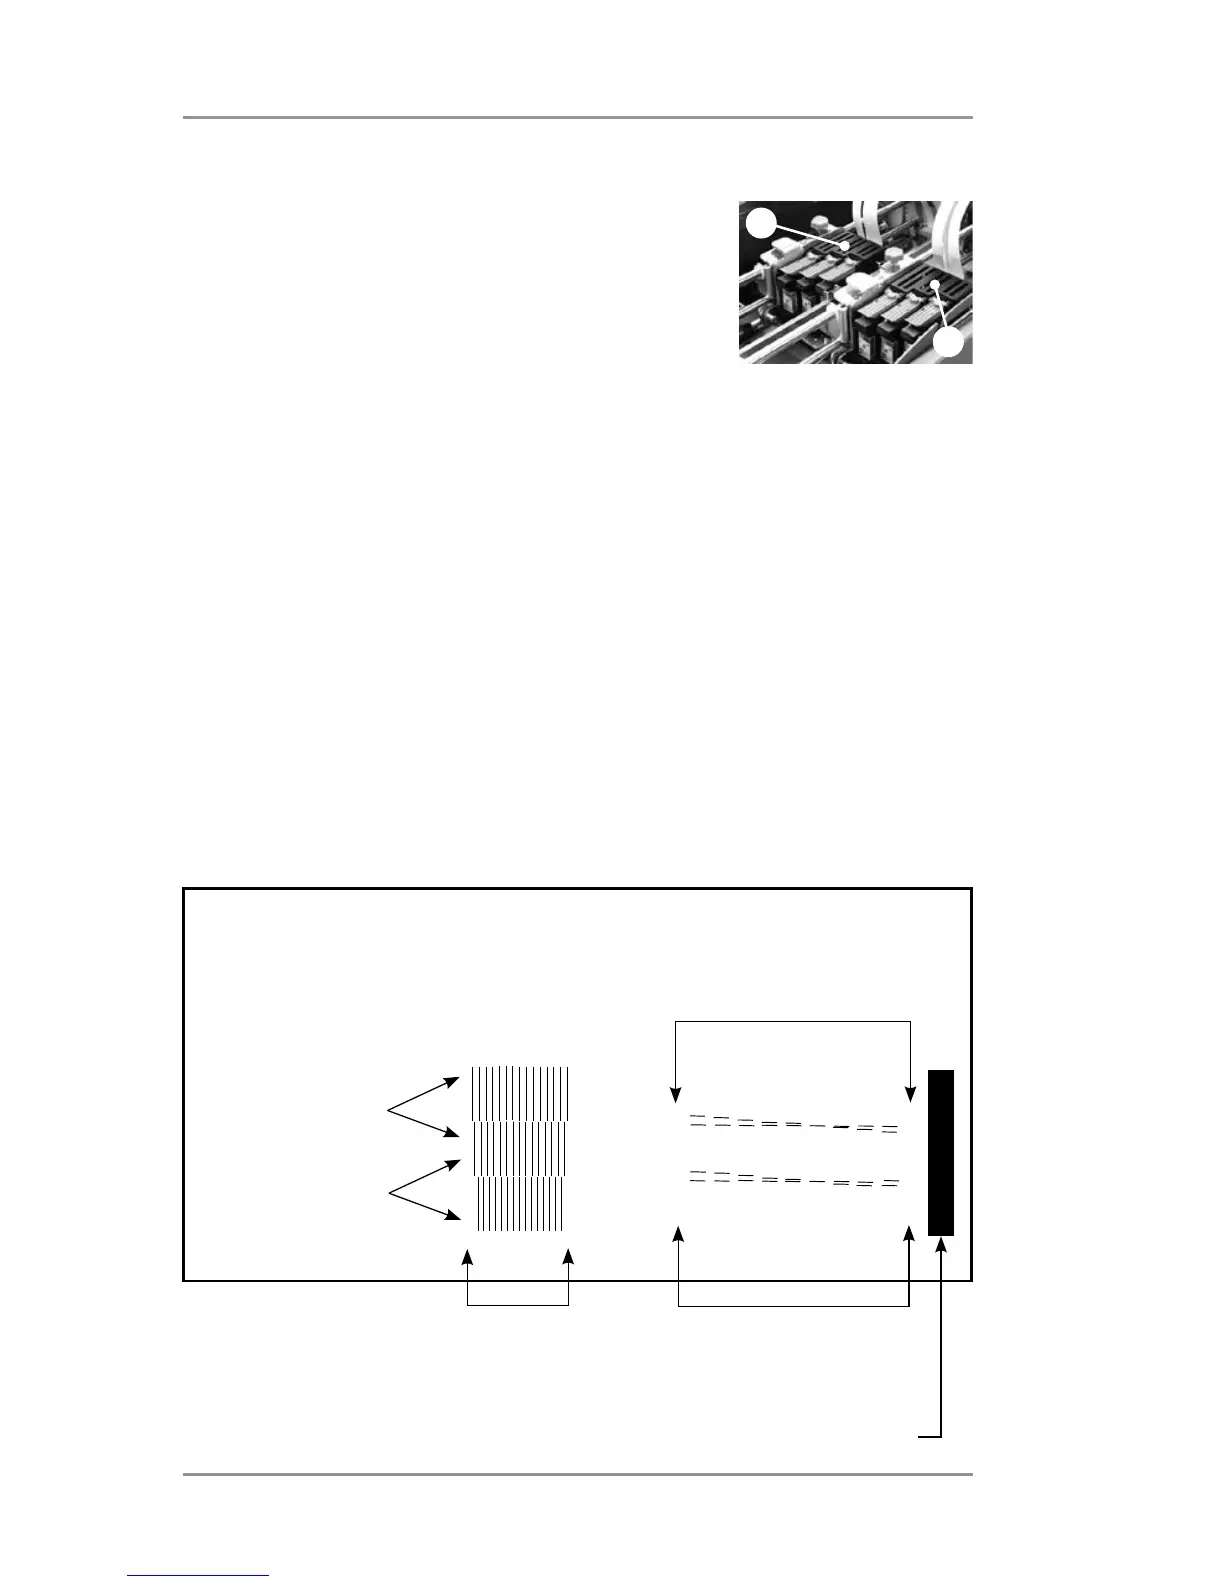
4. Press Enter. A test pattern will print from the printer. Use this
pattern to make the necessary adjustments in the steps that
follow. See sample test pattern below.
Heads 2 and 3
Heads 1 and 2
Heads 1 and 2 Vertical
Adjustment Pattern
Heads 2 and 3 Vertical
Adjustment Pattern
Horizontal
Adjustment
Pattern
Sensor Alignment Vertical Bar
A
B