3 • Printer Maintenance
3-8 SV61749 Rev. D
17. Press Menu to go back to the previous screen. Use the plus
(+) key to scroll to the next adjustment. PRINT HEAD ADJUST
screen displays.
18. Press Enter. The HORIZ ADJ: HDS 1 - 2 screen displays.
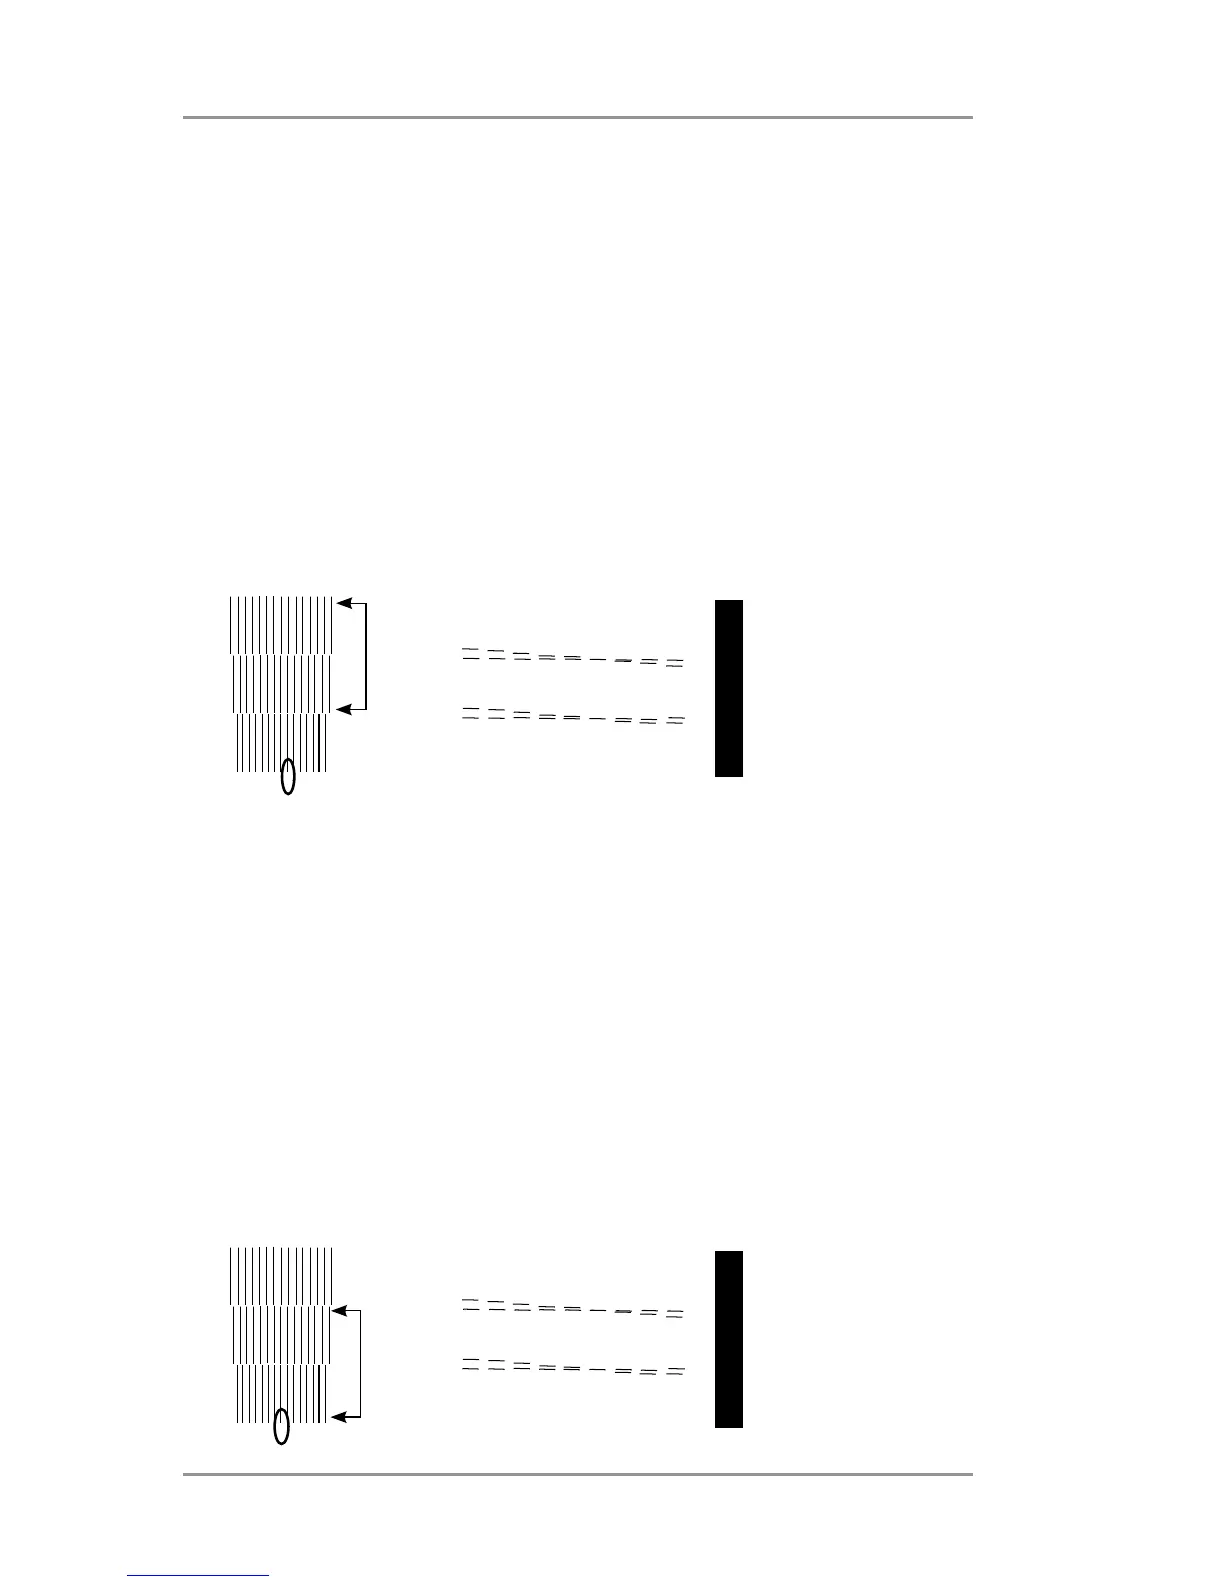
19. On the test pattern, locate the vertical line pattern that
corresponds to print heads 1 and 2 (see example below).
20. Select the pair of vertical lines from that pattern which most
closely form a straight line. In the example below, the selected
value would be " i ".
21. Press the plus (+) and minus (-) keys to scroll to the numeric
value determined in step 20 and press enter to save the value.
Head 1
Head 2
Head 3
1 2 3 4 5 6 7 8 9
1 2 3 4 5 6 7 8 9
A B C D E F G H I J K L M N O
22. Press Menu to go back to the previous screen. Use the plus
(+) key to scroll to the next adjustment. PRINT HEAD ADJUST
screen displays.
23. Press Enter. The HORIZ ADJ: HDS 2 - 3 screen displays.
24. On the test pattern, locate the vertical line pattern that
corresponds to print heads 2 and 3 (see example below).
25. Select the pair of vertical lines from that pattern which most
closely form a straight line. In the example below, the selected
value would be " i ".
26. Press the plus (+) and minus (-) keys to scroll to the numeric
value determined in step 25 and press enter to save the value.
Head 1
Head 2
Head 3
1 2 3 4 5 6 7 8 9
1 2 3 4 5 6 7 8 9
A B C D E F G H I J K L M N O
Horizontal Adjust Heads 1 and 2
Horizontal Adjust Heads 2 and 3