3-37
3 First Steps
Scanning
17. Define scan points as described in your PSV software manual.
18. Start the scan. In the menu bar, select Acquisition > Scan (toolbar: ).
The software creates a file for the scan. The
Save As
dialog appears.
19. Navigate to the saving location and enter the file name.
20. Click Save.
The scan starts. The software immediately saves every scan point
measured.
21. Once the scan is complete, switch to the presentation mode. In the menu
bar, select View > Presentation (toolbar: ).
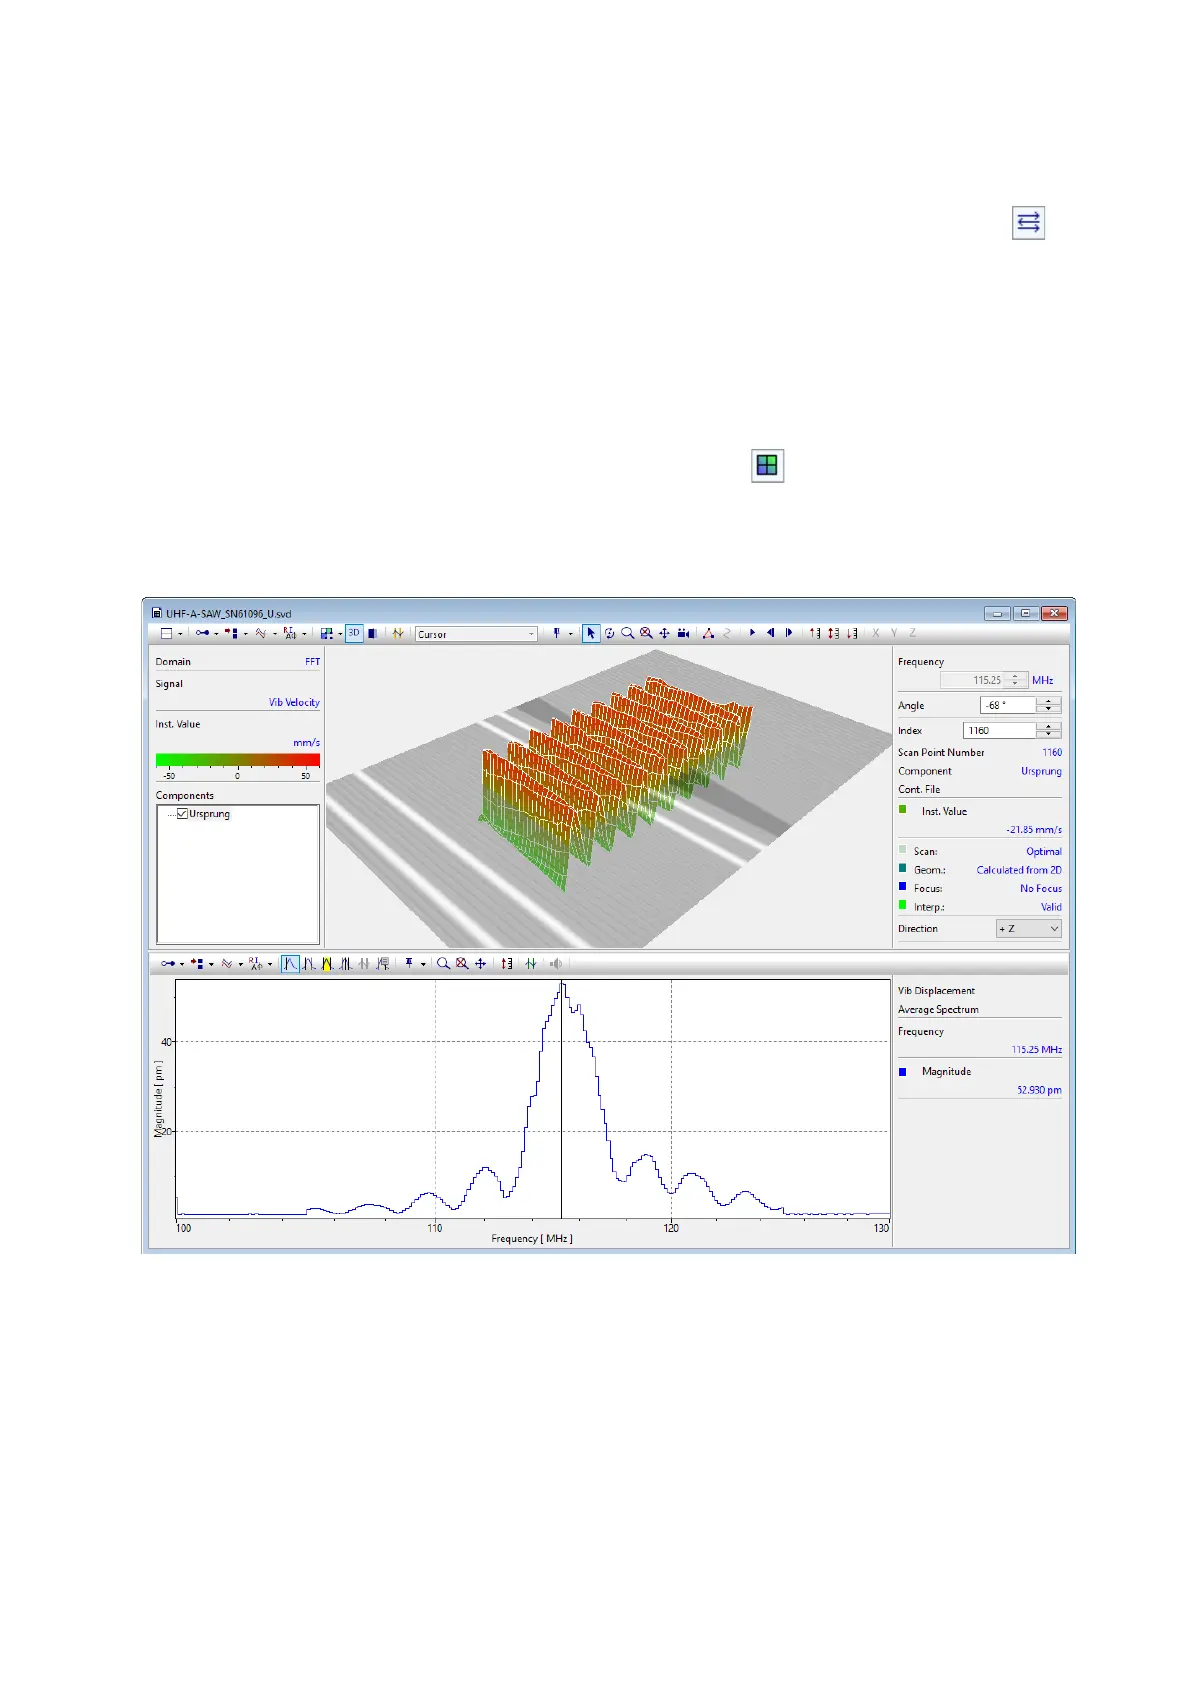
22. Compare the results. The result of the measurement should roughly
resemble the figure below.
If this is not the case, contact the Polytec service department.
Figure 3.27: Result of the scan