Power Meter Bulletin No. 3020IM9503R6/98
Chapter 4—Installation December 1998
16 1998 Square D All Rights Reserved
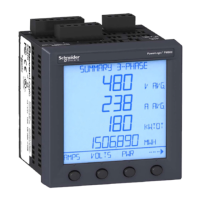
Remote Mounting
To mount the power meter remotely (inside an enclosure), follow these steps:
1. Turn off all power supplying the equipment before working on it. Follow
all safety precautions.
2. Select a mounting location on the floor or wall of the enclosure, ensuring
that there are adequate clearances, that the terminals are accessible, and
that the location complies with local and state electrical codes.
3. Tape the template shipped with the module to the panel in the desired
location (see figure 4-2, page 17); make sure the template is level. (Hole
positions and dimensions are shown in figure 4-3, page 17.) Make sure no
wires or equipment on the other side of the panel will be damaged, then
drill through the panel at the 4 holes marked A on the template. Use a
3/16" drill bit.
4. Place the power meter mounting feet holes over the drilled holes and
secure the power meter to the enclosure panel using No. 6 (maximum)
screws or bolts suitable for the panel. Tighten to 6–9 lb-in (0.7–1.0 N•m).
HAZARD OF ELECTRIC SHOCK, BURN, OR EXPLOSION.
Only qualified electrical workers should install and wire this equipment.
Perform such work only after reading this complete set of instructions.
Failure to observe these precautions will result in death or severe
personal injury!
DANGER
!
!
CAUTION
HAZARD OF EQUIPMENT DAMAGE.
When mounting the power meter module, provide the following clearances
(from enclosure walls or other objects): terminal end: 4" (102 mm); vented
sides: 3" (76 mm). No clearance is necessary on the non-vented sides.
Failure to observe this precaution can result in equipment damage.