PreciseFlex_Robot
104
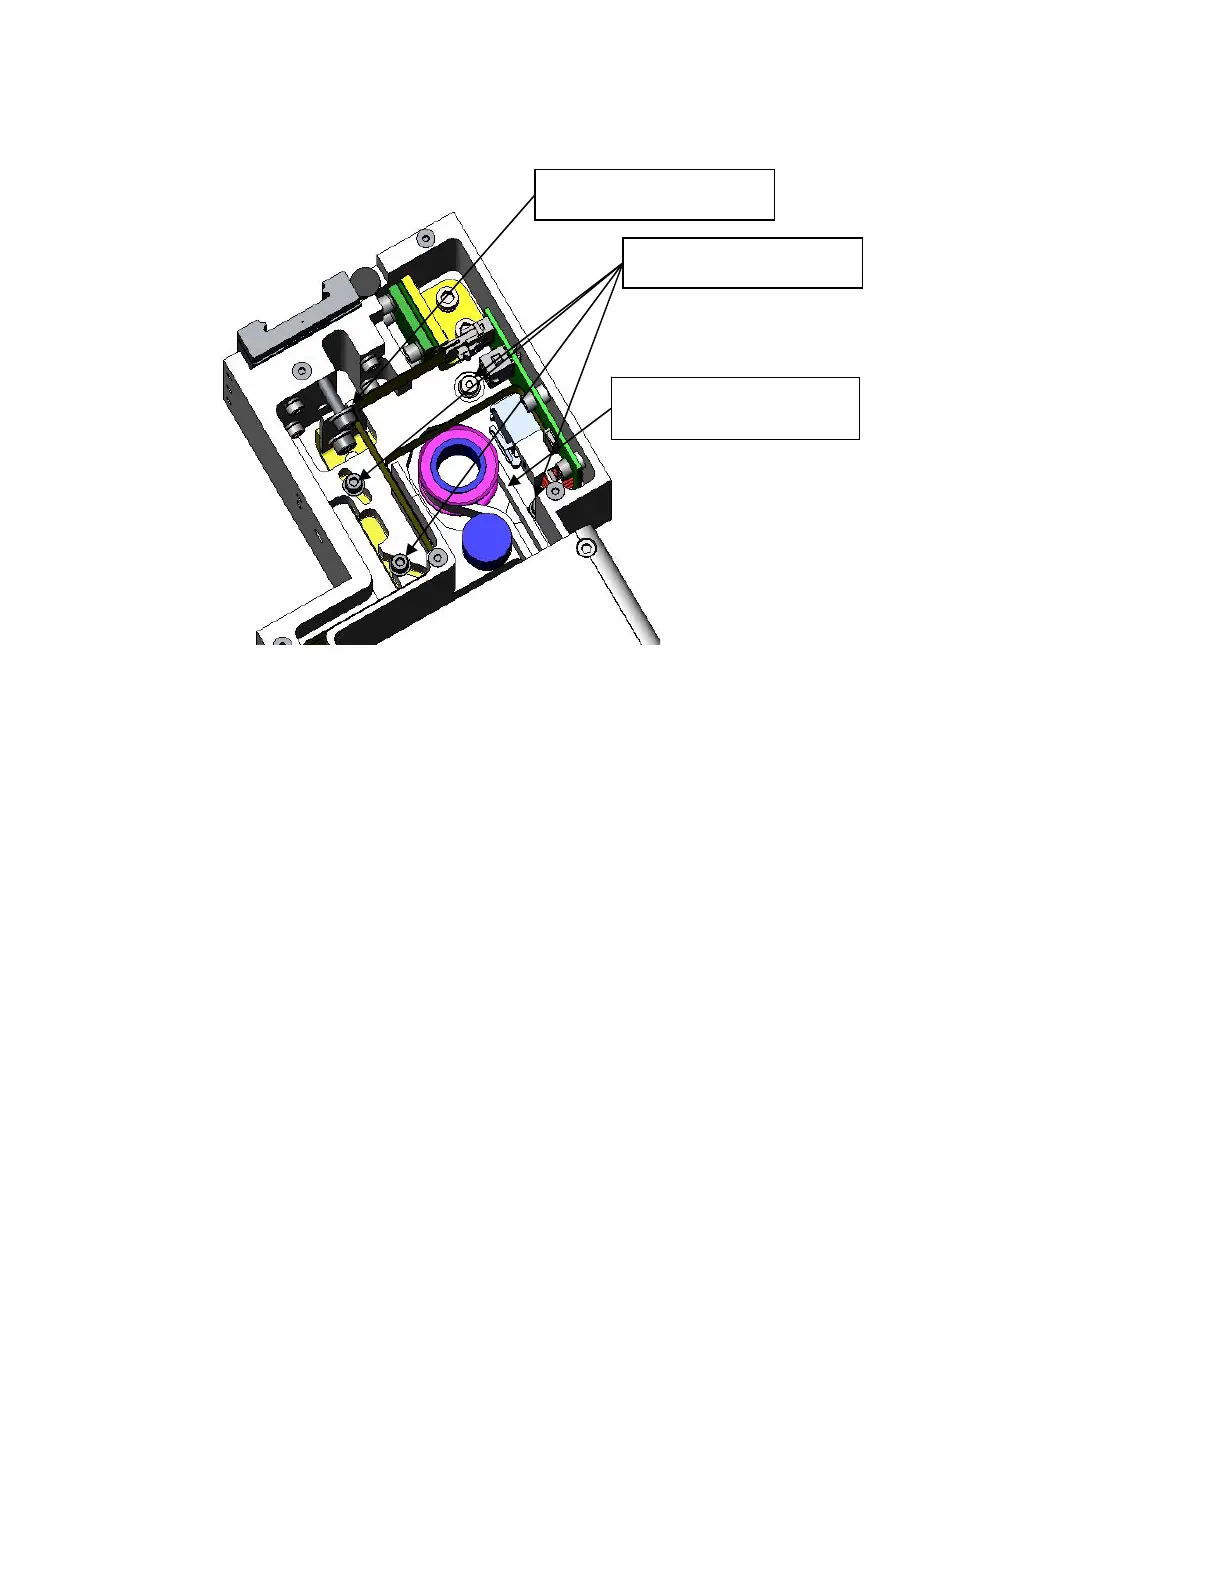
6. Loosen the 3 M3 SHCS and 1 M4 Shoulder screw clamping the J2 Motor Mount Plate to the Z
Carriage. It may be necessary to remove the tie wrap securing the J2 Motor cables to the Z
carriage in order to access the clamping screw under these cables. It is best to measure the belt
tension with a tension meter as described in Appendix E. If a belt tension meter is not available,
the Tension Leaf Spring will automatically reset the belt tension. It is helpful to jiggle the motor a
little bit to be sure any friction is overcome. The motor can be easily grasped by reaching under
the Z carriage (shoulder). Then re-tighten the clamping screws. Replace the tie wrap if it was
removed.
7. Replace the Z Carriage Stiffener Plate.
8. Replace the Front Cover.
9. Replace the Top Plate.
Tensioning the J3 Belt (Before 2014)
Tools Required:
1. Gates Sonic Belt Tension Meter, Model 507C
2. 3.0mm hex driver or hex L wrench
3. 2.5mm hex driver or hex L wrench
Prior to 2014 the J3 belt had a simple tensioning procedure described below. If this did not work due to
high friction in the motor mounting flange, then it became necessary to completely remove the robot
controller to accurately tension the J3 belt. Starting with 2014 shipments, an access hatch was added to
the bottom of both the inner link and outer link to make J3 and J4 belt access easy and belt tensioning
more accurate.
Prior to 2014, to tension the J3 Belt the user must:
Clamping Screws
Tension Spring
Measure Tension This
Span