516514 73
Section 5 Service Procedures
To reduce the risk of electric shock, fire, explosion, serious injury or death:
• Disconnect electric power to the dryer(s) before servicing.
• Close gas shut-off valve to gas dryer(s) before servicing.
• Never start the dryer(s) with any guards/panels removed.
• Whenever ground wires are removed during servicing, these ground wires must be
reconnected to ensure that the dryer is properly grounded.
W001R1
WARNING
© Copyright, Alliance Laundry Systems LLC – DO NOT COPY or TRANSMIT
53. CYLINDER ROLLERS
a. While supporting the access panel, remove two
screws from bottom edge of access panel. Refer
to Figure 7.
b. Gently lower the access panel to disengage
locators from bottom edge of front panel. Refer
to Figure 37.
c. Remove two screws holding bottom tabs on
front panel to dryer side panels. Refer to
Figure 36. Swing bottom of front panel away
from dryer far enough to disengage hold-down
clips and locators from cabinet top.
d. Disconnect wires from door switch. Refer to
Figure 36.
NOTE: Refer to wiring diagram when rewiring
switch.
e. Disengage belt from motor and idler pulleys.
Refer to Figure 47.
f. Remove four screws holding bulkhead to front
flange of cabinet. Then lift complete bulkhead
assembly out of slots in cabinet. Refer to
Figure 53.
IMPORTANT: When reassembling, be sure seal on
exhaust fan cover makes airtight seal on flange of
duct. Refer to Figure 44. If the seal is installed
improperly, the airflow through the exhaust system
will be restricted which can adversely affect dryer
performance.
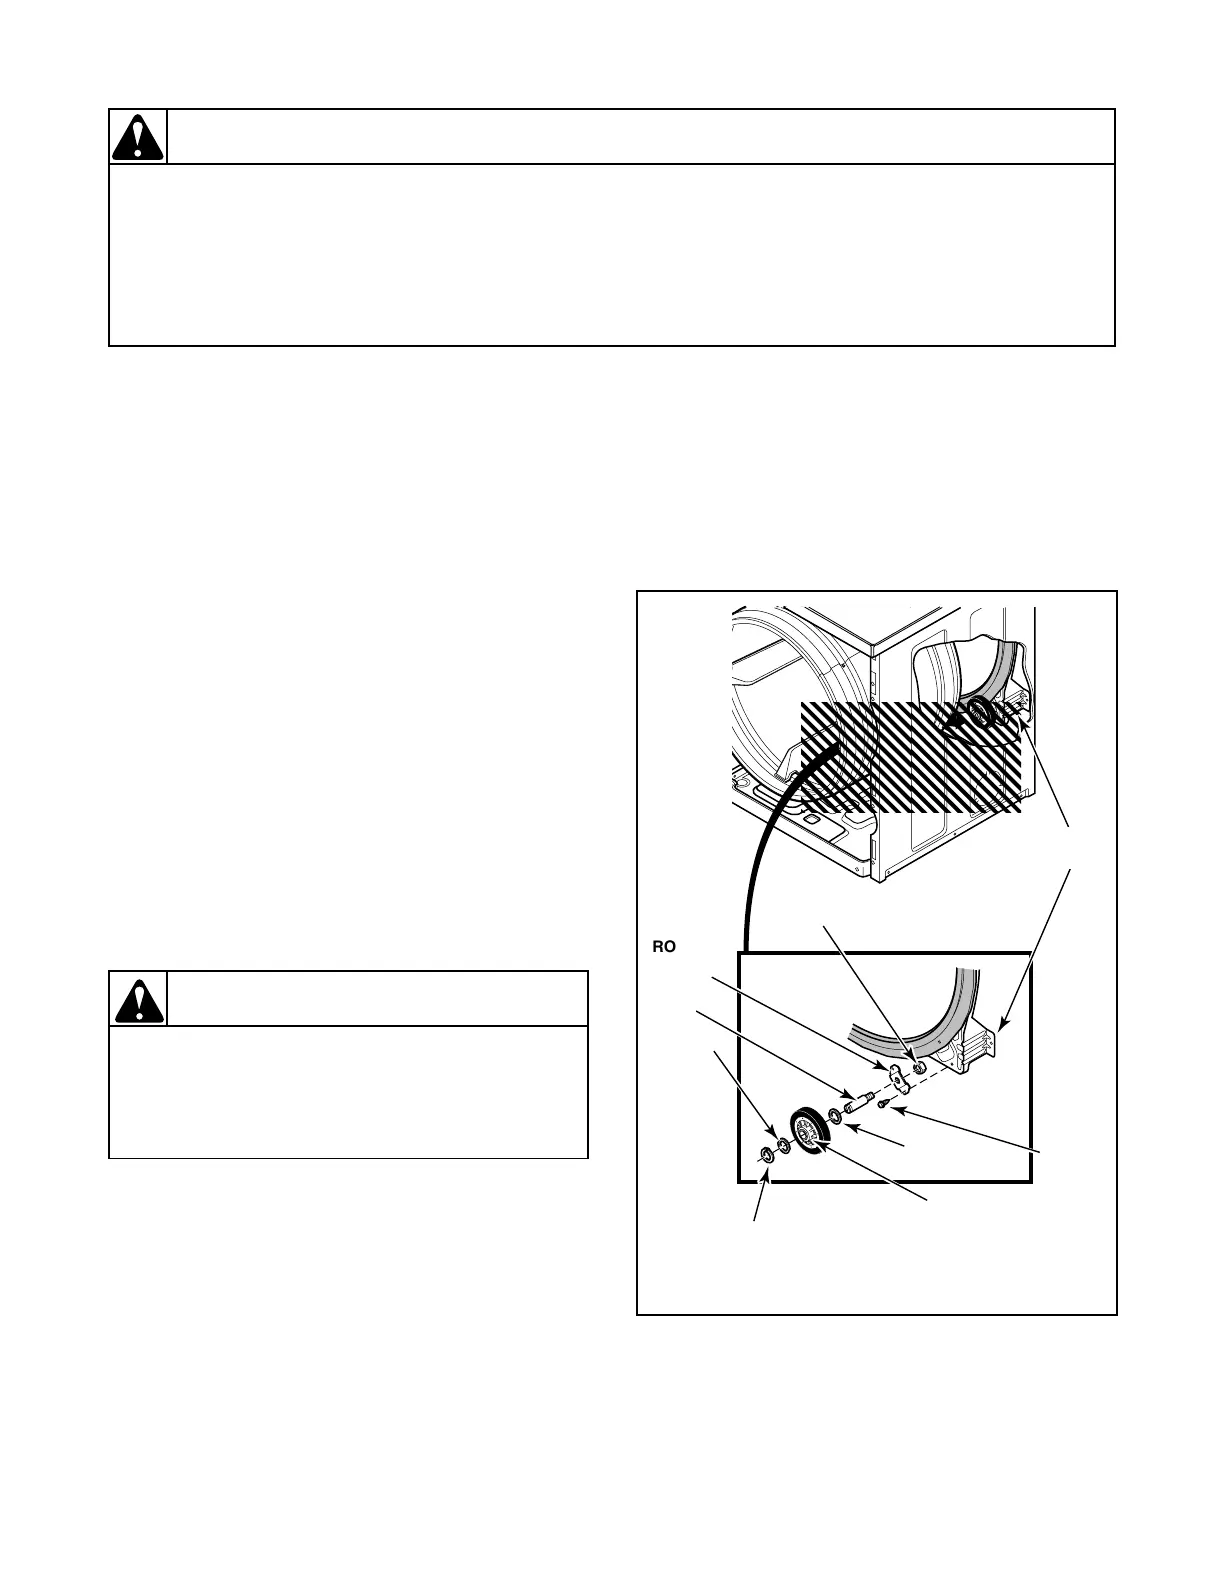
g. Pull cylinder forward allowing rear of cylinder
to drop down exposing rollers. Refer to
Figure 59.
h. Refer to Figure 59 for removal of roller from
bulkhead.
NOTE: When replacing the cylinder roller, it is
important that cylinder roller is installed with the
flanged surface of the roller bearing facing towards
the front of the dryer.
54. OUTLET COVER
a. Open door and remove two screws holding
outlet cover to rear bulkhead. See Figure 58.
Figure 59
To reduce the risk of serious injury or death
by carbon monoxide and other gases in gas
dryers, carefully read and follow all
instructions given in this section.
W005
WARNING
;;
ROLLER
BRACKET
SHAFT
SCREW
RETAINER
RING
FLANGED SURFACE
OF ROLLER BEARING
(Must face toward front of dryer)
LOCKNUT
WASHER
WAVE
WASHER
REAR
BULKHEAD
D260SE3D