Page 63 of 126
Proton Products SL mini and SLR mini Series Speed and Length Gauges Instruction Manual - issue 1s
Zebra ZM400 Cable
The gauge may either be directly connected to the printer via the DB25F “INTERFACE” port or via the
DB9F RS-232 port on an optional PSU-BOB mini:
SL / SLR mini INTERFACE port
Required cable connector: DB25M
Required cable connector: DB9M
Required cable connector: DB9M
Required cable connector: DB9M
Zebra ZM400 Printer Configuration
The Zebra ZM400 printer must be configured with the layout of the End of Reel report ticket using the
following procedure:
Install the “Zebra Designer” software onto a suitable PC.
Install the Zebra printer drivers onto the PC (the drivers are supplied on a CD-ROM with the
Zebra ZM400 printer and may also be downloaded from www.zebra.com).
Connect the PC to the Zebra ZM400 printer using the USB cable supplied with the printer.
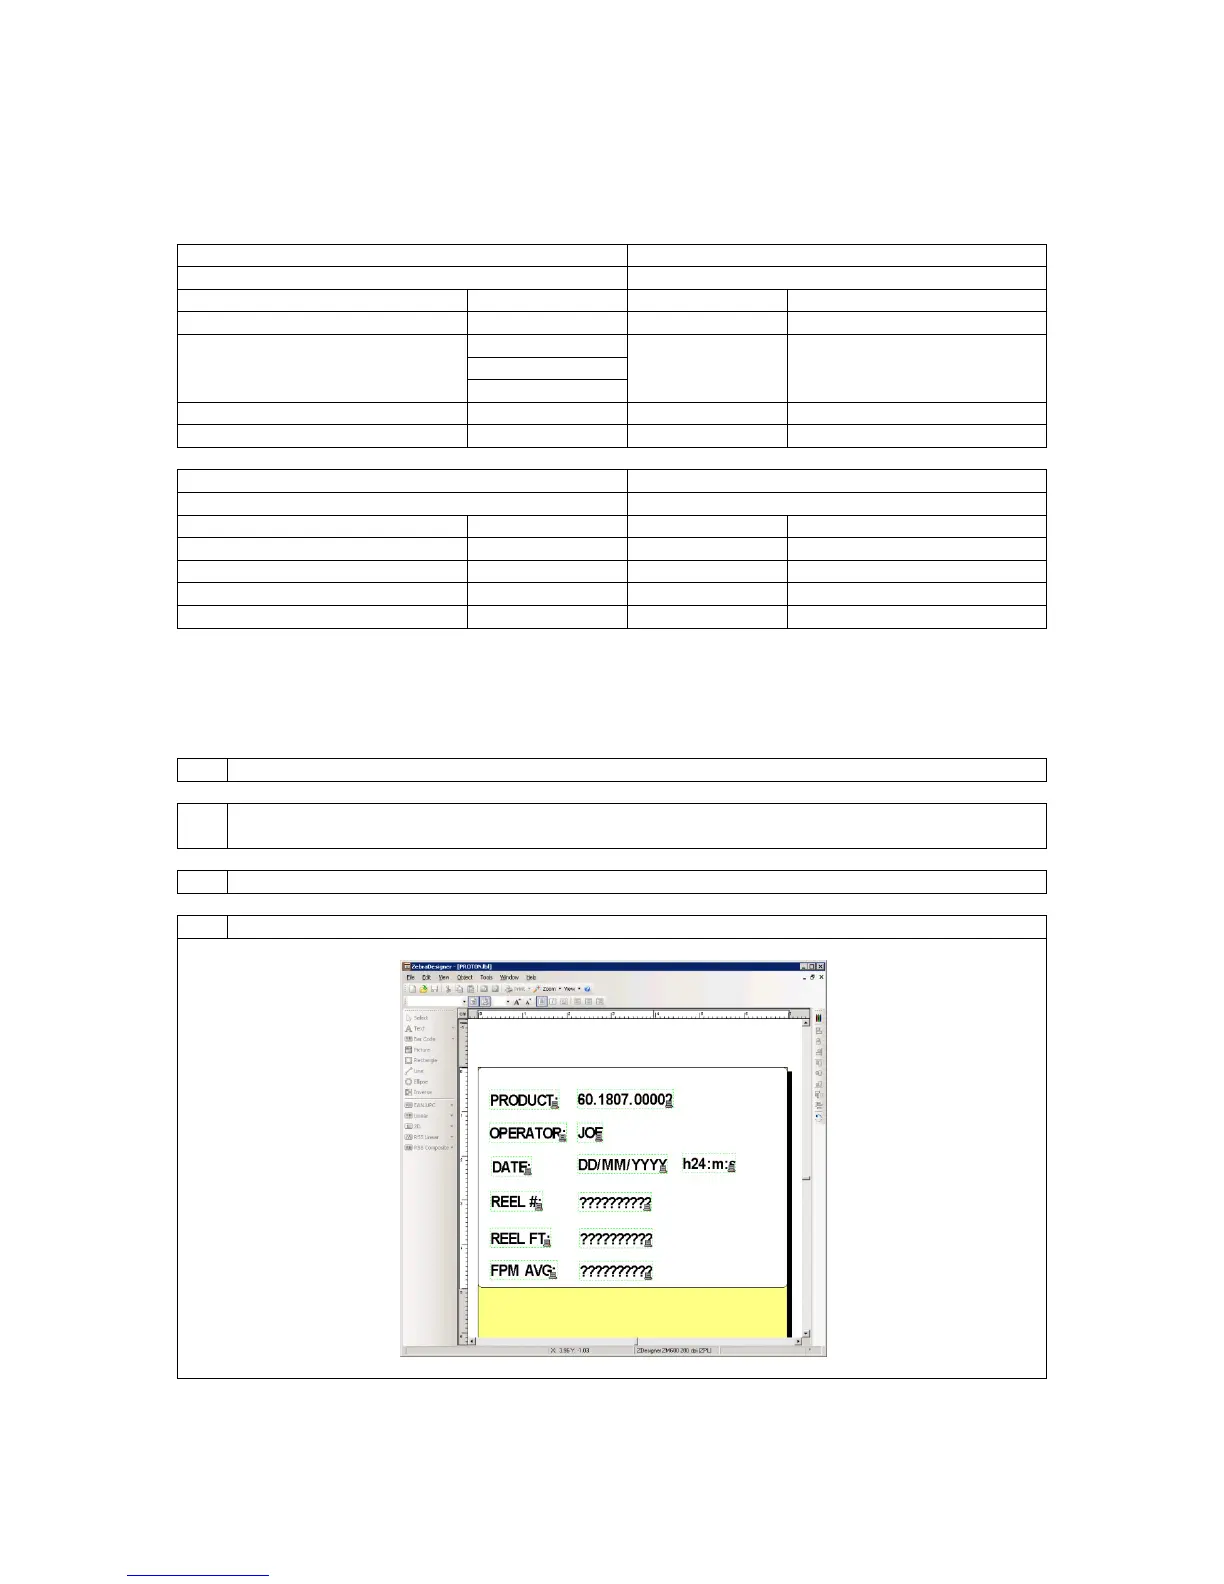
Run the “Zebra Designer” software and open the “PROTON.lbl” sample label layout file: