42
NetworkNetwork SubstreamSubstream Other SettingsOther SettingsEmailEmail
NETWORKNETWORK
DefaultDefault
ApplyApply ExitExit
TestTest
HTTP Port
Server Port
Obtain an IP address automatically
IP Address
Subnet Mask
Gateway
Preferred DNS Server
Alternate DNS Server
PPPoE
User Name
Password
HTTP Port
Server Port
Obtain an IP address automatically
IP Address
Subnet Mask
Gateway
Preferred DNS Server
Alternate DNS Server
PPPoE
User Name
Password
80
6036
192 . 168 . 001 . 100
255 . 255 . 255 . 000
192 . 168 . 001 . 001
000 . 000 . 000 . 000
000 . 000 . 000 . 000
80
6036
192 . 168 . 001 . 100
255 . 255 . 255 . 000
192 . 168 . 001 . 001
000 . 000 . 000 . 000
000 . 000 . 000 . 000
If you will be connecting to your DVR on the same network, say from within the same building,
enter the local IP address and this will be referred to as a Local Connection. The second
connection will be for times when you are away from that network and will be connecting to a
different network or using the 3G/4G function of your device.
Local Connection
To connect to your DVR using a wireless network that is connected to the same router as your
DVR - such as a home network with WiFi and Ethernet connections - you will need to use the
LAN or local IP address for your DVR. This can be found in your DVR’s Network window.
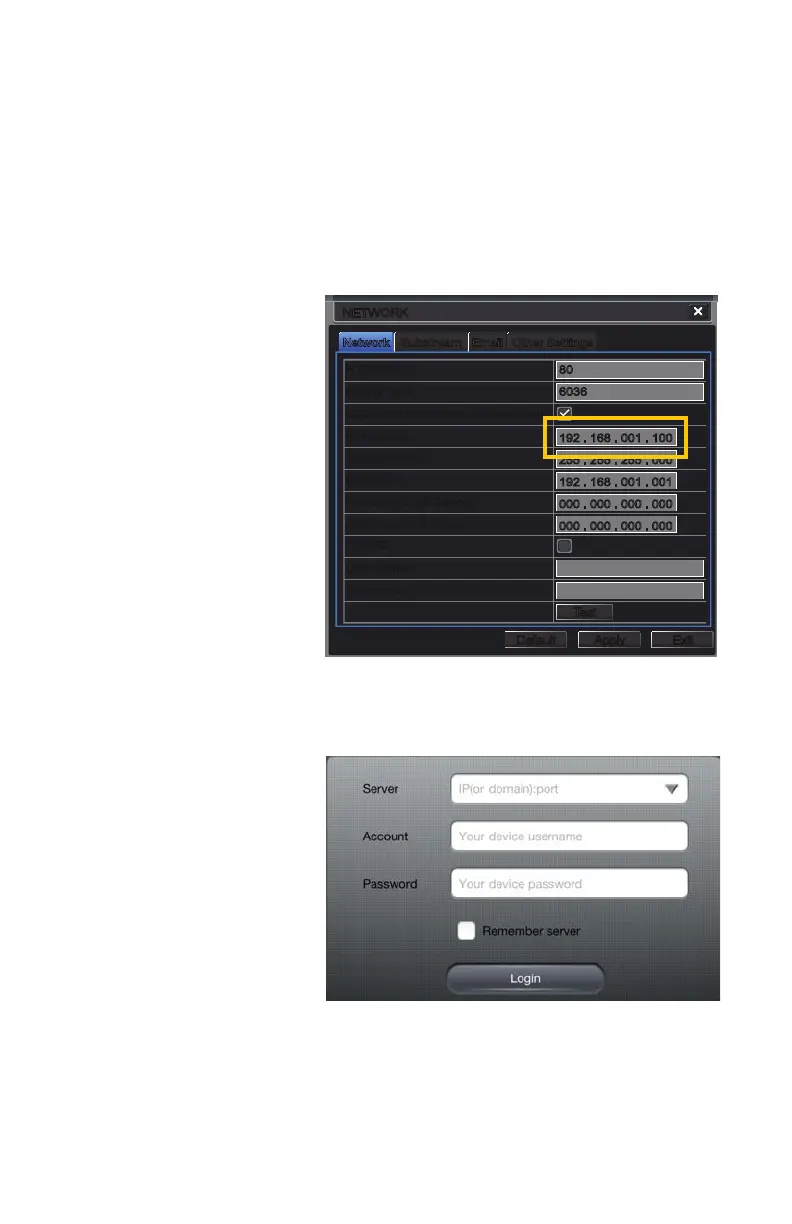
PICTURE 4-3
PICTURE 4-4
STEP 1. Open the
Network window and
write down the IP
address (Yellow box
in Picture 4-3).
Ensure that the box
labelled “Obtain an IP
address automatically”
is checked. If it isn’t,
check mark the box,
click on Apply and
then exit the window.
Reopen the window
to see the correct IP
address.
If you changed anything, you should return it to its previous configuration to avoid problems
with other devices or the DVR itself.
STEP 2. Tap on the white
fields in the Login
screen to enter the
needed information
Server - Insert the IP
address.
Account and Password
are those you use to
log into the DVR.
STEP 3. Check the box
for Remember Server
to add your new con-
nection to the list.

 Loading...