s
erver
r
Iser
2 a
ssembly
Riser 2 Assembly
Removing the Riser 2 Assembly
Prerequisite:
♦ Remove the top cover. See Opening the Top Cover on page 1-6.
♦ Remove the air duct. See Removing the Air Duct on page 1-7.
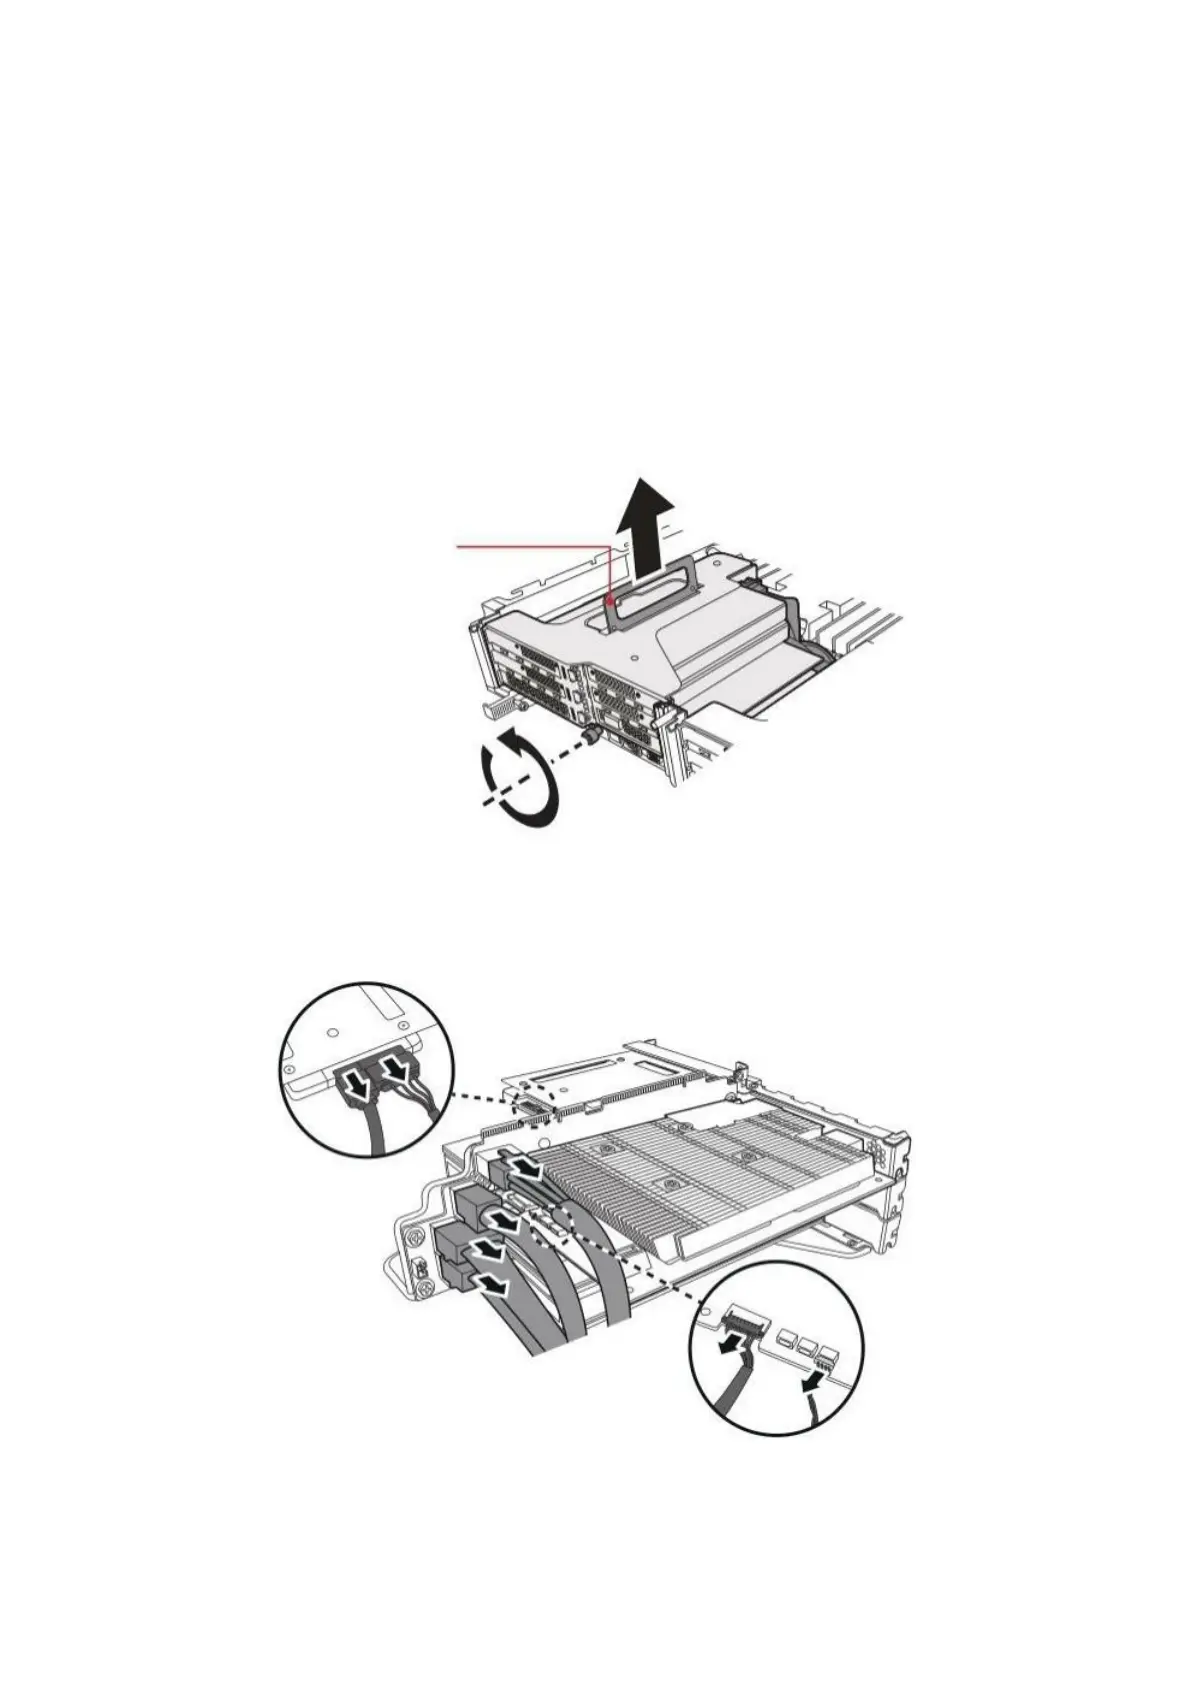
1. Loosen the captive screw securing the riser 2 assembly to the chassis.
2. Hold the riser 2 assembly holder and lift it to remove the riser 2 assembly from the
chassis.
Riser assembly
holder
Figure 1-42: Removing the Riser 2 Assembly
3. Disconnect the power and Mini SAS HD cables from the riser 2 board connectors.
Then disconnect the power and UART cables from the K2X-N card connectors.
4. Disconnect the SATA and power cables from the SSD connectors.
Figure 1-43: Disconnecting the Cables
1-28