Installation 63
3 Repeat the above sequence of steps for the companion rail.
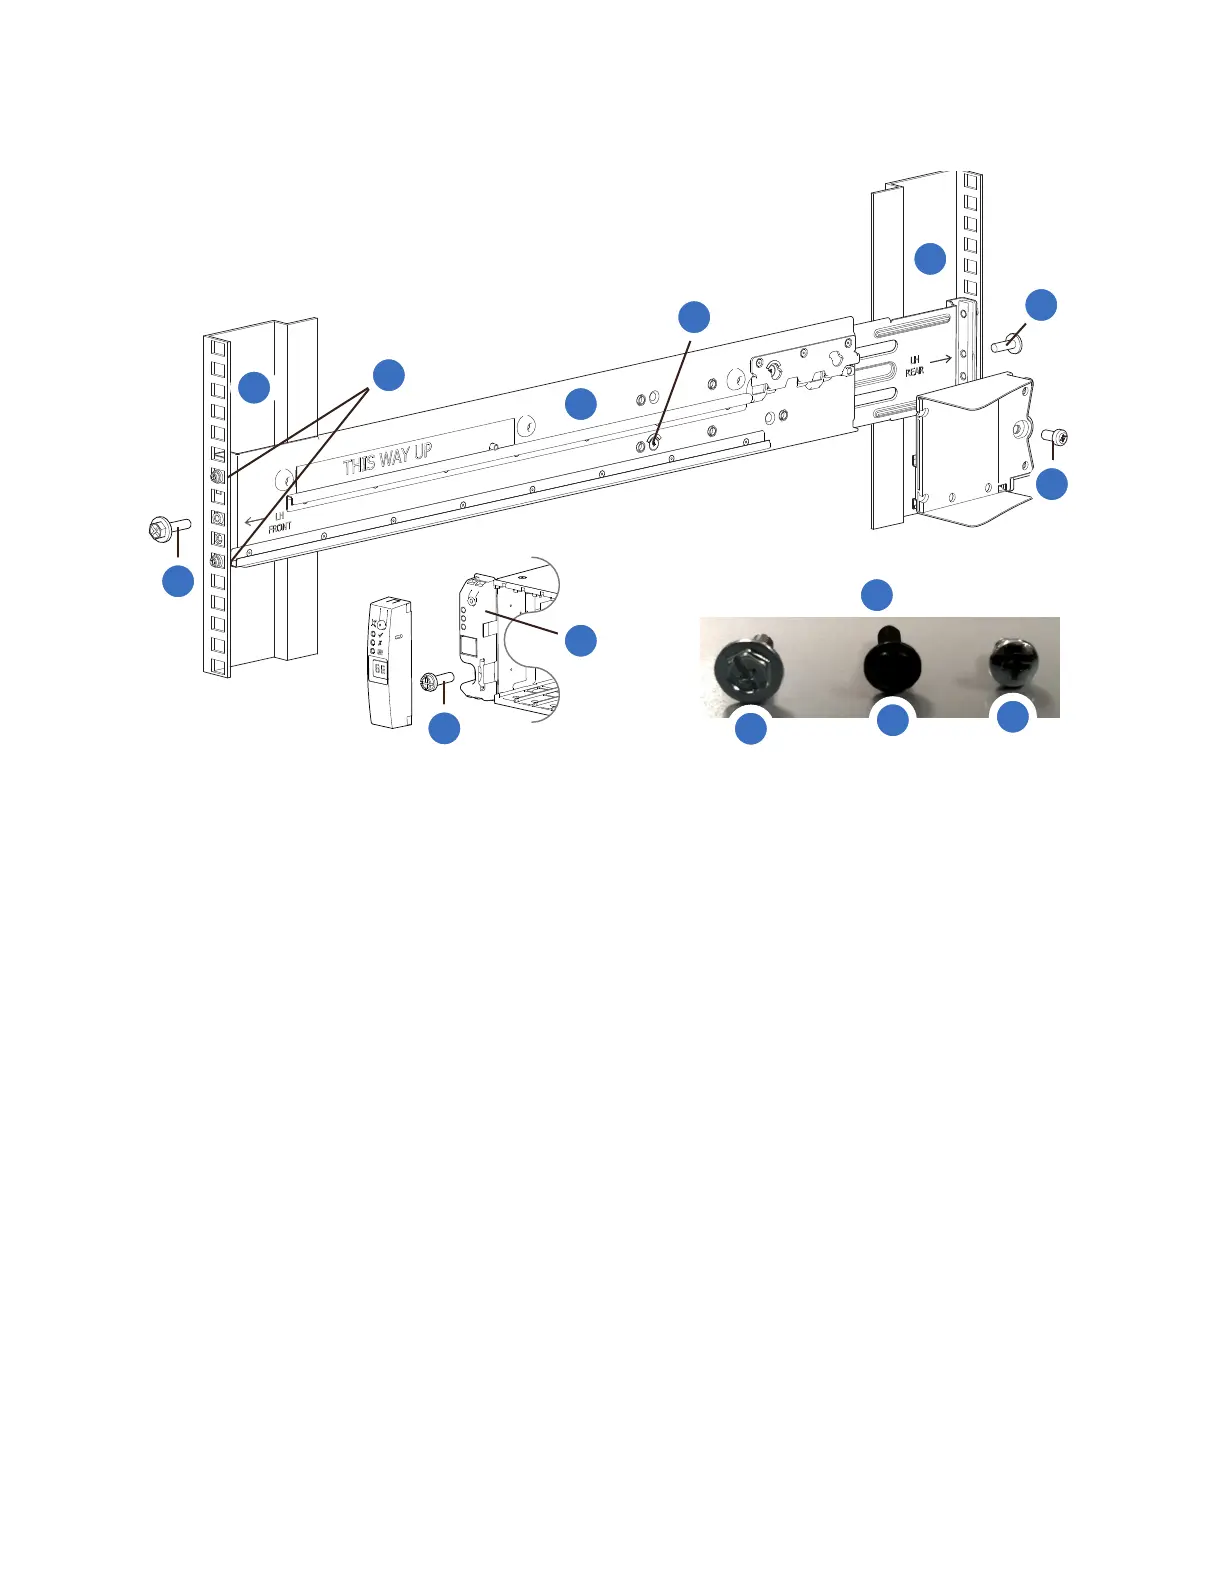
Figure 60 2U Secure Brackets to Rail
4 Install the chassis into the rack:
a Lift the chassis and align it with the installed rack rails, taking care to ensure that the chassis
remains level.
b Carefully insert the chassis into the rack rails and push fully in.
c Tighten the mounting screws (callout 9, A screw) in the rear rail kit brackets.
d Slide the chassis forward until it reaches the hard stops—approximately 400 mm (15.75”)
—and tighten the mounting screws (callout 3, A screws) in the front rail kit bracket.
e Return the chassis to the fully home position.
5 Install the 2u chassis fastening screw (callout 10, C screw) to secure the chassis to the back of the
rack.
4
6
8
1
3
5
7
9
10
11
B
C
1
2U Left ear (ops panel cover exploded to show
left ear flange fastening screw)
2
Fastening screw: B
3
Clamping screw (front): A
4
Front rack post: square hole
5
Rail location pins
6
Left hand (LH) rail
7
Locking screw
8
Rear rack post: square hole
9
Clamping screw (rear): A
10
2U Chassis fastening screw: C
11
Screws: Rail kit fasteners
 Loading...


