Installation
ENG
ESP-Me Controller
13
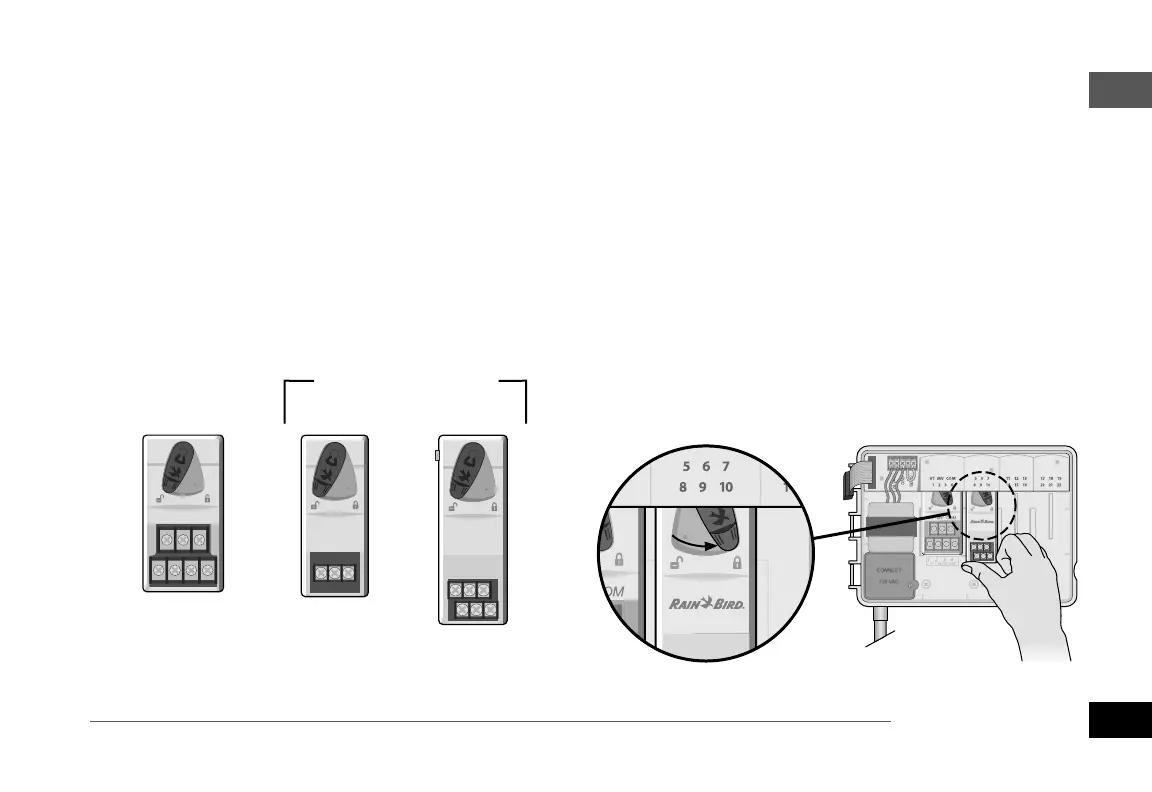
Station Expansion Modules
Optional Station Modules are installed in the empty
slots to the right of the base module to increase the
station capacity up to 22 stations.
NOTE: 6-Station module is compatible only with
the ESP-Me. They are not backwards compatible
with the previous ESP-M vintage controller.
NOTE: For ideal station sequencing, it is rec-
ommended that a 6-Station module always be
installed in Bay 2. For more details see the Station
Numbering section.
VT MV COM
3-STATION
(ESPSM3)
6-STATION
(ESPSM6)
Expansion Modules
(sold separately)
Base Module
(included)
Install Modules
A
Verify the securing lever on the module is in the
unlocked position (slide to the left).
B
Place the module under the desired slot between
the plastic rails.
C
Push the module up into the slot until secure.
D
Slide the securing lever to the locked position
(slide to the right).
REPEAT for additional modules.
NOTE: Modules can be installed or removed with
OR without AC power connected. They are con-
sidered “hot-swappable”.
BC
D

 Loading...