Chapter 2: Installing the system 13
If you need to adapt the standard installation, refer to
Adapting the installation
on
page 16
for adaptation options.
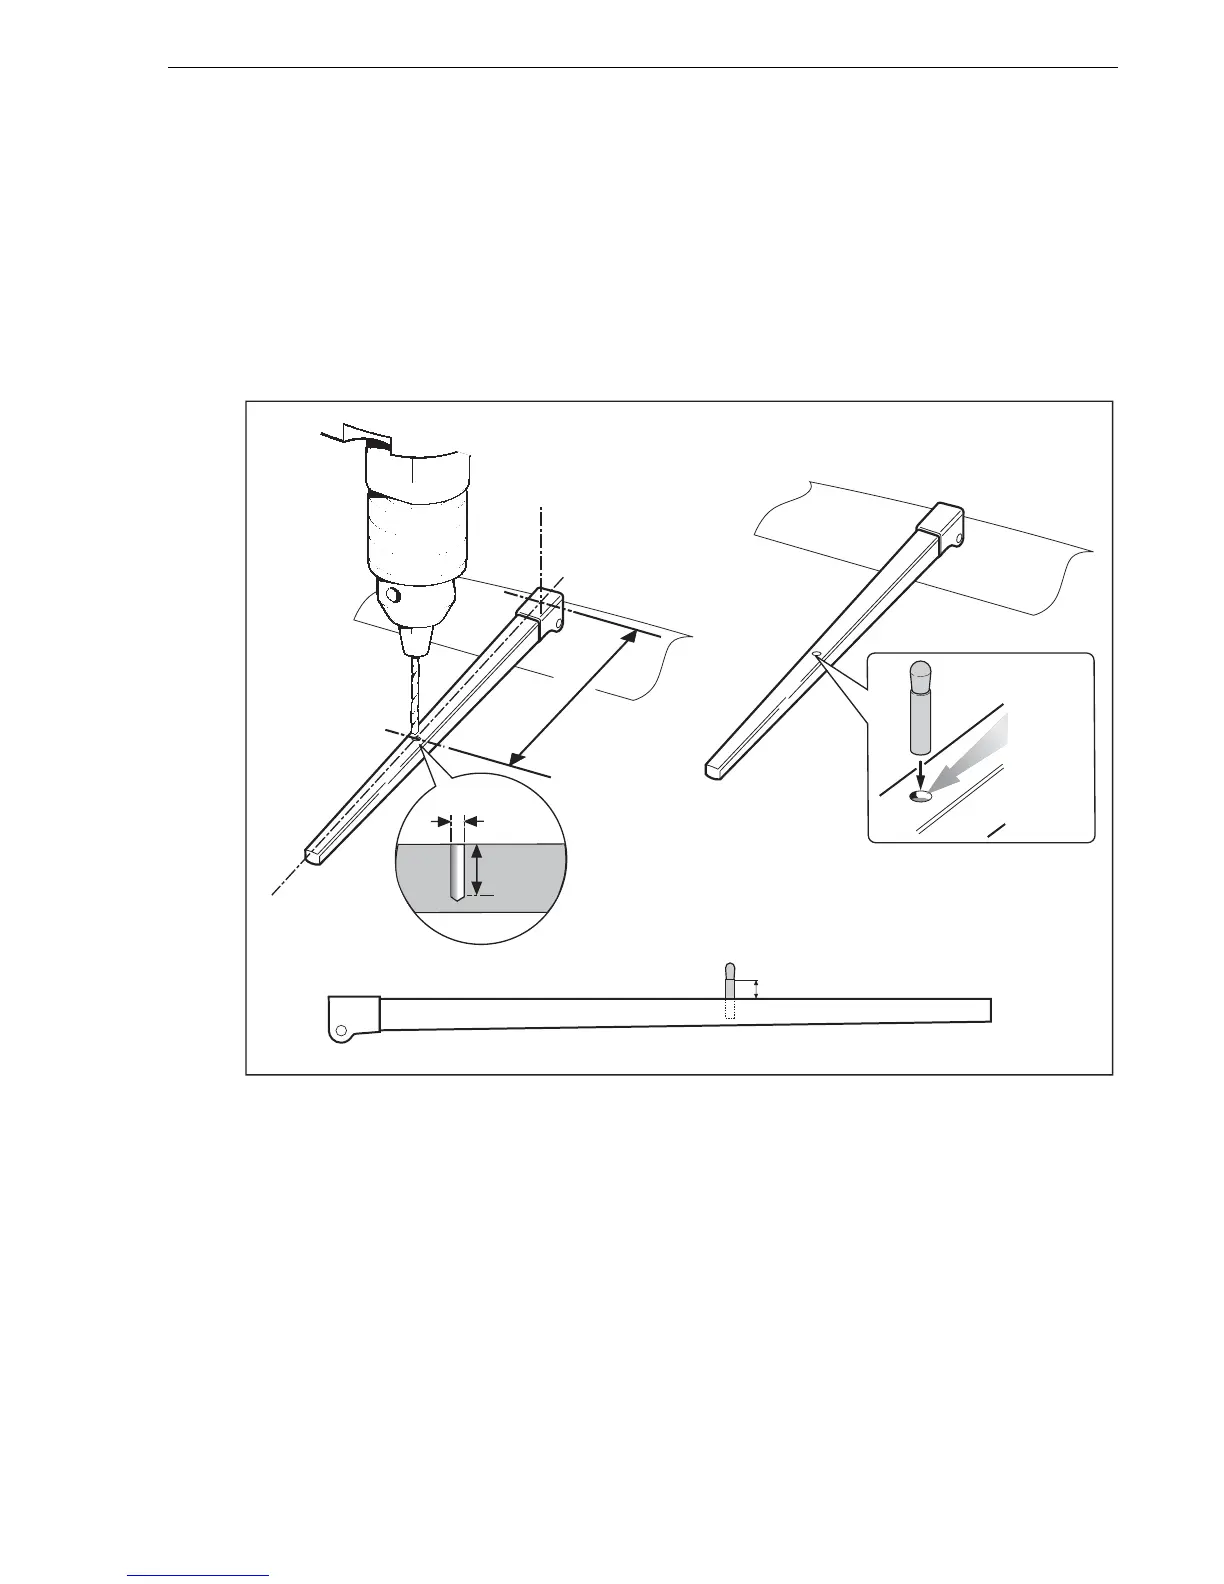
Step 1 - Mount the Tiller Drive
Use this procedure when neither accessories or adaptation of the drive unit position
are required.
1. Securely clamp the tiller, mark the pin position and drill the 6 mm (1/4”) hole.
2. Fix the pin in position using a two-part epoxy adhesive.
3. Check the shoulder height of the pin.
4. Mark the socket position and drill a 6 mm (1/4“) pilot hole to check the thickness of
the structure. If this is less than 25 mm, reinforce with plywood and bond into
position. Once this has cured, open up the hole diameter to 12.5 mm (1/2”).
5. Fix the socket in position using a two-part epoxy adhesive.
6. Once the epoxy has fully hardened, fit the tiller drive.
D10705-1
12.5 mm
(0.5 in)
6 mm
(0.25 in)
12.5 mm
(0.5 in)
Two part
epoxy
adhesive
to fix tiller
pin in
place
1. 2.
3.
Allow epoxy to fully harden
before applying load.
Dimension A
 Loading...