16 ST60+ Speed Instrument Owner’s Handbook
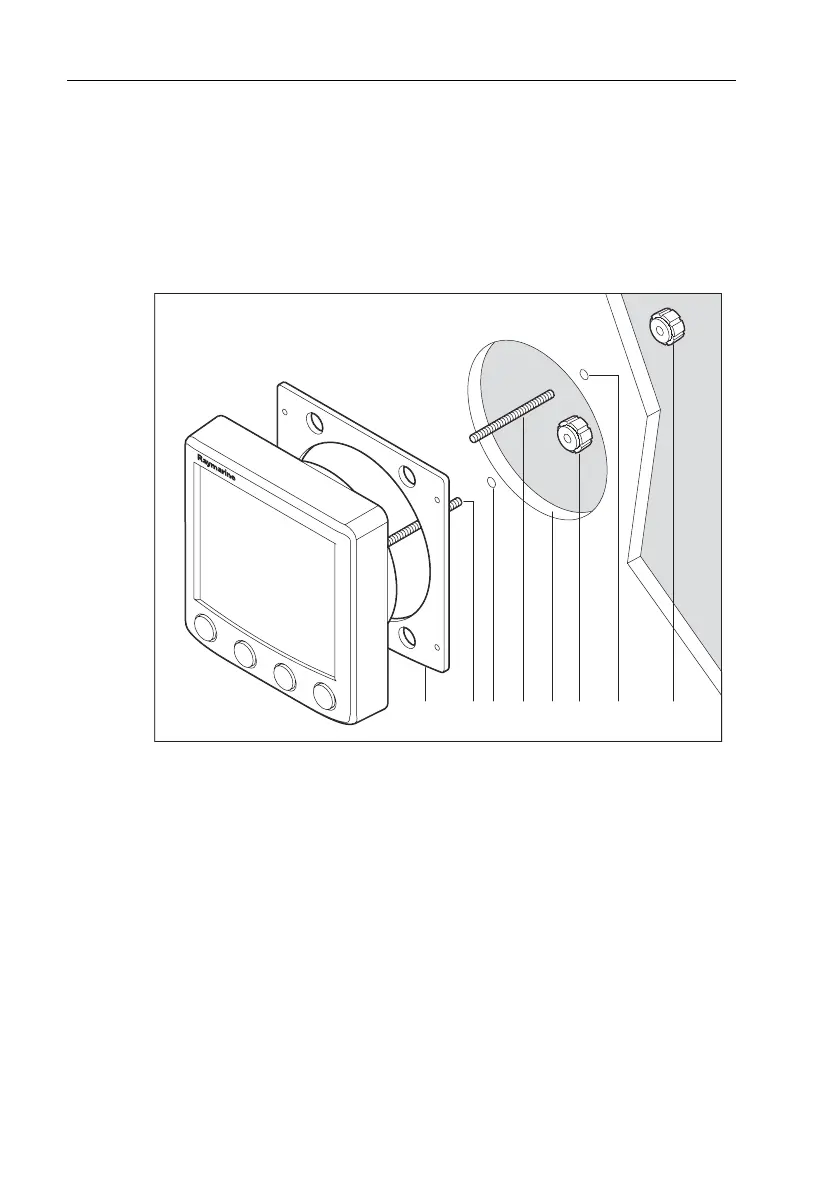
Surface mounting
To surface mount your ST60+ instrument (see the
Surface mounting
illustration):
1. Ensure that:
• The selected location is clean, smooth and flat.
• There is sufficient space behind the selected location to accommodate the
rear of the instrument and connectors.
2. Apply the surface mount template (supplied at the rear of this handbook) to
the selected location and mark the centers for the fixing studs (1) and the
aperture (3) that will take the rear casing of the instrument.
3. Drill out the two 0.2 in (5 mm) fixing stud clearance holes (2).
4. Cut out the clearance hole (3) then remove the template.
5. Peel off the protective sheet from the self-adhesive gasket (4) then stick the
gasket into position on the rear of the instrument.
6. Screw the two fixing studs into the threaded sockets on the rear of the instru-
ment.
7. Mount the assembled instrument, studs, bezel and gasket into the panel.
Secure from behind with the thumb nuts (5).
Surface mounting
412135 52
D8147-1
81261_1.book Page 16 Tuesday, November 29, 2005 12:42 PM

 Loading...