Chapter 3: Installation 19
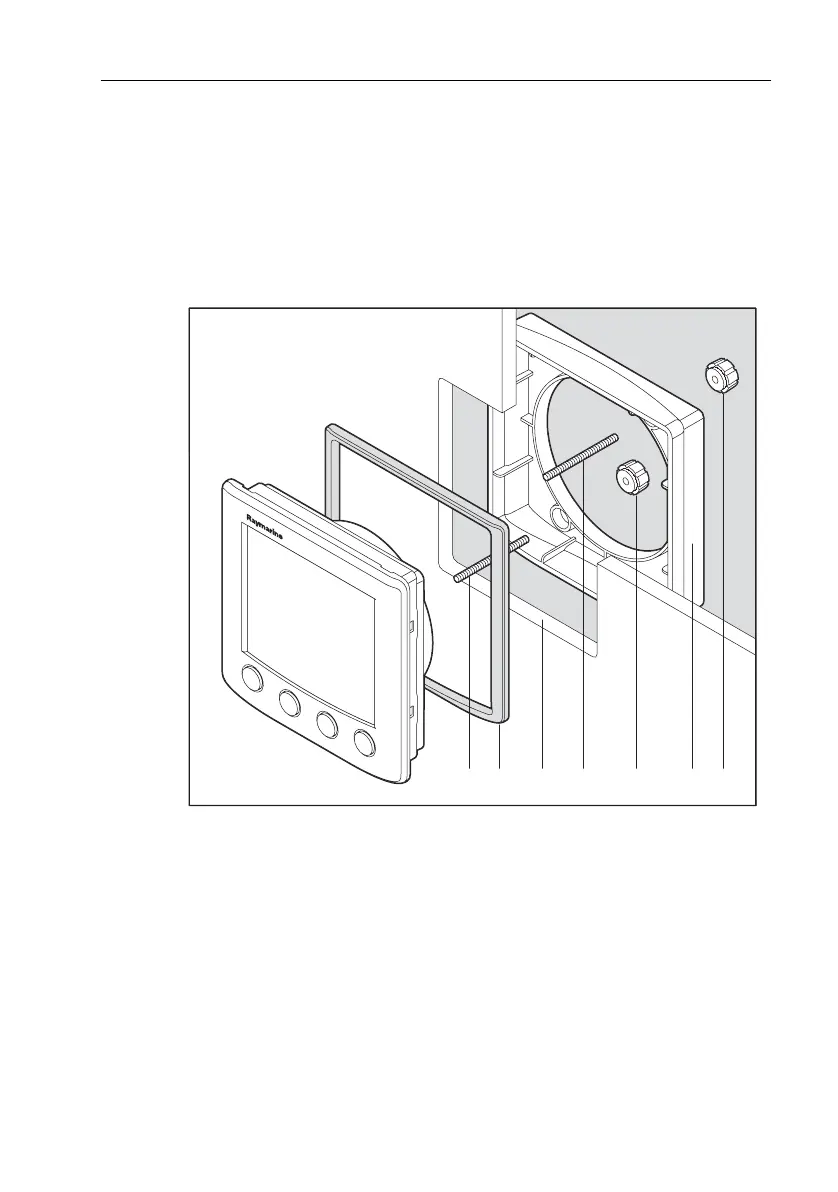
4. Cut out the aperture (3) for the assembled instrument and bezel and remove
the template.
5. Peel off the protective sheet from the self-adhesive gasket (4) then stick the
gasket into position on the rear of the bezel.
6. Screw the two fixing studs (1) into the threaded sockets on the rear of the
instrument.
7. Mount the assembled instrument, studs, bezel and gasket into the panel.
8. Locate the flush mount bracket (6) onto the fixing studs and secure the assem-
bly to the panel with the thumb-nuts (5).
Bracket mounting
A Control Unit Mounting Bracket (Part No. E25009) enables you to mount your
ST60+ instrument in locations where other forms of mounting are impractical.
Although this provides a useful alternative method for securing your instrument,
it is only suitable for use in positions where the instrument will not be exposed to
water.
To bracket mount your ST60+ instrument, do so in accordance with the Control
Unit Mounting Bracket Instruction Sheet.
Flush mounting
41 3 5 6 51
D8150-1
81261_1.book Page 19 Tuesday, November 29, 2005 12:42 PM

 Loading...