18 ST60+ Speed Instrument Owner’s Handbook
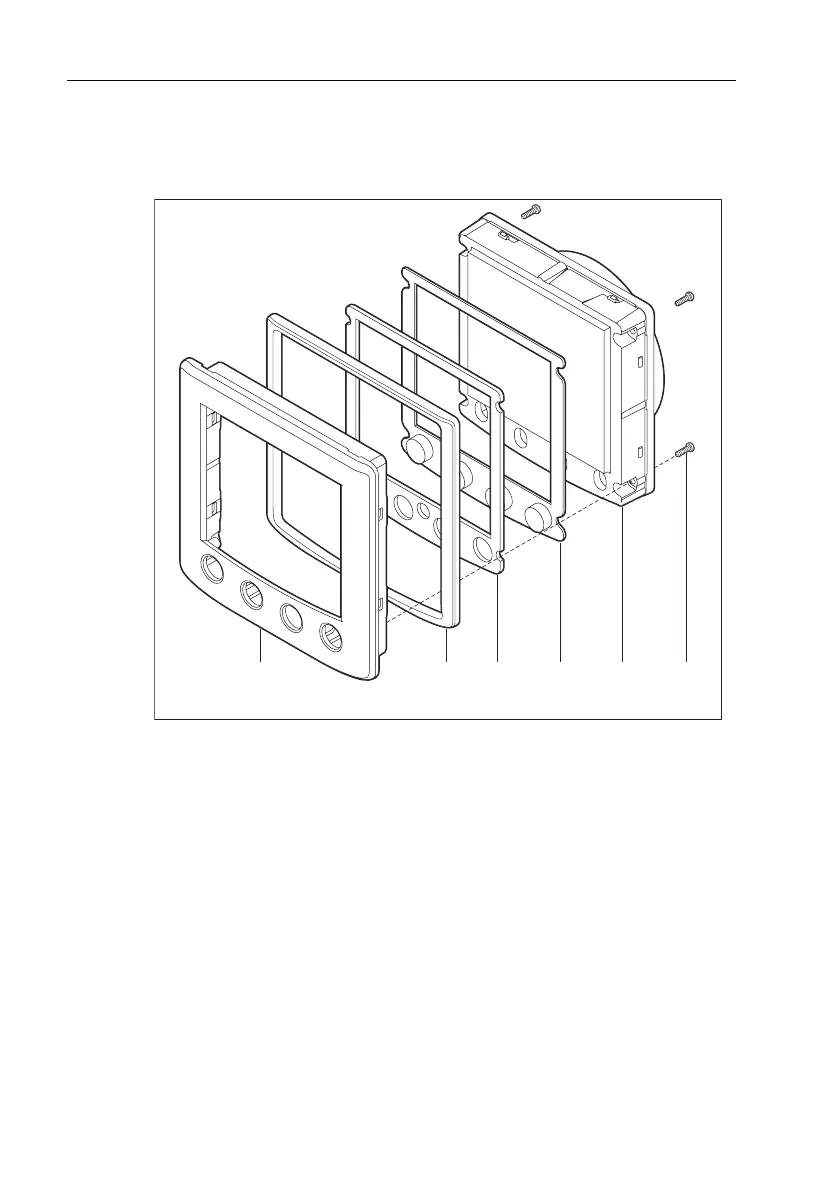
bezel together. Fit the screws from the rear of the instrument and tighten
them sufficiently to secure the instrument and bezel together. DO NOT OVER-
TIGHTEN.
Flush mounting procedure
Flush mount your instrument (see the
Flush mounting
illustration) as follows:
1. Assemble the ST60+ instrument and flush mount bezel as described under
Fitting the flush mount bezel
.
2. Ensure that:
• The panel on which you intend to mount the instrument is between
0.12 in (3 mm) and 0.78 in (20 mm) thickness.
• The selected location is clean, smooth and flat.
• There is sufficient space behind the selected location to accommodate the
rear of the instrument and connectors.
3. Apply the flush mount template (supplied at the rear of this handbook) to the
selected location and mark out the aperture into which the assembled instru-
ment and bezel will sit.
Fitting the flush mount bezel
87 9 10 11 12
D8149-1
81261_1.book Page 18 Tuesday, November 29, 2005 12:42 PM
 Loading...