3. Device List: Lists the cameras Reolink client has detected and added on your
network, users can configure the camera, for detailed configuration, please refer
to chapter 4.
4. PTZ: Set the Pan/Tilt/Zoom Parameters. For detailed configuration, please refer
to 3.1.3 Pan/tilt and Preset.
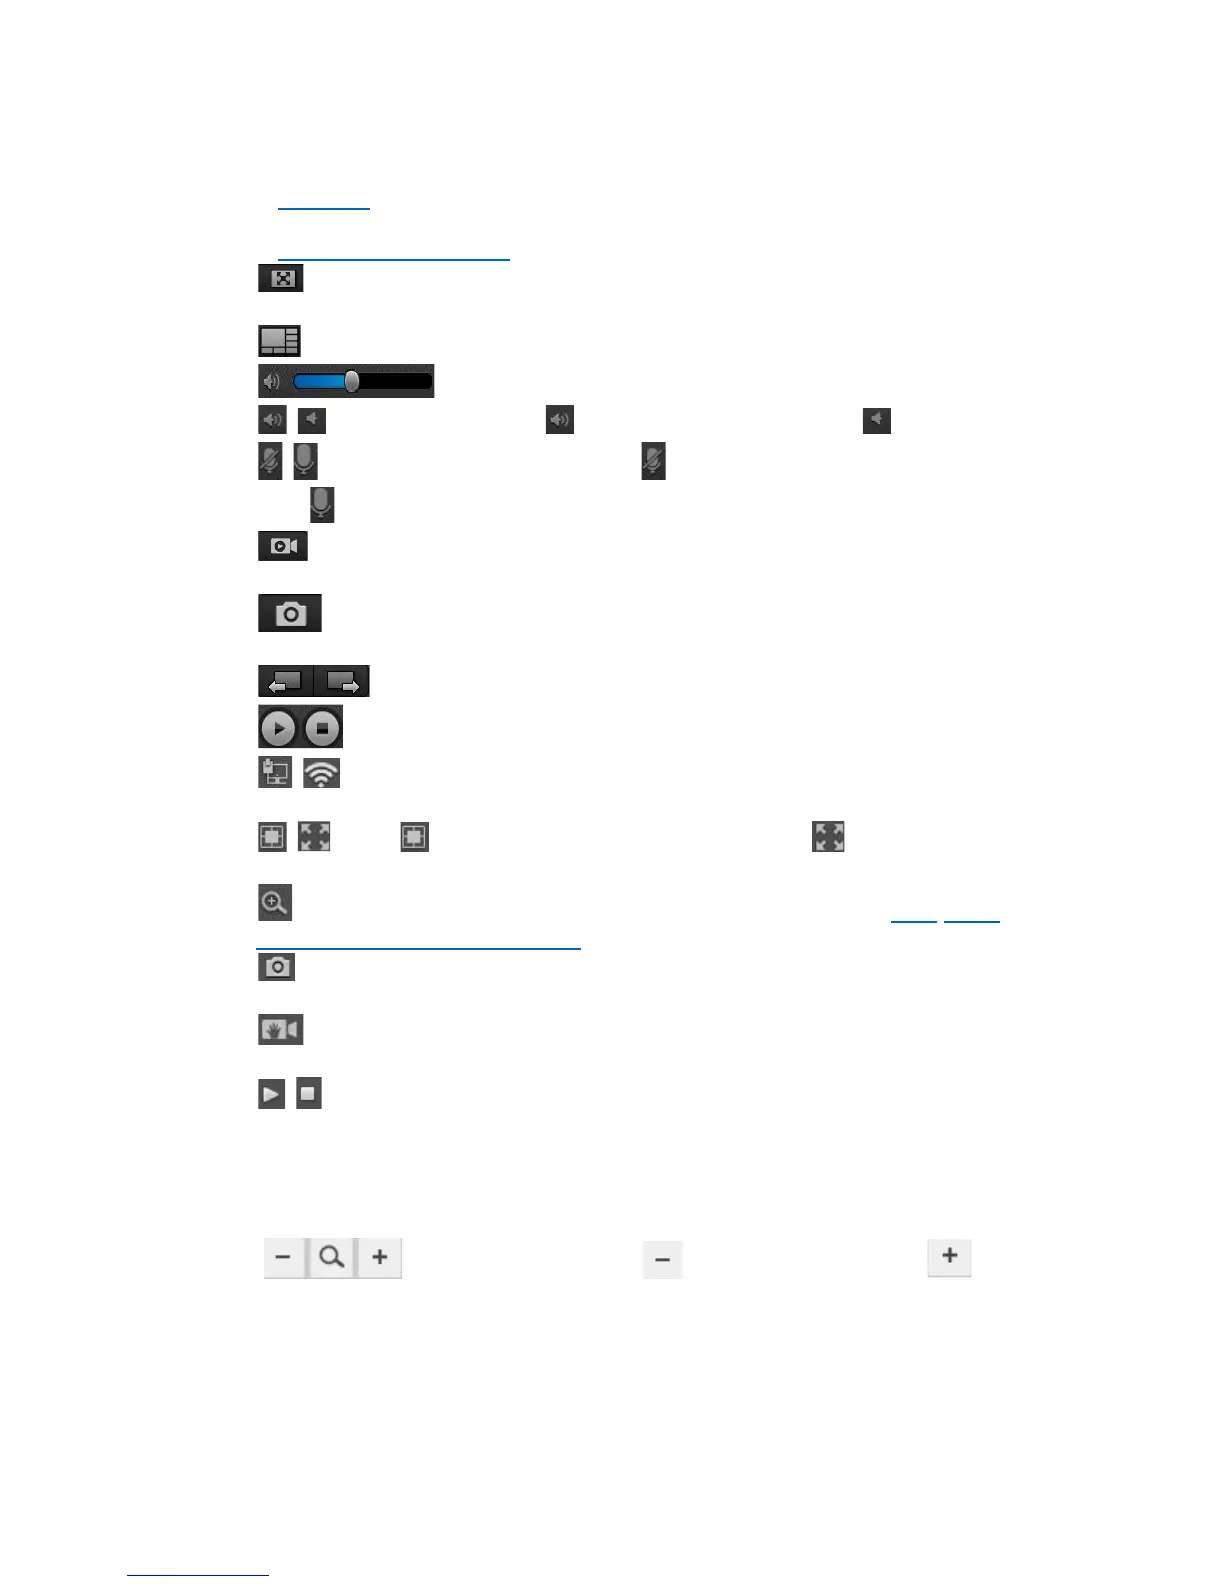
5. : Click to stretch the windows to full screen. Right click on the screen or hit
ESC on the keyboard to exit full screen.
6. : Click to choose 1/4 and multi-channel view up to 32 Channels.
7. : Click to adjust its volume.
8. / : Enable/disable audio. means audio is enabled while disabled.
9. / : Enable/disable two-way audio. means two-way audio is enabled
while disabled.
10. : Start/stop manual recording for all the channels. the video will be
automatically saved to your computer.
11. : Click to snap a picture for all the channels. The still picture will be
automatically saved to your computer.
12. : Click to see the cameras on the next page or previous page.
13. : Start/stop live feed for all the channels.
14. / : Indicates the camera is connected to the router via an Ethernet cable
or Wi-Fi and the Wi-Fi signal strength.
15. / : Click to compress the image to center or click to stretch image
to full window.
16. : Click to enter Digital Zoom. For more details, please refer to 3.1.2 Zoom
in/out the Image and Auto Focus.
17. : Click to snap a picture for the selected channel. The still picture will be
automatically saved to your computer.
18. : Start/stop manual recording for the selected channel. the video will be
automatically saved to your computer.
19. / : Start or stop live feed for the selected channel.
3.1.2 Zoom in/out the Image and Auto Focus
➢ Zoom in/out: Hold the button to zoom out and to
zoom in.
11