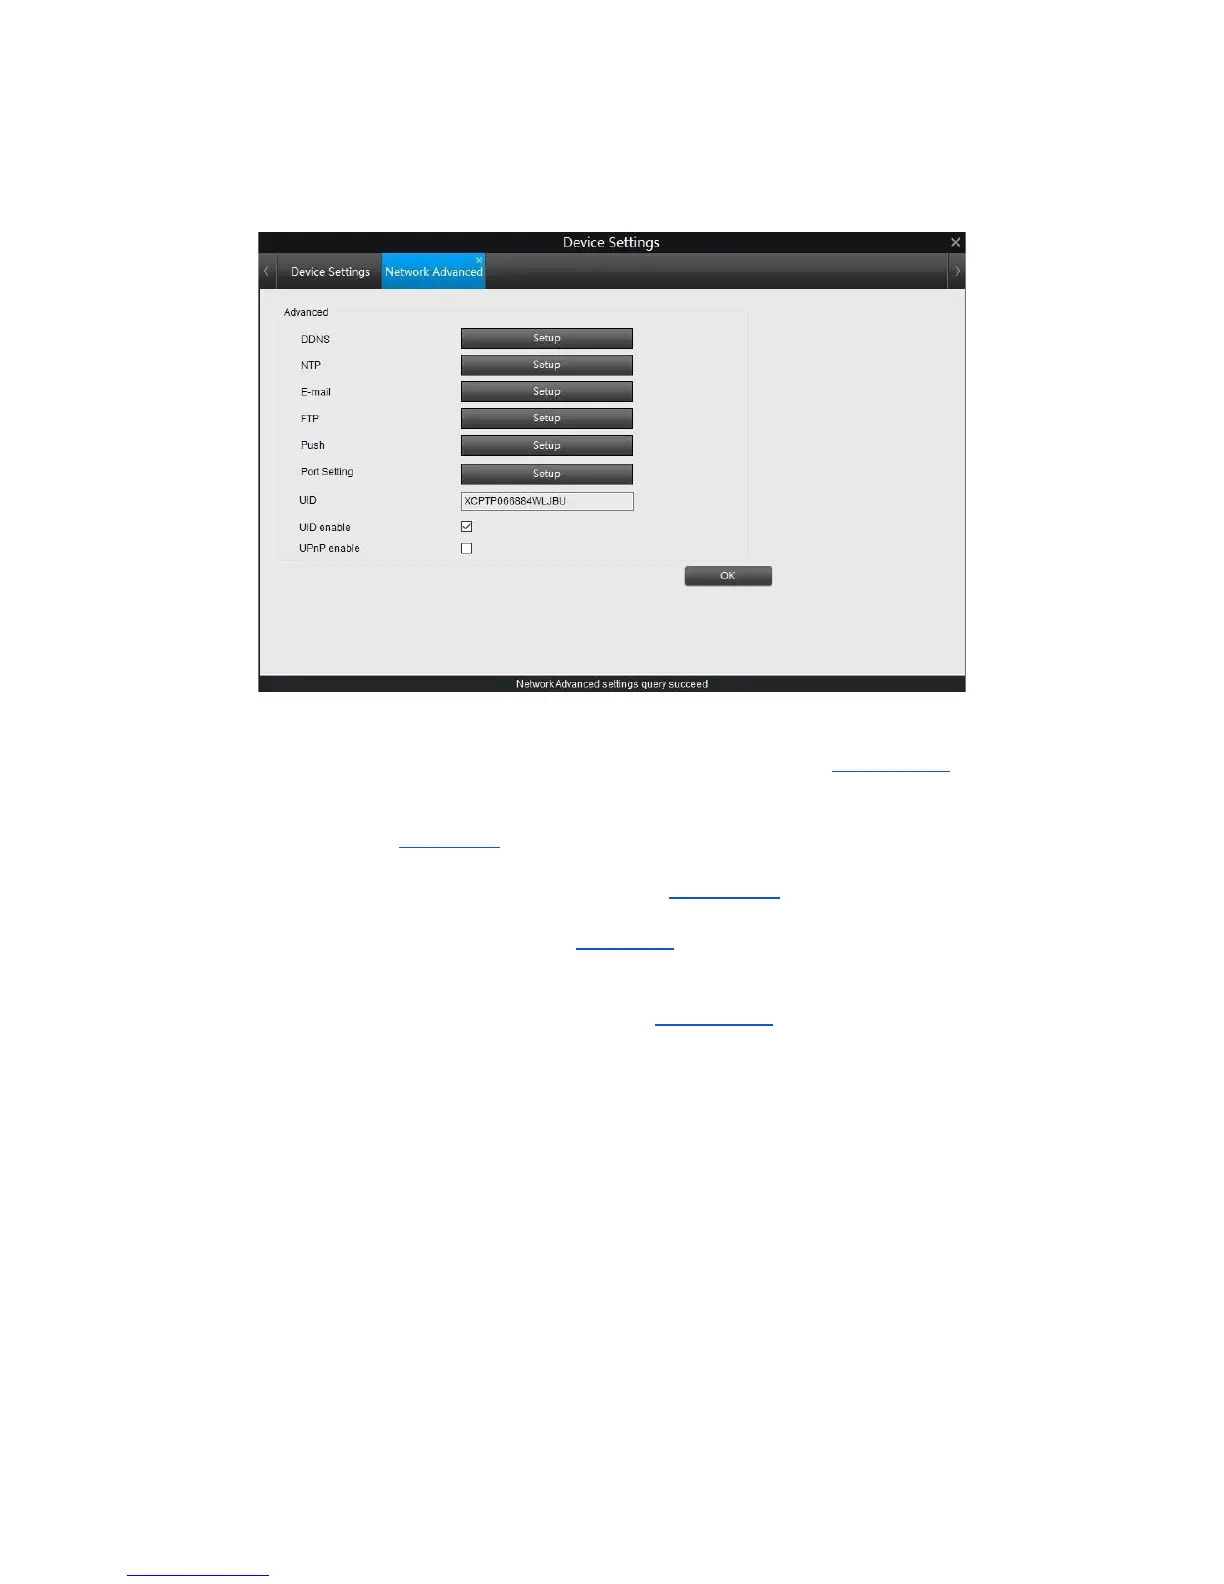
4.3.2 Network Advanced
➢ DDNS: Configure the Camera to automatically update a dynamic DNS service. If
you want to remotely access the Camera via the Internet, you’ll probably need to
configure a DDNS account. For detailed setup, please refer to DDNS Setup.
➢ NTP: Network Time Protocol. If you’ve got the Camera connected to the Internet,
you can have it automatically sync time with an online server. For detailed setup,
please refer to NTP Setup.
➢ E-mail: Setup the email account for the camera to send and receive image file or
video file. For detailed setup, please refer to Email Setup.
➢ FTP: Setup the FTP server which the camera will upload its video or picture to.
For detailed setup, please refer to FTP Setup.
➢ Push: Enable/disable Push Notification and setup its schedule.
➢ Port Settings: Displays the port of the camera, users can change the port value
here. For more information, please refer to Port Settings.
➢ UID: Displays the UID code of the camera. The UID is read-only.
➢ UID enable: Enable or disable UID.
➢ UPnP enable: Enable or disable UPnP.
Click OK to save and enable settings.
DDNS Setup
DDNS allows users to access the camera remotely via an URL address which will
automatically synchronize you WAN IP address once configured. Click the Setup
button next to DDNS to enter the DDNS setup page.
28