4.Replacement and Adjustment
35
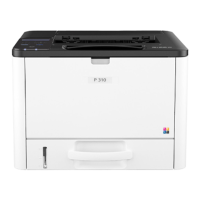
4. Disconnect the three FFCs and pull out from the ferrite core [A].
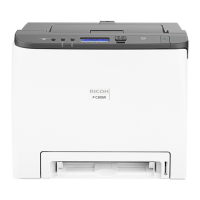
5. Disconnect the three connectors. When disconnecting the connector [A], use a tool such as radio
pliers to hold it.
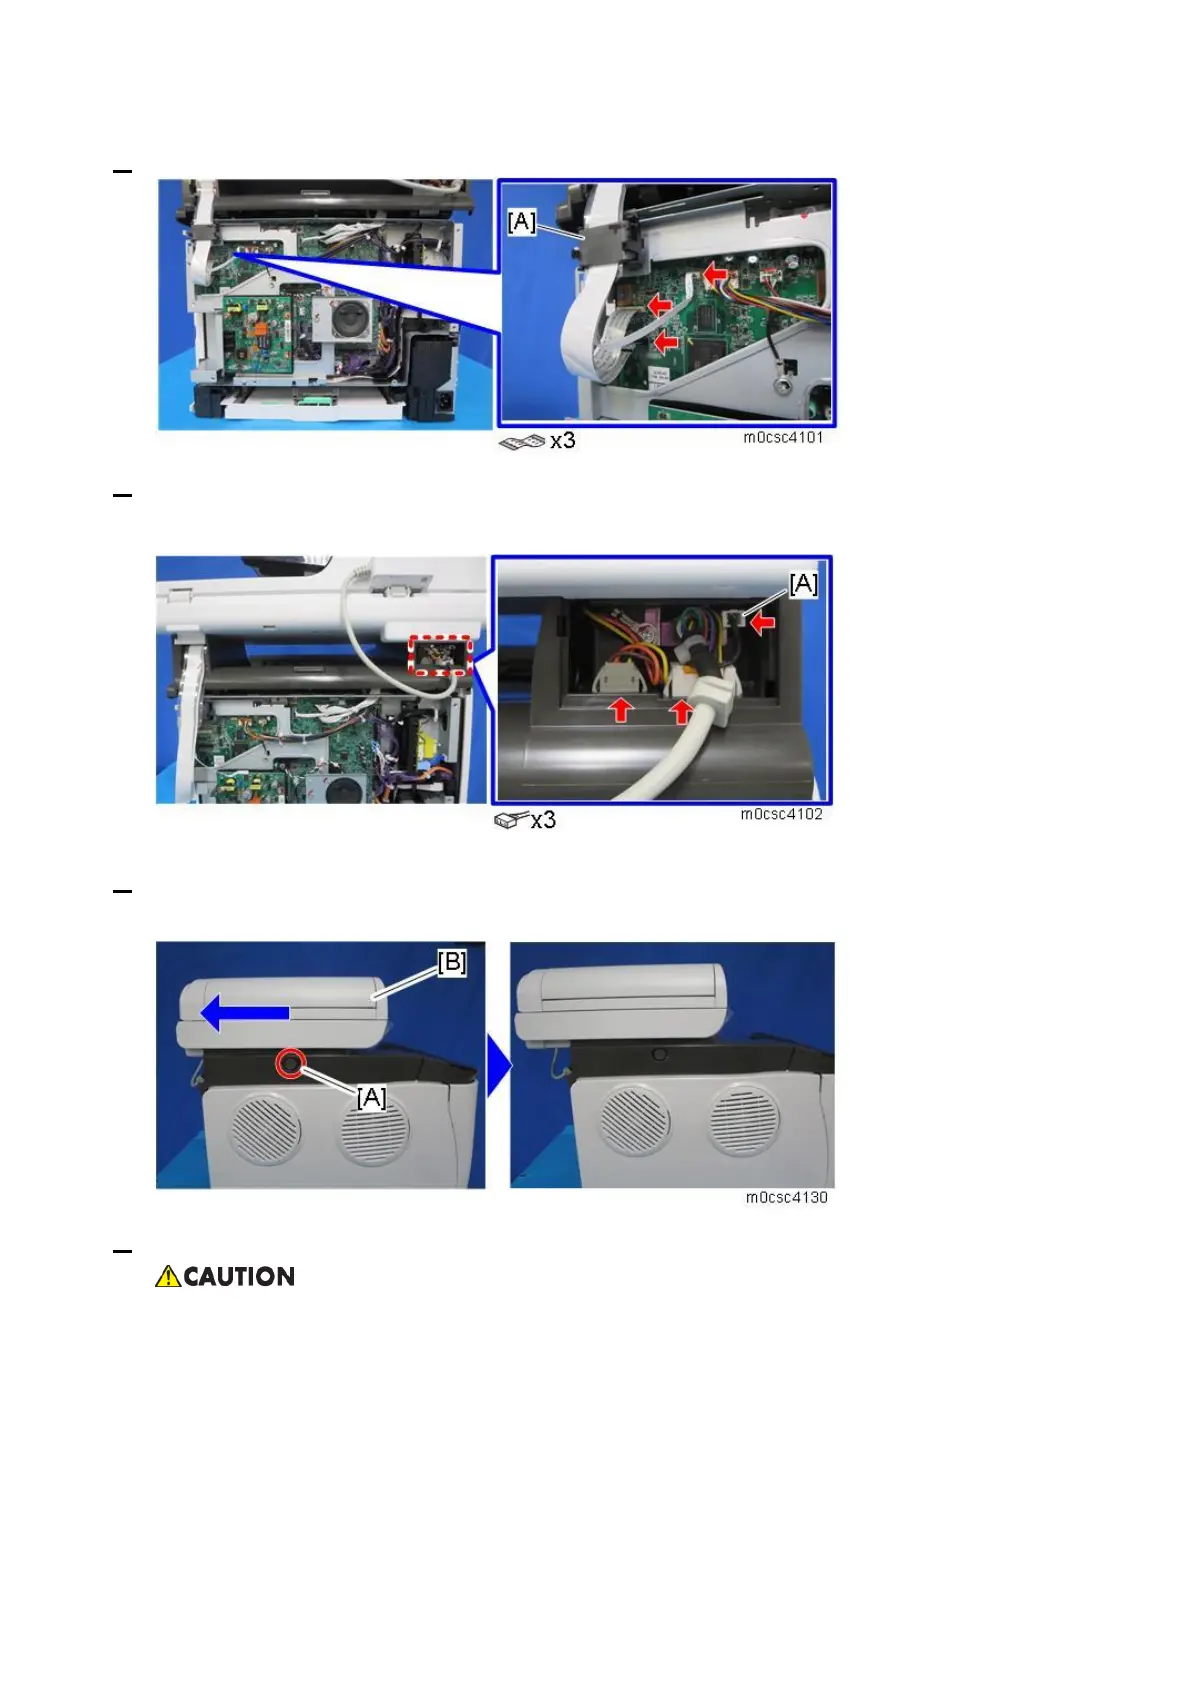
6. Press and hold the lock button [A], and then slide the scanner unit [B] in the direction of the blue
arrow.
7. Open the top cover and loosen the fixing screw [A].
Do not remove the fixing screw. If the fixing screw is removed with the scanner unit at the rear of
the machine, the scanner unit may fall.
 Loading...