2.Replacement and Adjustment
66
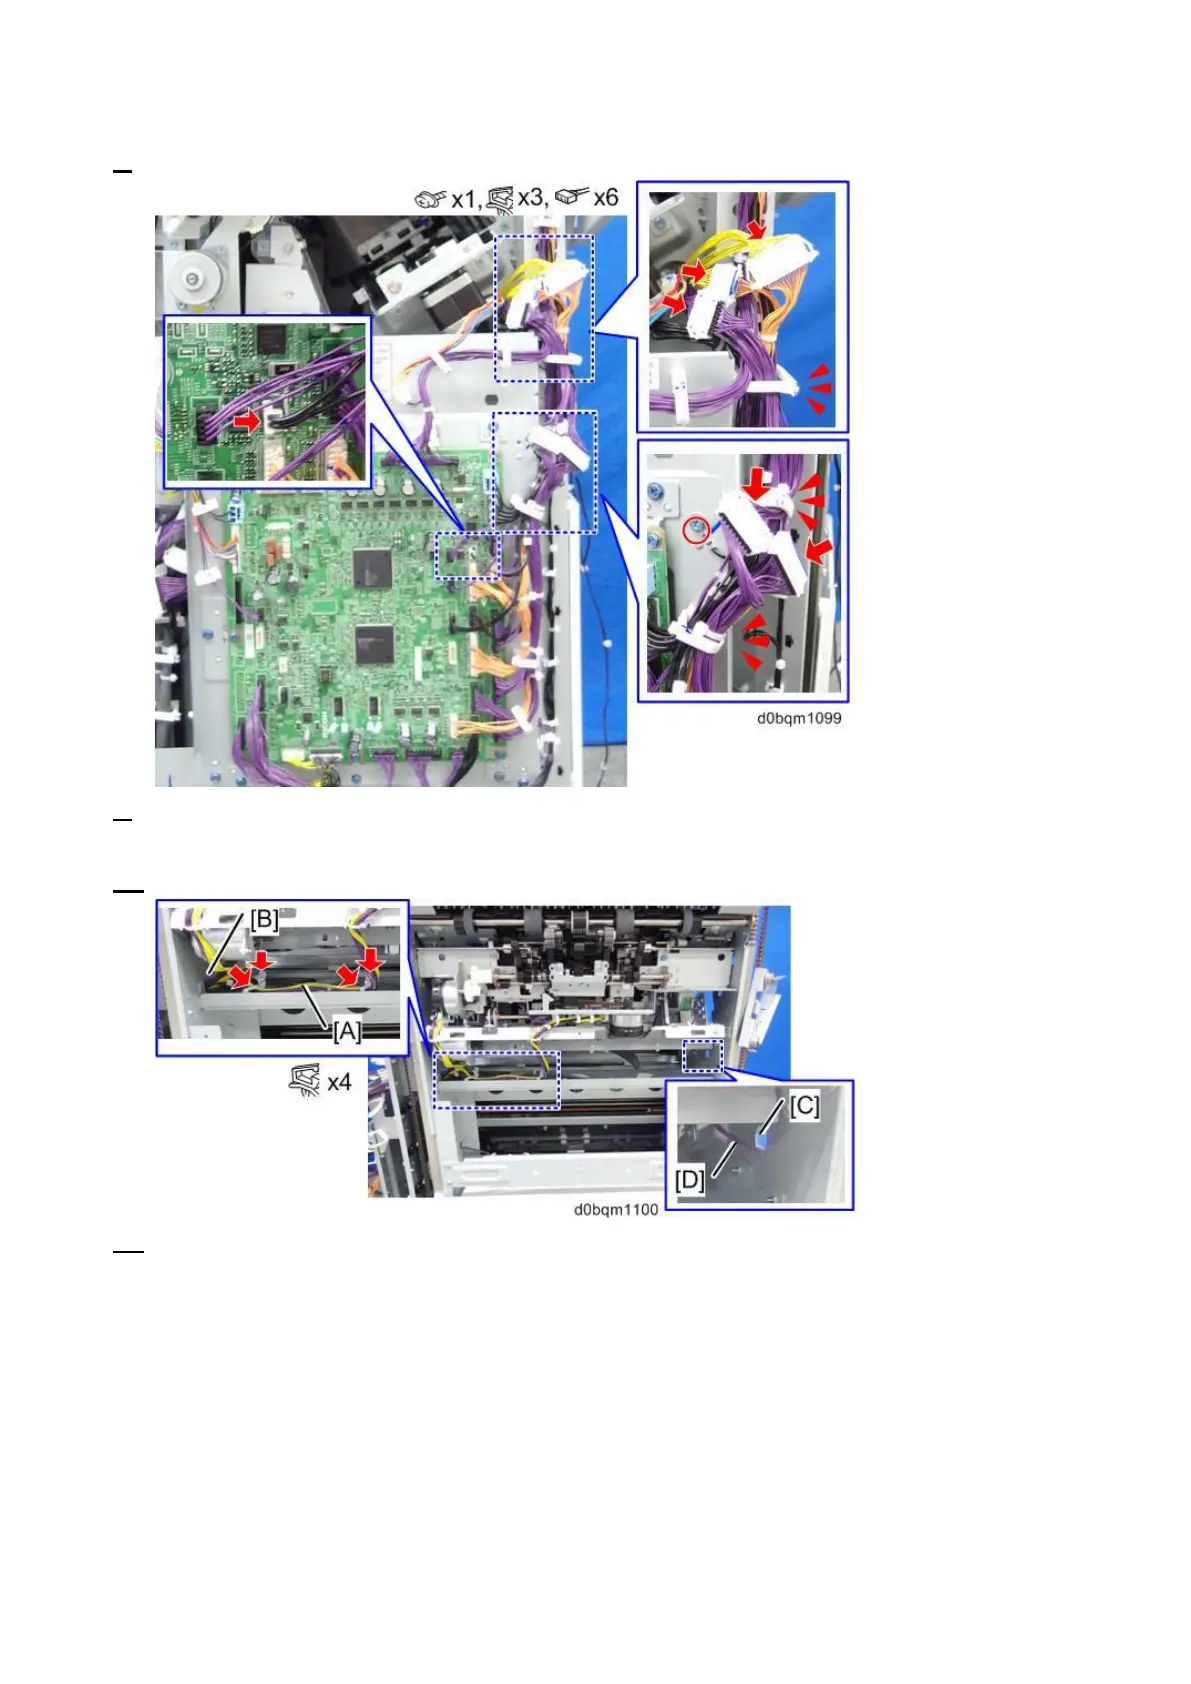
8. Remove the main board, ground wire, connectors, and clamps.
9. Remove the four clamps, and then pull the harness [A] out through the hole [B] on the left side of
the finisher.
10. Pull the harness [C] out through the hole [D] on the left side of the finisher.
11. Remove the stapler unit. (Stapler Unit)