Network Video Recorder User Manual
61
2. Connect the NVR to internet through router
Step1: Enter into the NVR’s Main MenuSetupNetwork configurationNetwork to
input IP address, subnet mask and gateway, or tick off "Obtain an IP address
automatically."
Step2: Make sure the LAN can be connected; access your router by entering the
gateway address, then log on the router management interface to map port.
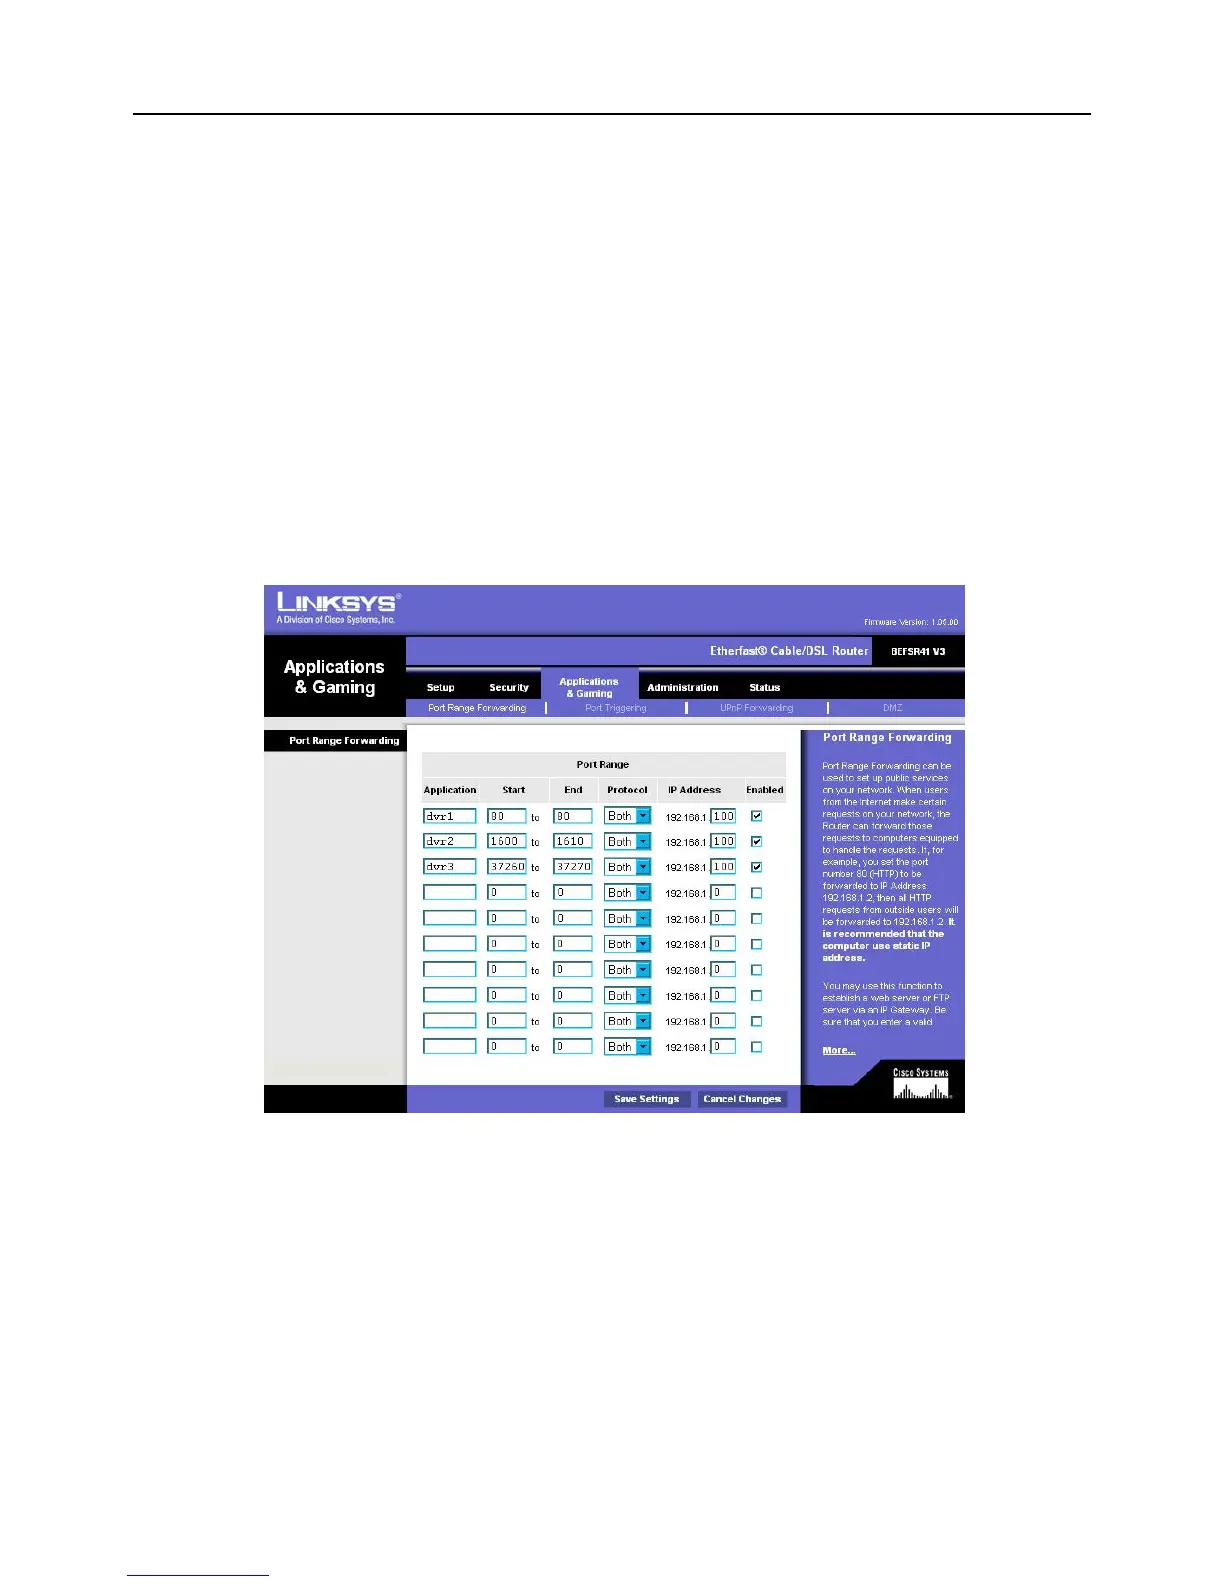
In this paper, we take Linksys router for example. Specify the IP address and port to
be forwarded from the internal/local IP address of your NVR to the Internet in router "Port
Range Forwarding" of "Applications & Gaming". Each NVR has two ports. (LAN IP
address of NVR can be added to the DMZ host, different router’s configuration is different,
and user can refer to the router manual). As shown in Fig 5-3:
Fig 5-3
After mapping the port, user can check the WAN IP address in the “running” of router,
directly access to the NVR through the WAN IP address and HTTP port, such as:
http://113.108.119.20:HTTP port number. Then enter into the control download interface.
Step3: The following setup steps are the same as steps 6-8 of Chapter 5.1.1 on LAN.
Owing to WAN address will change frequently, remote access is not very convenient,
and users can access NVR by domain name.
For example: enter into NVR’s Main MenuSetupNetwork configurationOther
Settings, tick off “DDNS”, select DDNS Server, enter the user name, password and host
 Loading...