CustomizingThisUnit
Attaching/RemovingtheFaceplateofThisUnit
Youcanremovethefaceplateofthisunittocustomizethetoppanel.
Makesureyoudonʼtcutyourfingersontheedgeswhenremovingorattachingthefaceplate.
Thefaceplatemaybendifitisexposedtostrongimpactwhenremoved.Ifthishappens,youmaynotbeableto
reattachit.
Removingthefaceplate
Attachingthefaceplate
Toattachthefaceplate,followthestepsforremovingthetoppanelinreverseorder.
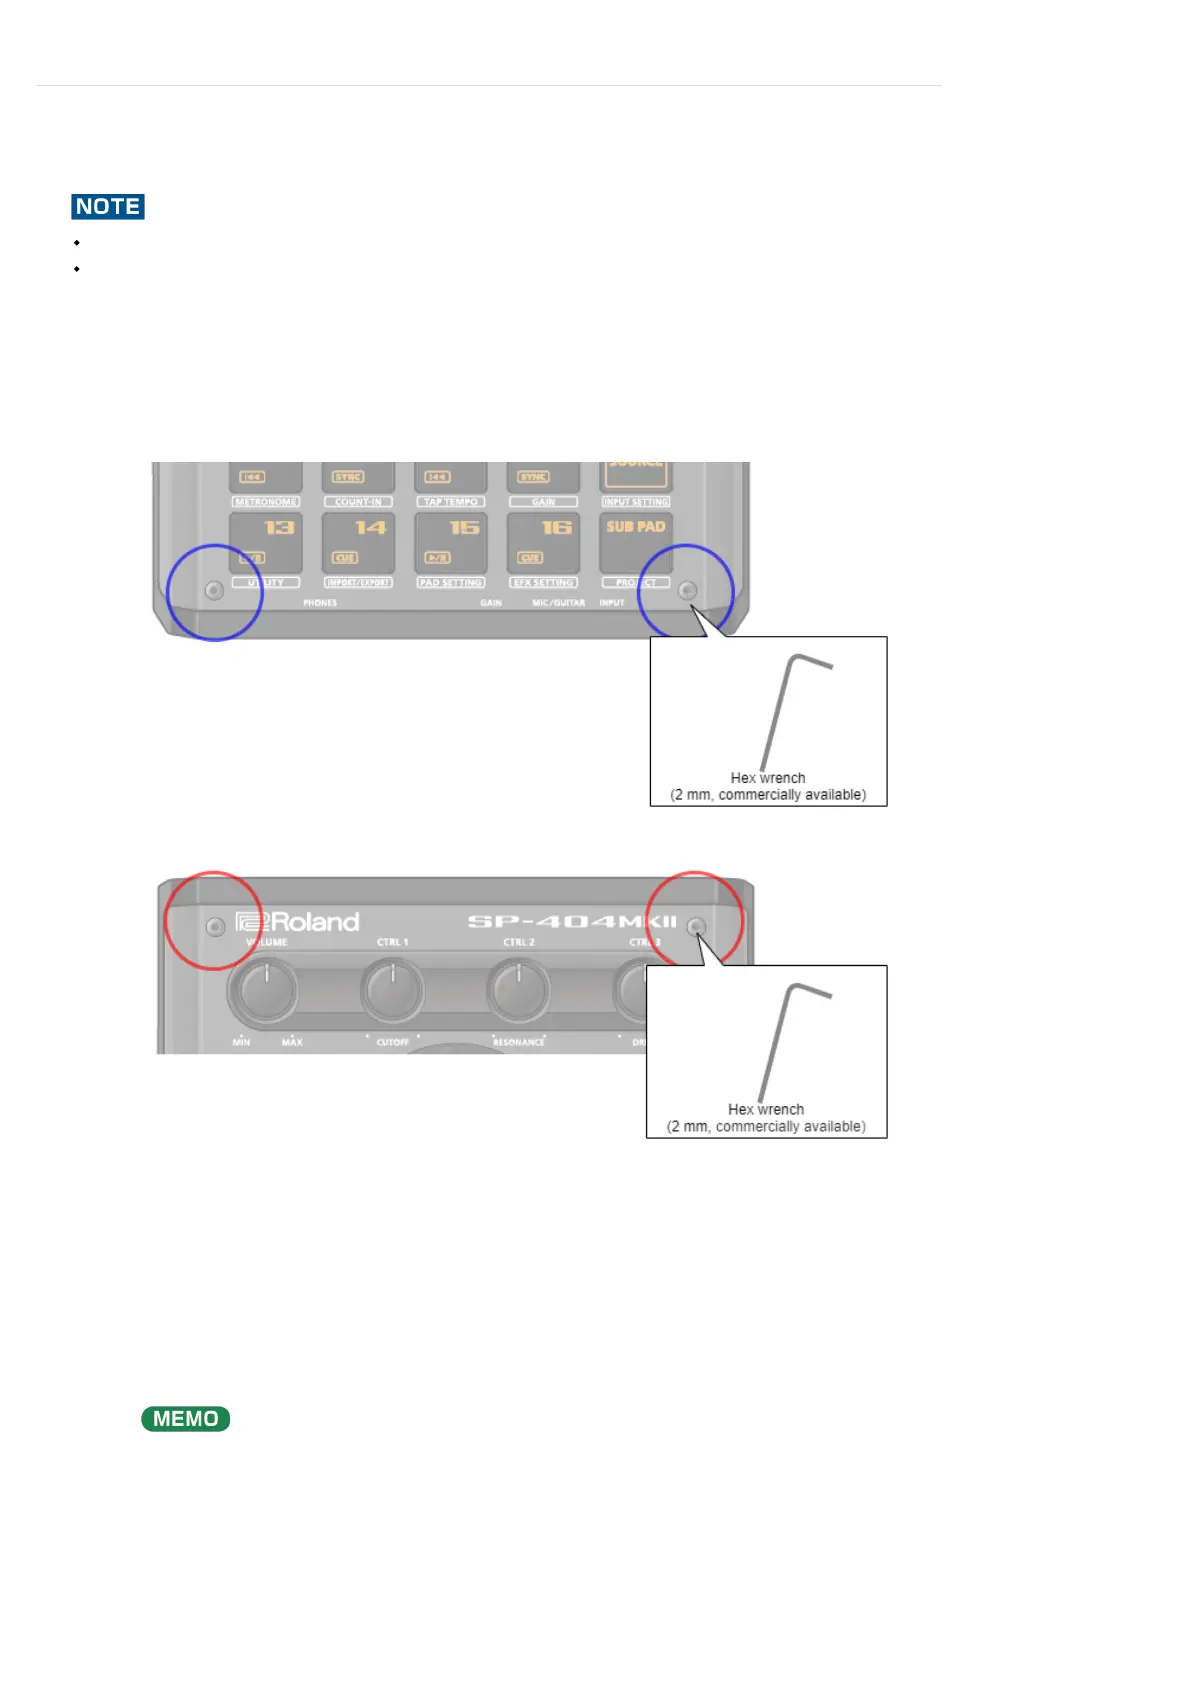
Useacommerciallyavailablehexwrench(2mm)toremovethetwoscrews(atthefrontoftheunit)
circledinblue.
1
Removethescrews(atthefarsideoftheunit)circledinred.
2
Useacommerciallyavailablehexwrench(2mm)toattachthetwoscrews(atthefarsideoftheunit)
circledinred.
1
Installthetwoscrews(atthefrontoftheunit)circledinblue.
 Loading...