00809-0100-4835 Rev BD
July 2016
5-6
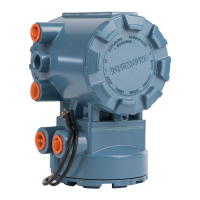
Numbers in parentheses refer to item numbers in Figure 5-1.
The sensor module (8) is not field-repairable and must be replaced if
defective. If no visible defect such as a punctured isolating diaphragm or
loss of fill fluid is observed, check the sensing module in the following
manner:
1. Remove the electronics assembly (4) from the transmitter per the
steps outlined in Electrical Housing Disassembly
allow access to the sensor module pins located at the top of the
sensor module.
Refer to Figure 5-2 for the following steps.
DIODE CHECK
Using a digital multimeter with diode test functionality, measure
the voltage drop of the sensor diodes between the following
sensor module
pins (the positive (+) lead should be connected to
the first sensor module pin listed):
A. Pin #3 and Pin #5
(Should measure approximately 1.2 volts)
B. Pin #4 and Pin #3
(Should measure approximately 1.2 volts)
C. Pin #4 and Pin #5
(Should measure approximately 2.4 volts)
Results obtained using the above procedure may vary depending on the
specific meter that is used for testing (manufacturer, model, type, etc.).
Please contact Rosemount Nuclear Instruments, Inc. with any questions
regarding test procedure and/or results.
RESISTANCE CHECK
Using a low-voltage ohmmeter, check resistance between the
following sensor module pins:
A. Pin #1 and all other Pins
(All measurements should be >10 mega ohms)
B. Pin #2 and Pin #5
(Should measure between 15 kilo ohms and 38 kilo
ohms)
C. All Pins and the module housing
(All measurements between pins and module housing
should be >10 mega ohms)
The above procedure does not completely test the sensor module. If
electronics assembly replacement does not correct the abnormal
condition and no other problems are obvious, replace the sensor