20 • Creating a Soft Panel for Ultritouch Ultritouch+Ultrix User Guide (v1.0)
5. Click Edit... > Add.
The Add Panel dialog opens.
6. Type a unique identifier in the Name field. This will be used to identify the panel in the tree under the Soft
Panels node.
7. Use the Style menu to specify Ultritouch PB.
8. Click
Apply to save your settings and close the Add Panel dialog.
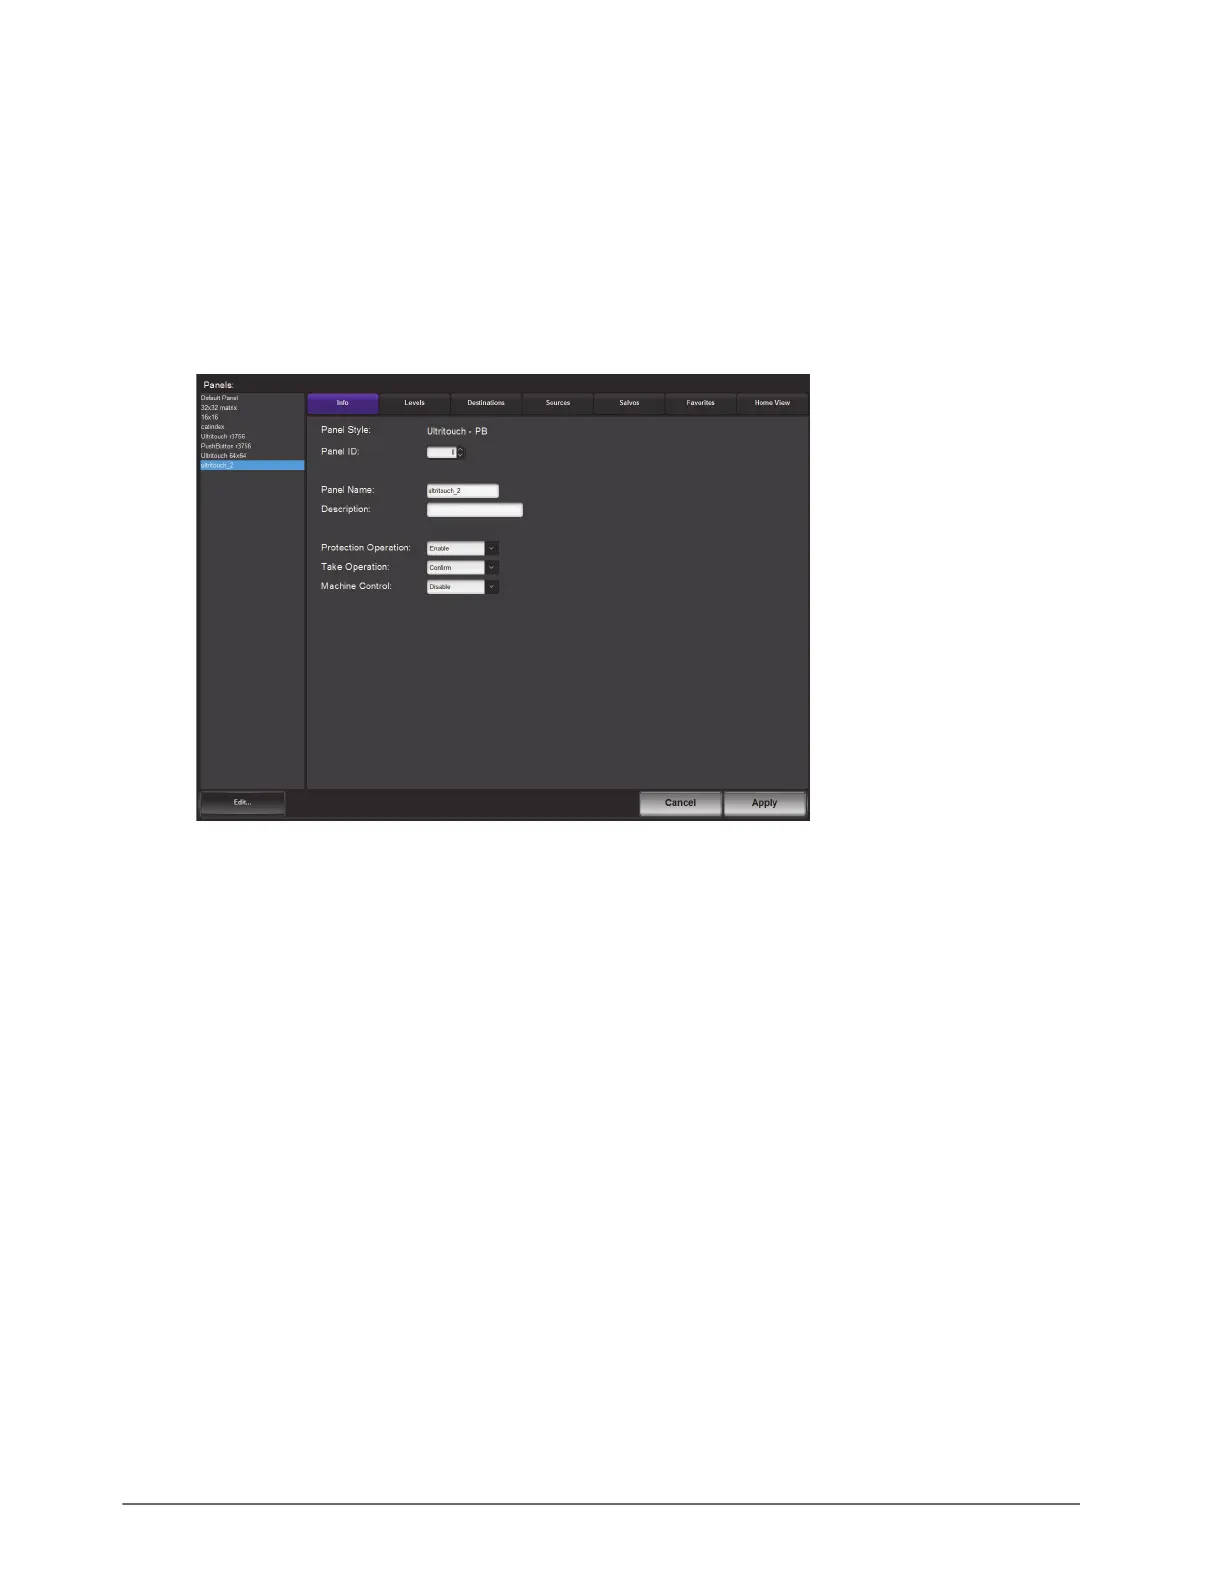
The new panel name is added to the Saved Panels list of the Panels tab and is automatically selected for
editing. In the following example, the
ultritouch_2 soft panel was created.
Adding Operation Features to the Soft Panel
You can customize the Operations window to include, or not, specific operational buttons used when switching
crosspoints.
To edit the soft panel operational features
1. Double-click the soft panel name from the Panels list in the left toolbar of the Panels tab.
2. Click
Info.
3. Use the Description field to provide a textual summary of the panel.
4. Use the Protection Operation menu to provides options for preventing crosspoint switches. Choose from the
following:
• Enable — The
LOCK, PROTECT, and FREE buttons display on the soft panel. This is the default setting for
Ultritouch soft panels.
• Disable — The
LOCK, PROTECT, and FREE buttons do not display on the soft panel. These protection
options are not available for the soft panel.
5. Use the Take Operation menu to configure the
TAKE button for the soft panel. Choose from the following:
• Confirm — Displays a
TAKE button on the soft panel. You must select the TAKE button to perform a
crosspoint switch.
• Direct — The soft panel does not display a
Take button. A crosspoint switch occurs automatically after each
destination/source selection is made by the user on the soft panel. This is the default setting for Ultritouch
soft panels.